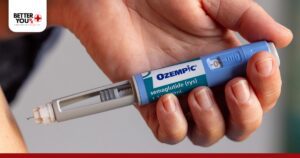
How to reset Ozempic pen? If your Ozempic pen appears jammed or the dose selector isn’t moving properly, you’ll need to follow specific steps to troubleshoot and reset the device. Resetting an Ozempic pen typically involves removing the needle, checking for blockages, and performing the priming process to ensure proper medication flow before your next injection.
Managing your diabetes medication properly requires understanding how your injection device works. The Semaglutide-based pen delivers precise doses, but occasional issues can arise that make you wonder whether the device needs resetting.
How to Reset Ozempic Pen When Issues Occur
The term “reset” can be misleading because injection pens aren’t electronic devices with reset buttons. Instead, troubleshooting focuses on clearing blockages, ensuring proper assembly, and verifying that you’re following the correct injection technique. Most problems people experience with their pens stem from simple issues that can be resolved with proper handling and understanding of the device mechanics.
Dose Selector Problems
When It Won’t Turn – First check whether a needle is attached, as the pen’s safety mechanism prevents dose selection when no needle is present. Remove any needle cap and verify that the needle is screwed on completely before attempting to turn the dose selector again. Ensure you’re turning the dial in the correct direction to advance rather than trying to turn it backward.
Insufficient Medication – Check the dose counter window on your pen to see how much medication remains. If it shows a number lower than your prescribed dose, the pen cannot be “reset” to provide more medication. You’ll need a fresh pen to receive your complete dose rather than attempting to force the dial beyond its stopping point.
Stuck Dial Solutions – If your counter shows ample medication remains but the dial still won’t turn, ensure no needle is currently attached. Remove the needle, then try turning the dose selector without any attachment. If the dial remains stuck, gently turn it counterclockwise to zero, then try advancing it again without applying excessive force.
Debris Removal – Debris or medication residue around the dose selector can sometimes create resistance. Wipe the exterior of the pen with a damp cloth, being careful not to get moisture inside the cartridge window. Allow the pen to dry completely before attempting to attach a needle or select a dose.
Injection Button Issues
Won’t Press Down – This usually indicates the needle is blocked, you haven’t selected a dose, or you’re applying insufficient pressure. Verify that you’ve turned the dose selector and that a number appears in the dose counter window. The medication needs several seconds to flow through the needle during injection, so consistent pressure throughout the process is essential.
Incomplete Delivery – Always count slowly to six after pressing the injection button fully before withdrawing the needle from your skin. Releasing pressure too quickly results in incomplete dose delivery and medication leakage. Keep the pen pressed firmly against your skin throughout the entire counting period to ensure you receive your full prescribed amount.
Blocked Needle – If the button won’t press at all despite having a dose selected, the needle may be blocked or clogged. Remove the current needle, attach a fresh sterile needle, prime the pen again, and select your dose. Never attempt to clear a blocked needle by pushing harder, as this could cause the pen to malfunction or break internally.
No Medication Flow
Air Bubbles Present – If medication doesn’t appear at the needle tip during priming, air bubbles may be present in the cartridge. The needle itself might also be clogged from manufacturing debris or improper handling. Gently tap the cartridge with the pen held needle-up to encourage bubbles to rise to the top near the needle attachment point.
Try Fresh Needle – Attempt priming again with a completely fresh needle from a new sterile package. If medication still doesn’t flow after multiple priming attempts with different needles, the pen may be defective and should be returned it. Never use the same needle for multiple priming attempts, as this increases contamination risk and infection possibility.
Temperature Damage – Semaglutide must be stored properly both before and after first use to maintain its effectiveness. If your pen has been exposed to temperatures above 86°F or below freezing, it should not be used even if it appears to function normally. Temperature-damaged medication may be ineffective or potentially unsafe, compromising your blood sugar control.
What Steps Should You Take to Prime Your Ozempic Pen?
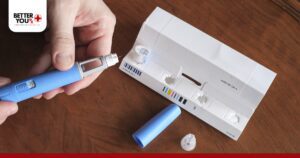
Priming your pen before each injection is the closest thing to a “reset” function that these devices have. This process clears air from the needle and confirms that medication will flow properly when you inject.
Preparation Steps
Hand Washing – Wash your hands thoroughly with soap and water for at least 20 seconds. Dry your hands completely with a clean towel before handling your pen. Clean hands prevent introducing bacteria that could cause infection at the injection site, especially important for people with diabetes who may have slower wound healing.
Visual Inspection – Remove your pen from storage and check the medication in the cartridge window. The solution should be clear and colorless without any particles, cloudiness, or discoloration. Inspect the rubber seal at the end of the cartridge to ensure it’s intact and hasn’t been damaged during storage or handling.
Needle Selection – Take a new needle from its sterile packaging and remove only the paper tab from the outer seal. Each needle should only be used once, so each injection requires a fresh needle and new priming sequence. Never reuse needles even if you’re the only person using the pen, as dulled tips cause more pain and increase infection risk.
Proper Attachment – Keep the outer needle cap in place while screwing the needle straight onto the pen. Align the needle directly with the cartridge tip rather than approaching at an angle. Screw until firmly attached but don’t overtighten, as this could damage the rubber seal and cause medication leakage during injection.
Priming Process
Remove Caps – Pull off the outer needle cap and set it aside in a clean location for later use during disposal. Remove the inner needle cap and discard it immediately, as this piece is not meant to be reused. Both caps must be removed before you can prime or inject your medication dose.
Set Priming Dose – Turn the dose selector until the dose counter shows the priming dose symbol or 0.25 mg. The priming dose may vary slightly depending on your specific pen model. Don’t skip this step or select your regular injection dose for priming, as you need the smaller amount specifically for checking flow.
Tap for Bubbles – Hold the pen with the needle pointing straight upward toward the ceiling. Tap the cartridge gently with your finger several times to make any air bubbles rise to the top. Continue tapping for at least 10 to 15 seconds to ensure all air moves away from the needle and toward the top of the cartridge.
Press Button – Press and hold the dose button all the way in until the dose counter returns to 0. You should see a drop of medication appear at the needle tip within a few seconds. If nothing appears, repeat the entire process up to six times with the same needle before trying a different needle.
This priming step is crucial because air in the needle would prevent you from receiving your full dose during injection. The pen is designed with extra medication to account for these priming losses throughout the life of the device. For those exploring weight management alongside diabetes control, understanding when treatment effectiveness begins helps set realistic expectations for your health journey.
Why Won’t My Ozempic Pen Dial Turn?
When your dose selector becomes difficult to turn or stops moving entirely, several factors could be causing the problem. Understanding why this happens helps you determine whether you can continue using the pen or need to switch to a new one. The dose selector mechanism is designed with precision to deliver accurate amounts, so any resistance usually indicates a specific issue that needs addressing.
End of Supply Issues
Reading the Counter – The dose counter provides the most reliable indication of remaining medication in your pen. This counter tracks how many units you’ve selected and injected, counting down from the total capacity. When the counter shows a number lower than your prescribed dose, the pen cannot deliver a full injection and you need to start a new pen.
No Split Dosing – Don’t attempt to combine the remaining amount from an old pen with a partial dose from a new pen. Splitting doses between pens increases the risk of dosing errors and makes tracking difficult. Most prescribing information recommends against this practice unless specifically instructed by your healthcare provider for safety reasons.
Starting Fresh – Discard a pen once it cannot deliver your full prescribed dose, even if medication remains visible in the cartridge. The visible medication may not be enough to provide accurate dosing through the mechanism. Starting a new pen ensures you receive the correct therapeutic amount for maintaining stable blood sugar control.
Proper Disposal – Follow the medication disposal guidelines when discarding partially used pens. Never throw pens in regular household trash where others might accidentally contact them. Many pharmacies offer medication take-back programs for safe disposal of injectable medications.
Mechanical Problems
Safety Features – The pen’s design prevents dose selection when a needle is mounted as an important safety feature. This prevents accidental dose selection and medication waste when you’re not ready to inject. Remove the needle first, then try turning the dose selector to see if it moves freely without the attachment.
Gentle Handling – Don’t force the mechanism by applying excessive pressure to turn a stuck dial. Forcing could cause internal damage that makes the pen completely unusable. If resistance continues after removing the needle, turn the dial counterclockwise to zero before attempting to advance it again with steady, moderate pressure.
Cleaning Method – Wipe the exterior with a damp cloth if debris is present around the dose selector area. Never submerge the pen in water or use alcohol to clean it, as liquids can damage internal components. Allow the pen to dry completely before using it to ensure no moisture interferes with the mechanism.
How Can You Clear Air Bubbles from Your Pen?
Air bubbles in the medication cartridge cause concern for many people using injectable diabetes medications. While small bubbles typically don’t affect dose accuracy significantly, large air pockets can prevent proper medication flow and result in underdosing. Learning to identify and properly remove air bubbles ensures you receive the correct amount of medication with each injection for optimal blood sugar management.
Identifying Bubbles
Visual Check – Before each use, hold your pen up to the light and examine the medication through the cartridge window. Small bubbles smaller than the head of a pin are normal and won’t interfere with your injection. These tiny bubbles occur naturally in liquid medications and don’t require special removal efforts.
Size Matters – Larger bubbles or multiple small bubbles that take up noticeable space in the cartridge should be addressed before you select your dose. Significant air pockets can occupy space meant for medication, leading to receiving less than your prescribed amount during injection.
Frequency Monitoring – Some people notice more bubbles after storing their pen at room temperature compared to refrigerated storage. This is a normal physical process as dissolved gases in the liquid medication become less soluble at higher temperatures. This doesn’t mean your medication has gone bad—it simply requires bubble removal before use.
Defect Recognition – If bubbles continue to appear after multiple priming attempts, or if the entire cartridge looks foamy throughout, the pen may be defective. Persistent foam or excessive bubbles despite proper tapping and priming indicate a manufacturing issue rather than normal air presence.
Removal Techniques
Tapping Method – Hold the pen with the needle pointing upward toward the ceiling. Gently tap the cartridge with your fingertip or fingernail using a steady rhythm. The tapping motion encourages bubbles to rise through the liquid medication toward the top of the cartridge where they can be expelled during priming.
Continue Tapping – Keep tapping for at least 15 to 20 seconds to give all bubbles sufficient time to move upward toward the needle attachment point. Rushing this step may leave bubbles trapped in the medication, which will then enter the needle during injection.
Prime to Expel – After tapping, perform the priming process with the pen still held vertically. You should see medication—possibly mixed with small bubbles—emerge from the needle tip. If a large amount of air comes out initially, repeat the priming process until you see only clear medication at the needle tip with minimal air.
Repeat if Needed – Don’t proceed with your injection if you still see significant bubbles after the first priming attempt. Continue the tap-and-prime cycle until medication flows cleanly from the needle without visible air pockets emerging first.
What to Avoid
No Shaking – Never shake your pen vigorously to remove bubbles. Aggressive shaking can create foam or introduce additional air into the medication, making the problem worse rather than better. The mechanical action of shaking disrupts the medication’s settled state and creates more bubbles.
Gentle Approach – The gentle tapping method is sufficient for normal bubble removal and won’t damage the medication or device. Patience with this technique produces better results than aggressive handling attempts.
For those managing weight alongside diabetes, understanding challenges like treatment plateaus can provide additional context for comprehensive health management beyond just proper pen usage.
When Should You Start a New Ozempic Pen?
Knowing when to transition from your current pen to a new one prevents dosing errors and ensures you maintain consistent medication levels. Each pen is designed to deliver a specific number of doses depending on your prescribed strength.
Counter-Based Decisions
Track Remaining Doses – The dose counter works by tracking how many units you’ve selected and injected, counting down from the pen’s total capacity. When it shows less than your prescribed dose, you need a new pen immediately. For example, if you need 1 mg but only 0.5 mg remains, you cannot receive adequate treatment from that pen.
No Partial Combining – Never attempt to split your dose between an old pen and a new pen without consulting your healthcare provider. This practice makes accurate dosing difficult to track and increases the likelihood of errors. Each injection should come from a single pen to maintain consistency and proper record-keeping.
Visible vs. Usable – Even if medication remains visible in the cartridge, discard the pen when the counter indicates insufficient medication for your full dose. The mechanism may not be able to deliver that remaining medication accurately, and attempting to extract it could result in underdosing.
Time-Based Expiration
In-Use Limits – Once you use a pen for the first time, it has a limited shelf life even if medication remains inside. For Semaglutide pens, this “in-use” time is typically 56 days when stored at room temperature below 86°F. Beyond this period, the medication’s potency may decline even if it looks normal.
Date Tracking – Write the date of first use on the pen label using permanent marker so you can track how long you’ve been using it. This simple step prevents accidentally using degraded medication that may not control your blood sugar effectively.
Beyond 56 Days – Even if the dose counter shows available medication after 56 days, the pen should be discarded because the medication may have degraded chemically. Expired medication may not provide adequate blood sugar control, putting your health at risk.
Expiration Priority – Always check the expiration date printed on your pen before first use and periodically throughout the use period. If a pen expires before you’ve used all doses, discard it at expiration regardless of the counter reading.
Storage-Related Replacement
Freezing Damage – If your pen has been frozen at any point, the medication is no longer safe to use even after thawing completely. Freezing can change the medication’s molecular structure, making it less effective or potentially creating harmful compounds.
Heat Exposure – Pens exposed to temperatures above 86°F for extended periods should be discarded, as heat can alter medication effectiveness significantly. Even brief exposure to high heat, such as leaving the pen in a hot car, can compromise the medication.
Visual Changes – Any discoloration, cloudiness, or particles in the solution indicate the pen should not be used regardless of the counter reading. These changes suggest contamination or chemical degradation that makes the medication unsafe.
If you’re exploring weight management treatments or need alternative diabetes medications, proper storage and replacement timing applies equally to these therapies for maintaining safety and effectiveness.
What Needle Techniques Prevent Pen Problems?
Many perceived pen problems actually stem from incorrect needle attachment rather than device malfunction. The needle serves as the medication’s pathway from the cartridge to your injection site, and any issues with how it’s connected can disrupt this flow.
Needle Selection
Always Use New – Use a new needle for every injection without exception. Reusing needles increases infection risk dramatically, causes more injection pain due to dulled needle tips, and can introduce air into the cartridge or lead to medication leakage. Each needle is individually packaged in a sterile container that should remain sealed until you’re ready to inject.
Correct Size – Check that you have the correct needle size for your pen. Needles typically come in various lengths, commonly 4mm, 6mm, or 8mm. Your healthcare provider will recommend the appropriate length based on your body composition and preferred injection sites.
Compatibility Matters – Different injection devices use different needle compatibility systems, and using the wrong type can result in improper attachment or medication leakage. Always purchase needles specifically designed for your pen model to ensure proper fit and function.
Sterile Packaging – Never use a needle if its sterile packaging has been compromised or opened. Damaged packaging means the needle is no longer sterile and could introduce bacteria into your injection site or contaminate your medication cartridge.
Attachment and Removal Process
Straight Alignment – Align the needle straight with the cartridge tip—don’t approach at an angle when attaching. Misaligned attachment can damage the rubber seal on your pen, leading to leakage and inaccurate dosing over time.
Gentle Pressure – Turn the needle clockwise while applying gentle pressure until you feel resistance indicating it’s fully seated. Don’t continue turning after you feel resistance, as overtightening could damage the rubber seal and compromise the pen’s integrity.
Security Check – The needle should feel secure but not require excessive force to attach properly. If you need to apply significant pressure to attach the needle, check that you’re using the correct needle type for your specific pen model.
Safe Removal – Following injection, carefully replace the outer needle cap using the one-handed recapping method if you’ve been trained in this technique. Unscrew the capped needle and dispose of it in a sharps container immediately. Never throw loose needles in your regular trash, as this poses a serious safety hazard for anyone handling your garbage.
For those managing side effects with injectable medications, learning about strategies to minimize discomfort can improve your overall treatment experience and adherence to your prescribed regimen.
How Do Storage Guidelines Prevent Device Problems?
Proper storage significantly impacts pen function and medication effectiveness. Many troubleshooting issues stem from storage mistakes rather than device defects. Following manufacturer guidelines for temperature control and handling protects your investment and ensures the medication works as intended for controlling your blood sugar levels effectively.
Before First Use
Refrigeration Requirements – New, unused pens must remain refrigerated between 36°F and 46°F until you’re ready to use them. Store them in their original carton to protect from light, and place them in the main refrigerator compartment rather than the door, where temperature fluctuates more with opening and closing.
Never Freeze – Never store pens in the freezer compartment or anywhere they might freeze, even temporarily. Even brief exposure to freezing temperatures permanently damages the medication at a molecular level, making it ineffective or potentially unsafe.
Protect from Light – Keep pens in their original carton until first use to protect them from light exposure. Light can degrade the medication over time, reducing its effectiveness for blood sugar control.
Original Packaging – Don’t remove pens from their packaging until you’re ready to start using them. The packaging provides temperature stability and light protection that maintain medication quality.
After First Use
Storage Options – Once you’ve used a pen for the first time, you have two storage options – continue refrigerating it or keep it at room temperature below 86°F. Many people find room temperature storage more convenient because cold medication can be uncomfortable to inject and requires waiting time before use.
Protect from Heat – Keep your pen away from heat sources like radiators, direct sunlight, or hot appliances. Don’t leave it in your car, especially during summer months when interior temperatures can exceed 130°F within minutes. If you need to travel with your pen, use an insulated medication travel bag with ice packs.
Cap Storage – Always store pens with the cap on when not in use. Never leave a needle attached to the pen between injections, as this can allow air to enter the cartridge, cause medication leakage, or increase contamination risk. Remove and properly dispose of the needle immediately after each injection.
Understanding medication responses helps optimize treatment outcomes. If you’re experiencing challenges beyond injection technique, exploring resources about common side effects provides valuable insights for comprehensive diabetes management. Also, if you’re considering alternative treatment options like ZepBound, proper pen handling applies universally across injectable diabetes medications.
Frequently Asked Questions
Can You Dial Back an Ozempic Pen?
Yes, you can dial back the dose selector on an Ozempic pen if you’ve turned it past your intended dose. Simply rotate the dose selector counterclockwise backward until the correct dose appears in the dose counter window. The pen allows you to adjust the selected dose up or down before injection without wasting medication.
Can You Do an Ozempic Reset?
There is no true reset function for Ozempic pens because they’re mechanical devices rather than electronic ones. However, you can troubleshoot most issues by removing the needle, checking for blockages, turning the dose selector to zero, and then priming with a fresh needle.
What to Do When Your Ozempic Pen Is Not Working?
When your pen isn’t functioning properly, start by verifying that sufficient medication remains in the cartridge by checking the dose counter window. Remove any attached needle and try turning the dose selector without a needle mounted to see if the mechanism moves freely.
What Happens If I Forgot to Prime My Ozempic Pen?
Forgetting to prime your pen means you may have injected air instead of medication, resulting in receiving less than your prescribed dose. Air in the needle takes up space that should contain medication, so your body receives a smaller amount than the dose counter indicated you selected.
How Do I Reset the Ozempic Pen?
To troubleshoot your Ozempic pen when it’s not working properly, remove any attached needle and turn the dose selector to zero. Attach a new sterile needle, then perform the priming process by turning the dose selector to the priming dose, holding the pen vertically with the needle pointing up, and pressing the injection button until medication appears at the tip.
What Happens If You Inject Without Priming?
Injecting without priming means air trapped in the needle enters your injection site instead of medication, resulting in underdosing. While injecting small amounts of air subcutaneously isn’t typically dangerous to your health, you won’t receive your full prescribed medication amount, which can affect blood sugar control throughout the week.