Basal vs Bolus Insulin: Key Differences & Diabetes Management Guide

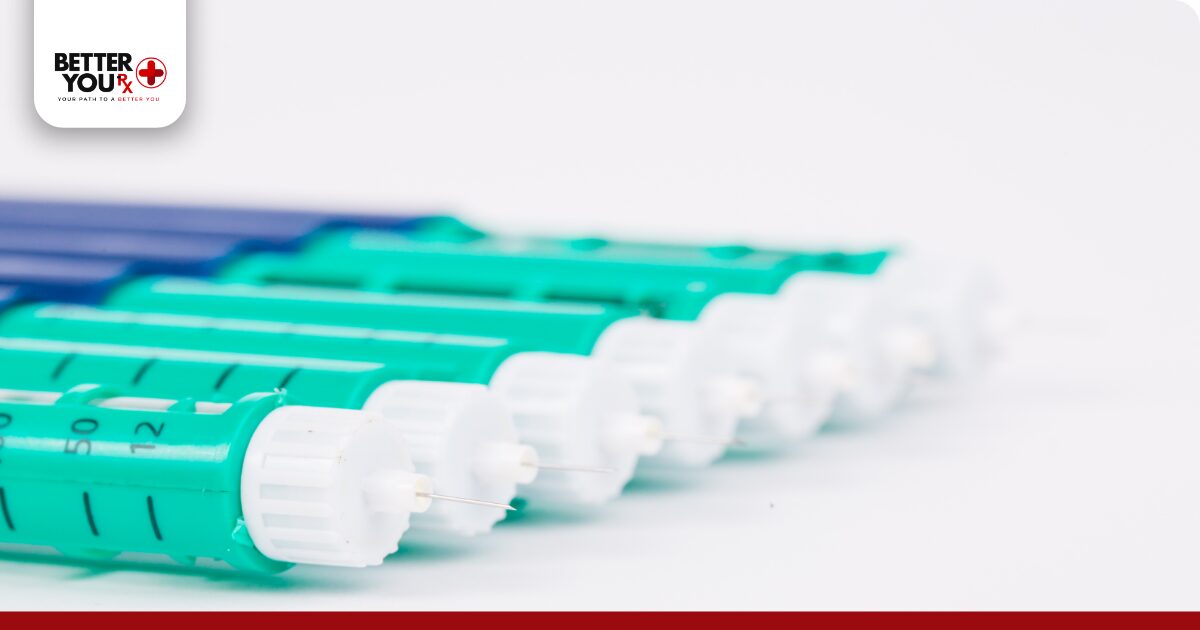
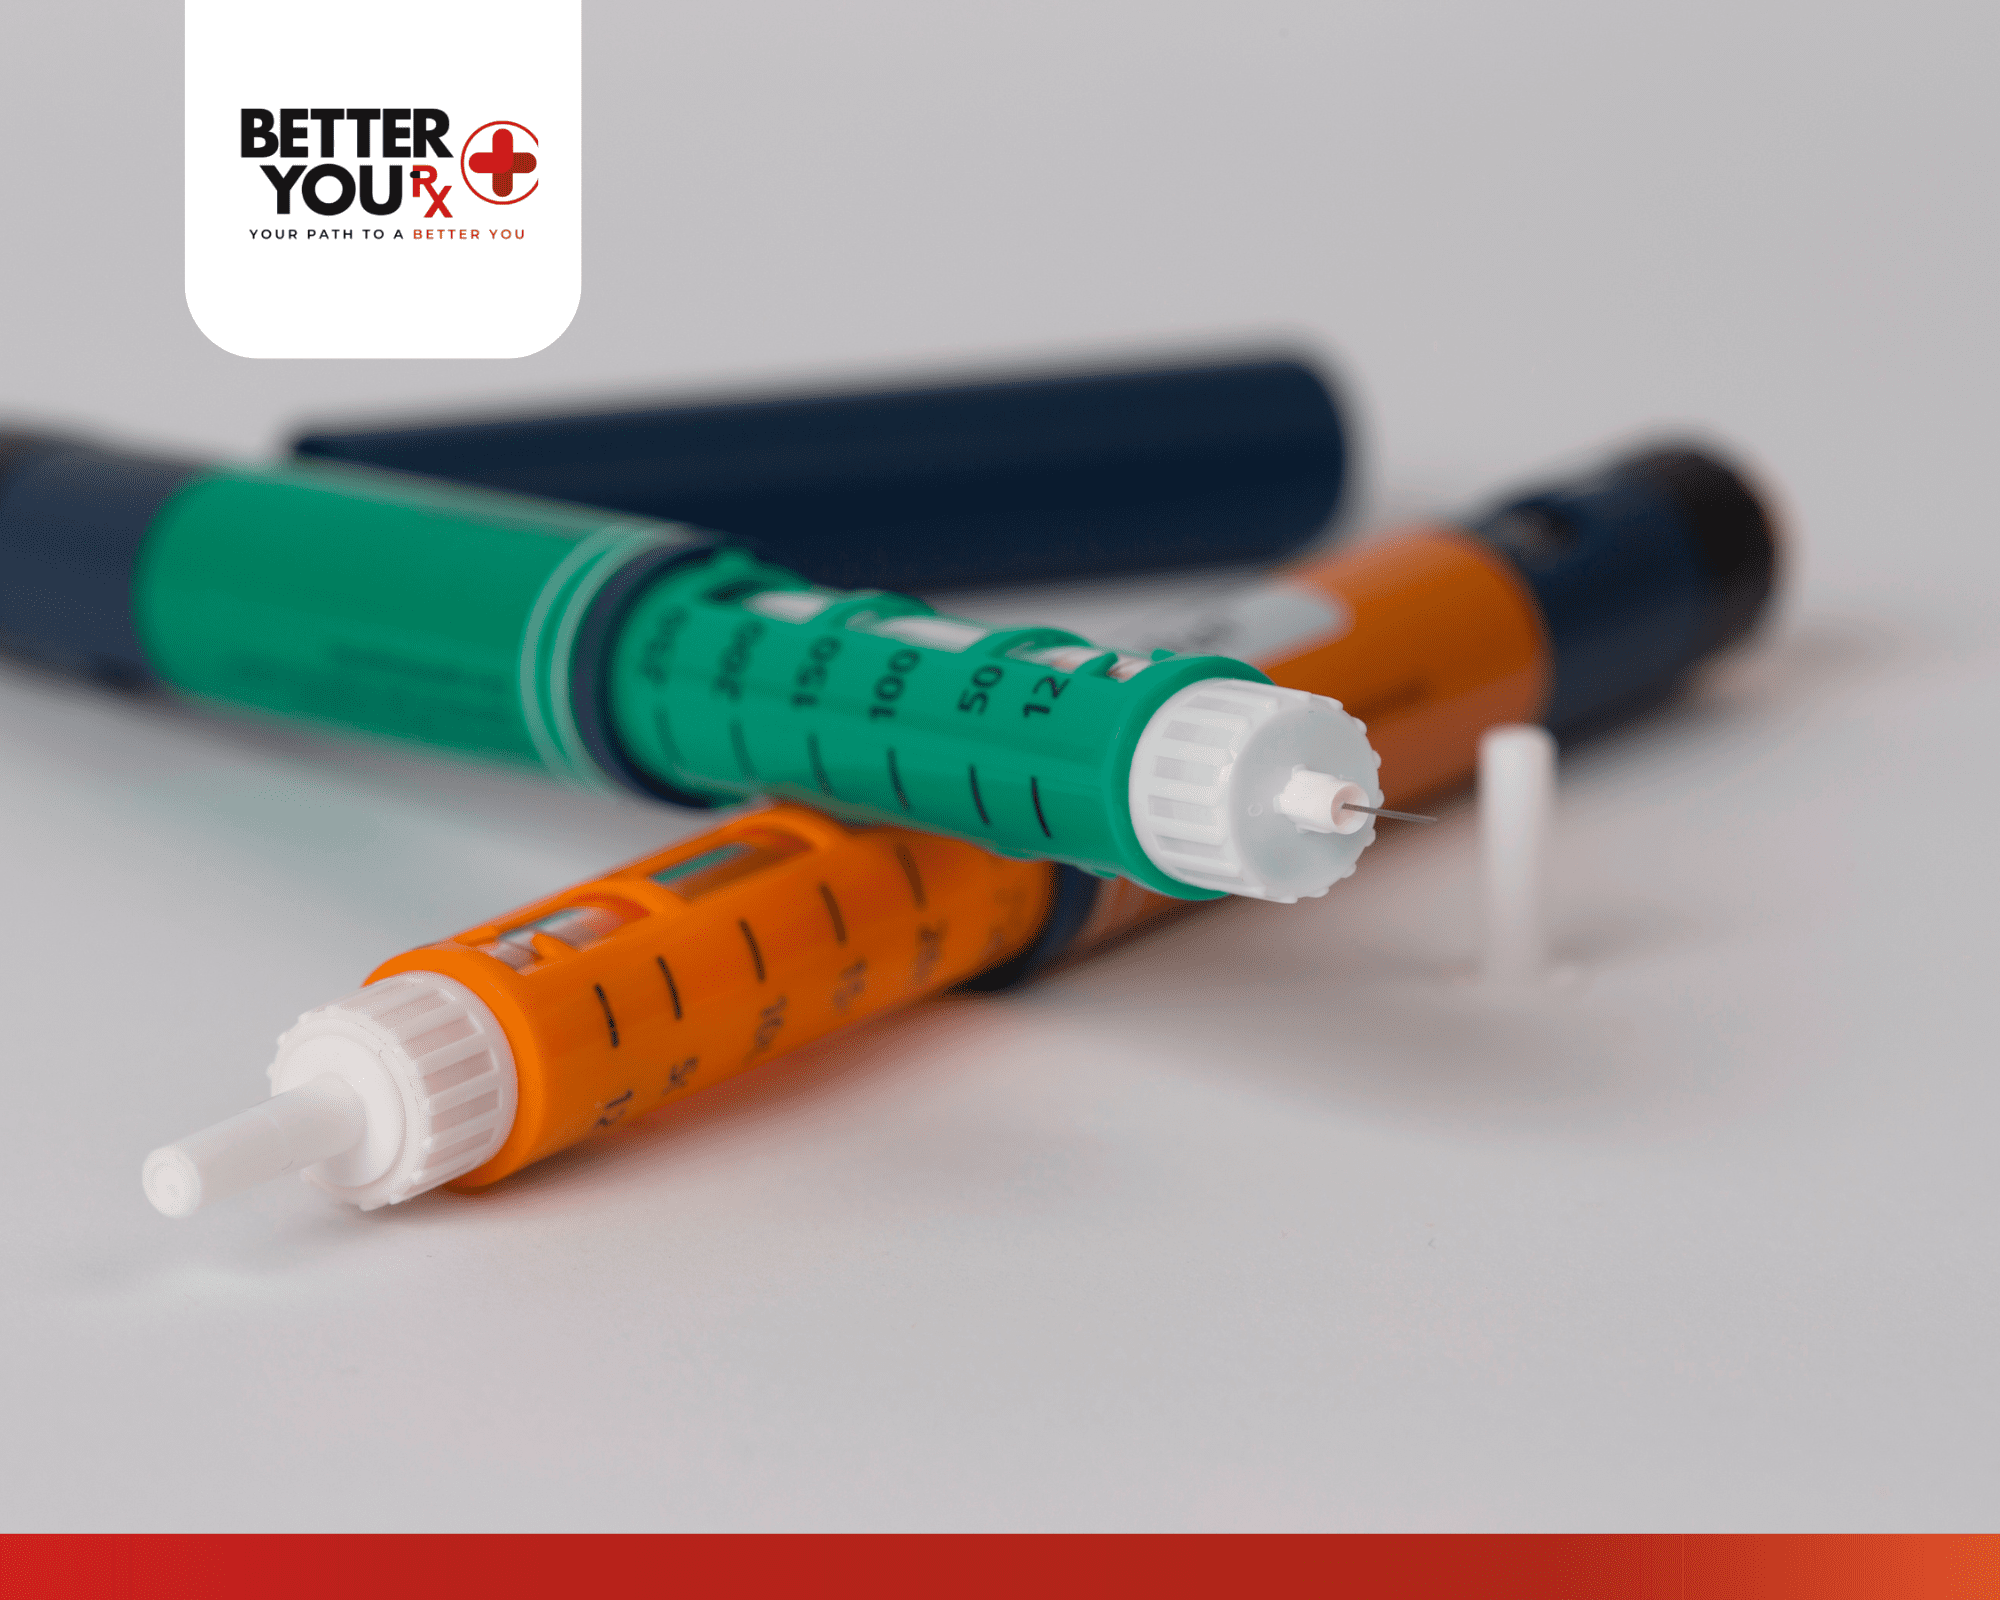
Basal vs bolus insulin represents two fundamental approaches to insulin therapy, each serving distinct purposes in diabetes management. Basal insulin provides steady, long-acting glucose control throughout the day and night, lasting 12-42 hours with minimal peak activity. Bolus insulin delivers rapid-acting coverage for meals and glucose spikes, beginning work within 15 minutes and lasting 3-4 hours.

Basal-bolus therapy combines both approaches, offering superior glucose control with lifestyle flexibility and reduced hypoglycemia risk compared to single insulin regimens. Common basal insulins include Glargine, Detemir, and Degludec, administered once or twice daily. Rapid-acting bolus options like Lispro, Aspart, and Glulisine require precise timing 15-30 minutes before meals. Both Type 1 and Type 2 diabetes patients can benefit from this approach, though implementation requires proper education in carbohydrate counting, insulin calculations, and blood glucose monitoring for optimal results.

What Is Basal Insulin?

Basal insulin represents the foundation of insulin therapy, providing steady, long-acting glucose control over extended periods. This type of insulin mimics the pancreas’s continuous, low-level insulin production that occurs between meals and during sleep. Basal insulin helps maintain stable blood glucose levels by suppressing glucose production from the liver and facilitating glucose uptake by muscles and other tissues.

Long-acting basal insulins are designed to provide consistent insulin levels for 12 to 24 hours or longer, depending on the specific formulation. These insulins have minimal peak activity, creating a relatively flat action profile that provides steady glucose control without significant fluctuations.

Common basal insulin types include Glargine (Lantus, Basaglar), Detemir (Levemir), and Degludec (Tresiba). Each has unique characteristics regarding duration of action, injection frequency, and individual response patterns. Glargine and Degludec typically require once-daily dosing, while Detemir may require twice-daily administration in some patients.

The primary advantage of basal insulin lies in its convenience and consistent action. Patients can administer basal insulin at the same time each day, providing reliable background glucose control that doesn’t require precise timing with meals. This consistency helps reduce glucose variability and provides a stable foundation for overall diabetes management.

Proper basal insulin dosing should maintain blood glucose levels within target ranges during fasting periods, between meals, and overnight. Healthcare providers typically adjust basal insulin doses based on fasting glucose levels and patterns observed through continuous glucose monitoring or frequent blood glucose testing.

Need basal vs bolus insulin? Order Humulin N KwikPen today for reliable intermediate-acting insulin therapy.

What Is Bolus Insulin?

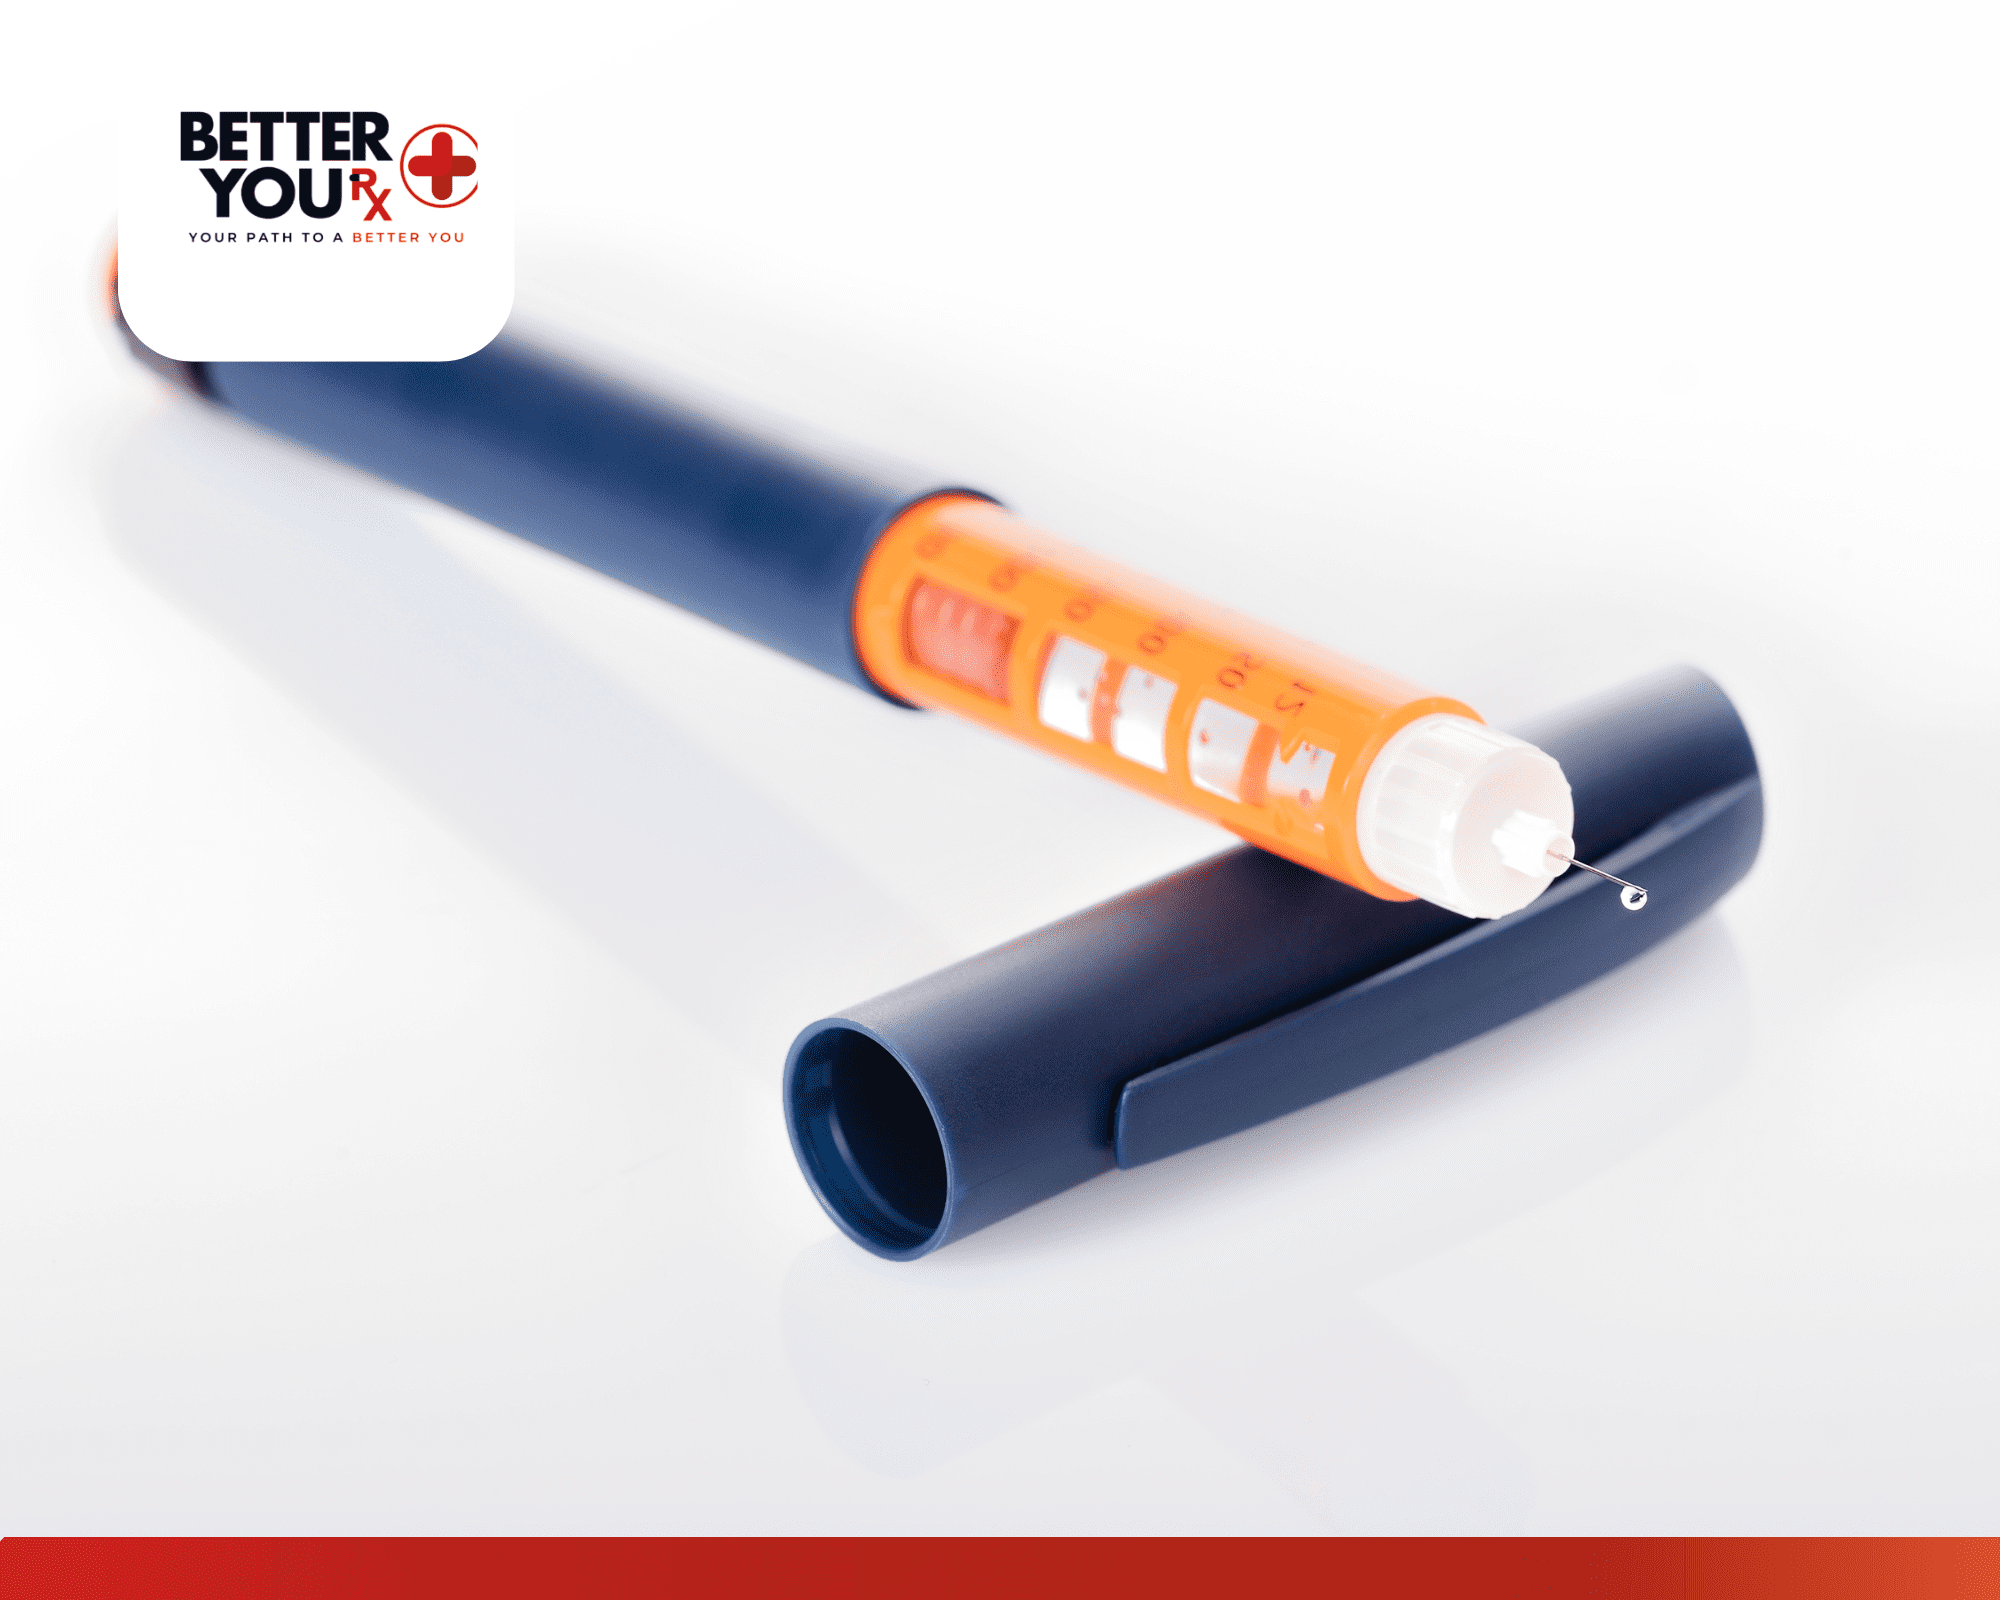
Bolus insulin provides rapid-acting glucose control specifically designed to manage blood glucose spikes associated with meals and snacks. This insulin type mimics the pancreas’s natural response to food intake, delivering quick-acting insulin coverage that matches carbohydrate absorption and prevents post-meal hyperglycemia.

Rapid-acting bolus insulins begin working within 15 minutes of injection, reach peak activity within 1-2 hours, and continue working for 3-4 hours. This action profile closely matches the body’s natural insulin response to food consumption, making bolus insulin ideal for meal coverage.

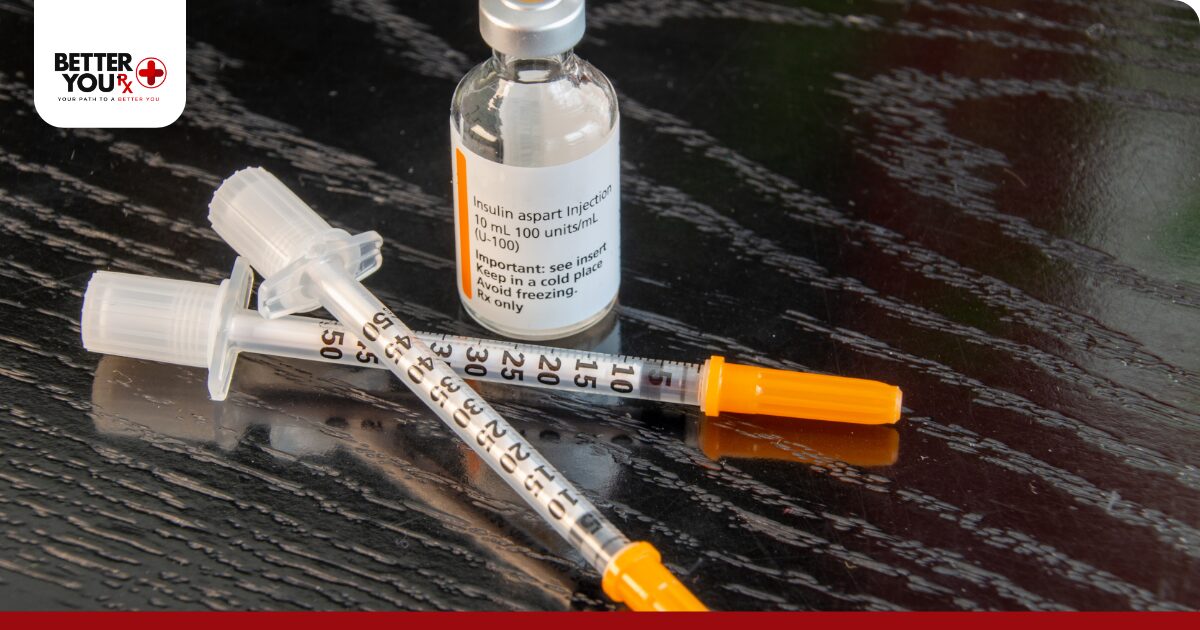
Popular bolus insulin options include Lispro (Humalog, Admelog), Aspart (Novolog), and Glulisine (Apidra). These insulins offer similar onset and duration characteristics but may have subtle differences in peak timing and individual response patterns. Some patients may respond better to one formulation over others, requiring individualized selection based on glucose response patterns.

Running out of basal vs bolus insulin? Get Admelog Vials delivered for effective bolus coverage.

Bolus insulin dosing requires careful calculation based on carbohydrate intake, current blood glucose levels, and individual insulin sensitivity factors. The insulin-to-carbohydrate ratio determines how much bolus insulin is needed for each gram of carbohydrate consumed, while correction factors help address elevated glucose levels.

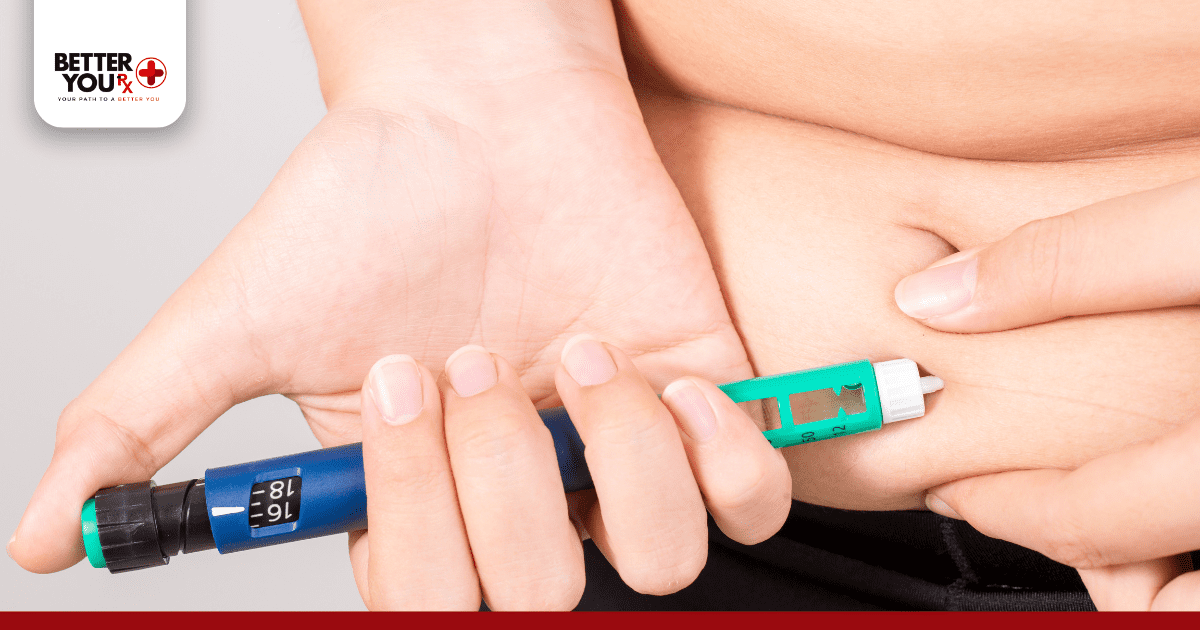
Timing bolus insulin administration is crucial for optimal effectiveness. Most rapid-acting insulins should be administered 15-30 minutes before eating to ensure insulin action aligns with glucose absorption from food. However, this timing may vary based on individual response patterns and current glucose levels.

Key Differences Between Basal and Bolus Insulin

Basal vs Bolus Insulin

The fundamental differences between basal and bolus insulin extend beyond their duration of action to encompass their intended purposes, dosing strategies, and roles in comprehensive diabetes management.

Duration and Onset Characteristics

Basal insulin provides extended coverage lasting 12-42 hours depending on the specific formulation, with minimal peak activity and steady action profiles. Bolus insulin offers rapid onset within 15 minutes, peaks within 1-2 hours, and completes its action within 3-4 hours.

Purpose and Function

Basal insulin addresses background glucose control, suppressing hepatic glucose production and maintaining stable glucose levels between meals and during sleep. Bolus insulin specifically targets meal-related glucose spikes and provides correction coverage for elevated glucose levels.

Dosing Flexibility

Basal insulin typically requires consistent daily timing but offers flexibility in exact administration time within a few hours. Bolus insulin demands precise timing relative to meals and requires dose adjustments based on carbohydrate intake and glucose levels.

Coverage Patterns

Basal insulin provides continuous, steady glucose management throughout the day and night. Bolus insulin delivers targeted coverage for specific events like meals, snacks, or glucose corrections, with distinct periods of activity and inactivity.

Basal-Bolus Insulin Therapy: A Comprehensive Approach

Basal-bolus insulin therapy combines long-acting basal insulin with rapid-acting bolus insulin to provide comprehensive glucose management that closely mimics natural pancreatic function. This approach offers superior glucose control compared to single insulin regimens and provides flexibility for varying meal patterns and lifestyle factors.

The basal-bolus regimen typically involves one or two daily basal insulin injections combined with bolus insulin doses before meals and for glucose corrections. This combination addresses both background glucose control and meal-related insulin needs, providing more physiologic insulin replacement.

Advantages of Basal-Bolus Therapy

Basal-bolus insulin therapy offers numerous advantages for diabetes management:

  • Improved Glucose Control: Better hemoglobin A1c levels and reduced glucose variability compared to conventional insulin regimens
  • Lifestyle Flexibility: Ability to adjust meal timing, carbohydrate intake, and daily schedules without compromising glucose control
  • Reduced Hypoglycemia Risk: More precise insulin dosing reduces the risk of low blood glucose episodes
  • Better Quality of Life: Increased freedom in food choices and daily activities while maintaining good glucose control
  • Customizable Approach: Ability to adjust both basal and bolus components independently based on individual needs
  • Physiologic Insulin Replacement: Closer mimicry of natural pancreatic insulin production patterns

Implementation Considerations

Successful basal-bolus therapy requires comprehensive diabetes education, including carbohydrate counting, insulin dosing calculations, and blood glucose monitoring techniques. Patients must understand insulin-to-carbohydrate ratios, correction factors, and timing principles for optimal results.

Healthcare providers typically start with conservative insulin doses and make gradual adjustments based on glucose patterns and patient response. Regular monitoring through blood glucose testing or continuous glucose monitoring helps optimize both basal and bolus insulin doses.

Timing and Administration Guidelines

Proper timing and administration techniques are crucial for maximizing insulin effectiveness and minimizing glucose variability in basal-bolus therapy.

Basal Insulin Timing

Basal insulin should be administered at consistent times daily to maintain steady insulin levels. Most long-acting insulins can be given at any convenient time, but consistency is important for predictable glucose control.

Morning administration of basal insulin may help address dawn phenomenon, the natural rise in glucose that occurs in early morning hours. Evening administration might be preferred for patients who experience overnight glucose elevations or prefer bedtime dosing routines.

Bolus Insulin Timing

Optimal bolus insulin timing depends on several factors including current glucose levels, meal composition, and individual insulin response patterns. Generally, rapid-acting bolus insulin should be administered 15-30 minutes before eating to ensure insulin action aligns with glucose absorption.

When blood glucose levels are elevated, bolus insulin may need to be given earlier to allow correction time before adding meal coverage. Conversely, if glucose levels are low or trending downward, bolus insulin timing may be delayed or administered closer to meal consumption.

For mixed meals containing protein, fat, and carbohydrates, some patients may benefit from split dosing or extended bolus delivery using insulin pumps. High-fat meals may require additional insulin coverage 2-4 hours after eating due to delayed glucose absorption.

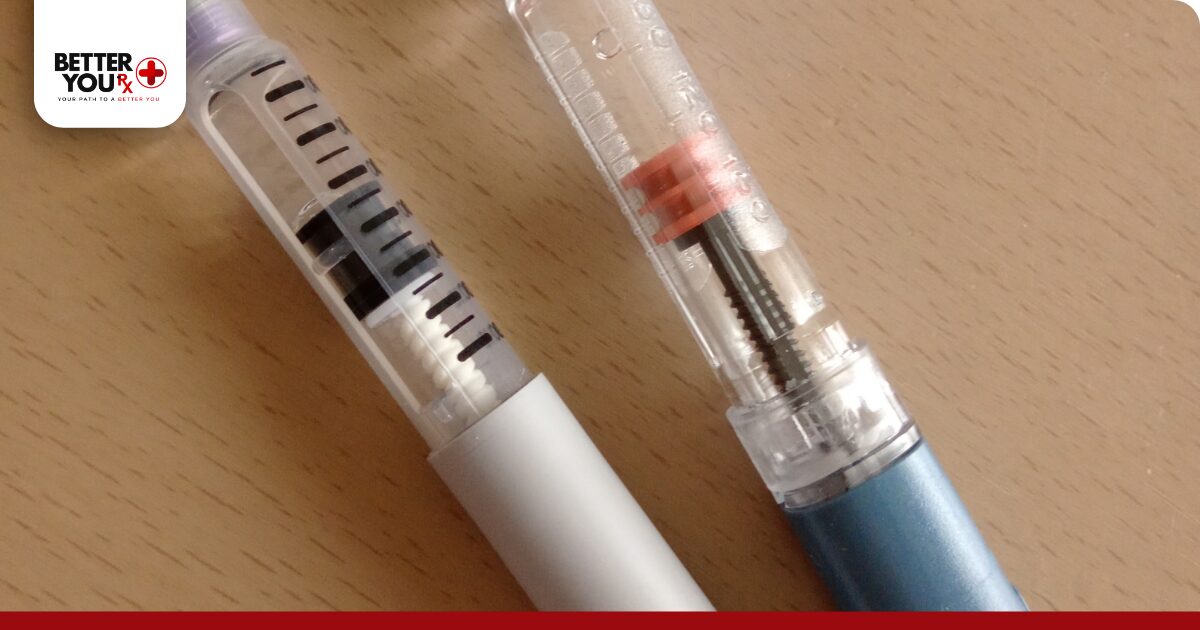
Insulin Types and Formulations

Comparison Table: Basal vs Bolus Insulin Characteristics

Characteristic

Basal Insulin

Bolus Insulin

Onset Time

1-4 hours

15 minutes

Peak Activity

Minimal to no peak

1-2 hours

Duration

12-42 hours

3-4 hours

Purpose

Background glucose control

Meal coverage & corrections

Dosing Frequency

Once or twice daily

Before each meal

Timing Flexibility

Consistent daily timing

Must align with meals

Common Types

Glargine, Detemir, Degludec

Lispro, Aspart, Glulisine

Action Profile

Steady, flat curve

Rapid rise and fall

Long-Acting Basal Insulin Options

Glargine (Lantus, Basaglar) Glargine provides 24-hour basal coverage with minimal peak activity and consistent glucose control. This insulin can be administered once daily at any convenient time, offering flexibility for different schedules and preferences.

Detemir (Levemir) Detemir offers 12-20 hour duration and may require twice-daily dosing in some patients. This insulin has a slightly different action profile that may provide more predictable glucose control for certain individuals.

Degludec (Tresiba) Degludec provides ultra-long-acting coverage lasting up to 42 hours, offering exceptional dosing flexibility and consistent glucose control. This insulin’s extended duration allows for variable dosing times while maintaining effective basal coverage.

Rapid-Acting Bolus Insulin Options

Lispro (Humalog, Admelog) Lispro offers rapid onset and peak activity within 1-2 hours, making it ideal for pre-meal administration and glucose correction. This insulin provides reliable meal coverage with predictable action patterns.

Aspart (Novolog) Aspart provides similar characteristics to Lispro with rapid onset and short duration. Some patients may find subtle differences in peak timing or overall response patterns that influence individual preferences.

Glulisine (Apidra) Glulisine offers rapid-acting coverage with unique formulation characteristics that may provide faster onset in certain situations. This insulin may be preferred for patients requiring very rapid meal coverage.

Explore Admelog vial options for convenient bolus insulin administration.

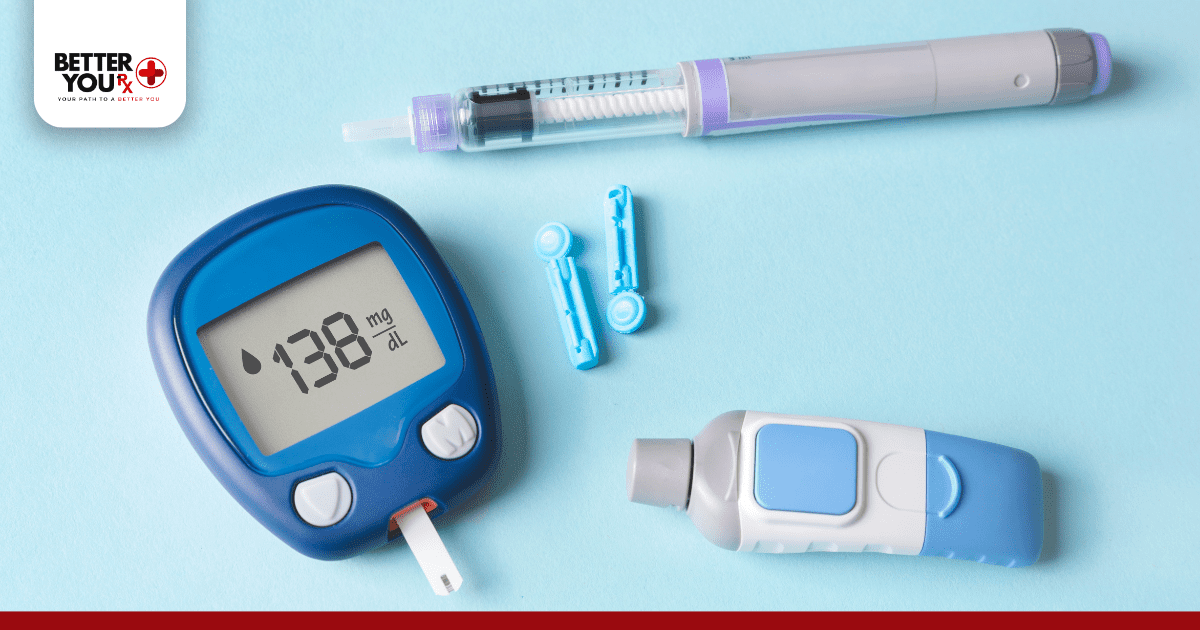
Effective basal-bolus insulin therapy requires comprehensive glucose monitoring to optimize dosing and timing decisions. Modern glucose monitoring options include traditional blood glucose meters, continuous glucose monitors (CGMs), and flash glucose monitoring systems.

Monitoring Strategies

Fasting Glucose Patterns

  • Regular fasting glucose monitoring helps evaluate basal insulin effectiveness and provides insights into overnight glucose control
  • Consistent fasting glucose levels within target ranges indicate appropriate basal insulin dosing for stable background control
  • Patterns of high fasting glucose may suggest insufficient basal insulin coverage or dawn phenomenon requiring dosing adjustments
  • Low fasting glucose levels could indicate excessive basal insulin that needs reduction to prevent nocturnal hypoglycemia

Post-Meal Glucose Responses

  • Monitoring glucose levels 1-2 hours after meals helps assess bolus insulin effectiveness and meal coverage adequacy
  • Post-meal glucose spikes above target ranges may indicate inadequate bolus dosing or timing issues with insulin administration
  • Consistent post-meal glucose elevation suggests need for insulin-to-carbohydrate ratio adjustments or earlier bolus timing
  • Post-meal hypoglycemia indicates excessive bolus insulin requiring dose reduction or carbohydrate intake modifications

Overnight Glucose Patterns

  • Continuous glucose monitoring or periodic overnight glucose checks help identify nocturnal glucose patterns and trends
  • Dawn phenomenon patterns show early morning glucose elevation requiring basal insulin timing or dosing adjustments
  • Overnight hyperglycemia may indicate insufficient basal coverage or need for split basal insulin dosing
  • Nocturnal hypoglycemia requires careful basal insulin reduction and may necessitate bedtime snack considerations

Dose Adjustment Principles

Insulin dose adjustments should be made systematically, changing one component at a time to identify specific effects. Basal insulin adjustments typically involve 10-20% dose changes based on fasting glucose patterns over several days.

Bolus insulin adjustments may involve insulin-to-carbohydrate ratio changes or correction factor modifications based on post-meal glucose responses and overall glucose control patterns. Healthcare providers should guide major insulin adjustments while patients can make minor corrections based on established guidelines.

Special Populations and Considerations

Blood Glucose Monitoring and Adjustment

Type 1 Diabetes Management

Individuals with Type 1 diabetes require complete insulin replacement therapy, making basal-bolus regimens essential for survival and optimal glucose control. These patients typically need more intensive monitoring and frequent dose adjustments due to complete insulin deficiency.

Basal insulin usually represents 40-50% of total daily insulin needs in Type 1 diabetes, with bolus insulin providing the remaining coverage for meals and corrections. Individual ratios may vary based on age, activity level, and metabolic factors.

Type 2 Diabetes Progression

Type 2 diabetes patients may progress from oral medications to basal insulin alone, eventually requiring basal-bolus therapy as beta cell function declines. This progression allows for gradual introduction of insulin therapy components while maintaining glucose control.

Starting with basal insulin alone allows patients to adapt to insulin injections before adding mealtime bolus coverage. This stepwise approach often improves treatment acceptance and long-term adherence to insulin therapy.

Pregnancy and Insulin Therapy

Pregnancy significantly affects insulin requirements due to hormonal changes and increased metabolic demands. Basal-bolus therapy often provides the flexibility needed to manage changing glucose patterns throughout pregnancy while maintaining tight glucose control for maternal and fetal health.

Insulin requirements typically increase during pregnancy, particularly in the second and third trimesters. More frequent glucose monitoring and insulin adjustments are necessary to maintain optimal glucose control during this critical period.

Low on basal vs bolus insulin? Get Novolog FlexPens fast delivery for convenient rapid-acting insulin delivery.

Lifestyle Integration and Patient Education

Successfully implementing basal-bolus insulin therapy requires comprehensive patient education and lifestyle integration strategies. Patients must understand carbohydrate counting, insulin dosing calculations, injection techniques, and glucose monitoring procedures.

Carbohydrate Counting Skills

Accurate carbohydrate counting forms the foundation of effective bolus insulin dosing. Patients need education about carbohydrate content in various foods, portion size estimation, and label reading skills for processed foods.

Practice with carbohydrate counting using real meals and snacks helps develop accuracy and confidence in insulin dosing decisions. Mobile apps and online resources can provide additional support for carbohydrate counting skills development.

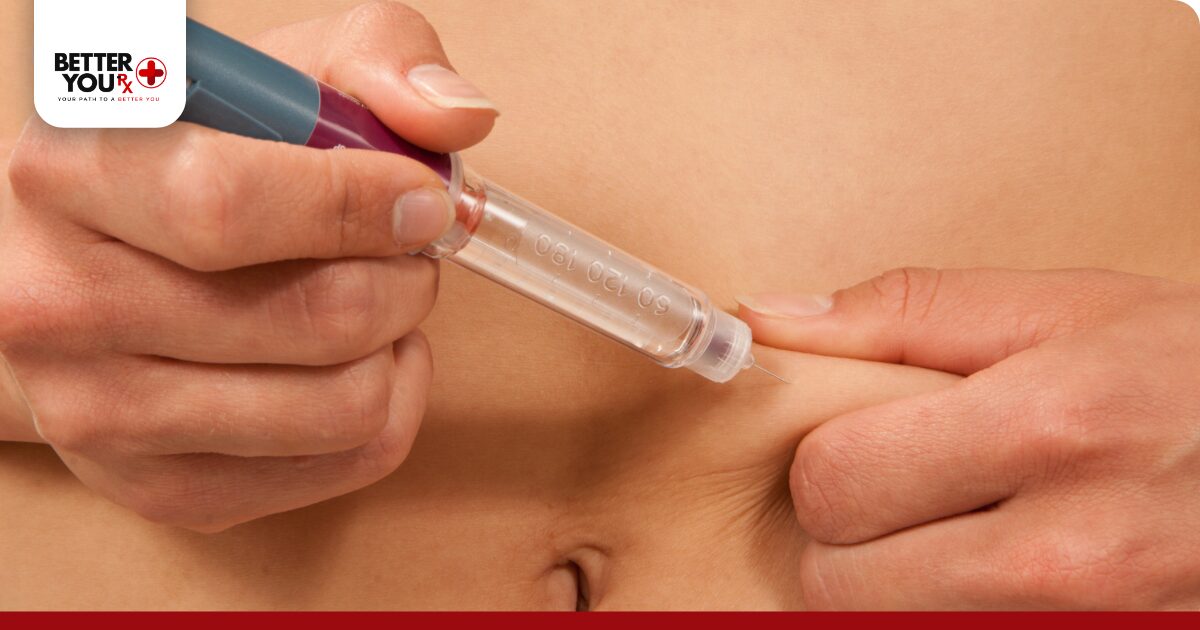
Injection Technique and Site Rotation

Proper injection technique ensures consistent insulin absorption and reduces complications like lipodystrophy. Patients should learn about injection site rotation, needle selection, and injection depth for optimal insulin delivery.

Regular assessment of injection sites helps identify developing lipodystrophy or other complications that could affect insulin absorption. Healthcare providers should review injection techniques periodically and provide corrective guidance as needed.

Exercise and Activity Considerations

Physical activity significantly affects glucose levels and insulin requirements. Patients need strategies for adjusting insulin doses around exercise, understanding activity timing effects, and managing exercise-related glucose changes.

Different types of exercise may have varying effects on glucose levels, requiring individualized approaches to insulin and carbohydrate adjustments. Continuous glucose monitoring can help identify patterns and optimize activity-related management strategies.

Technology Integration and Advanced Management

Key Differences Between Basal and Bolus Insulin

Modern diabetes technology offers numerous tools to enhance basal-bolus insulin therapy effectiveness and convenience. Insulin pumps, continuous glucose monitors, and smartphone applications provide advanced management capabilities.

Insulin Pump Therapy

Insulin pumps deliver both basal and bolus insulin through continuous subcutaneous insulin infusion, offering precise dosing and programmable delivery patterns. Pumps can provide variable basal rates throughout the day and sophisticated bolus delivery options for complex meal management.

Pump therapy may be particularly beneficial for patients with irregular schedules, frequent hypoglycemia, or difficult-to-manage glucose patterns. However, pumps require intensive education and ongoing support for safe and effective use.

Continuous Glucose Monitoring

CGMs provide real-time glucose readings and trends, enabling more proactive insulin dosing decisions and improved glucose control. Integration with insulin delivery systems creates automated insulin delivery systems that adjust insulin based on glucose patterns.

CGM data helps identify glucose patterns that may not be apparent through traditional blood glucose monitoring, enabling more precise insulin adjustments and improved overall management.

Troubleshooting Common Challenges

Basal-bolus insulin therapy may present various challenges requiring problem-solving approaches and management adjustments.

Managing Glucose Variability

High glucose variability may indicate timing issues, incorrect insulin-to-carbohydrate ratios, or inadequate basal insulin coverage. Systematic evaluation of glucose patterns helps identify specific causes and appropriate interventions.

Hypoglycemia Prevention

Recurrent hypoglycemia may result from excessive insulin dosing, timing mismatches, or inadequate carbohydrate coverage. Hypoglycemia unawareness requires particular attention and may necessitate relaxed glucose targets temporarily.

Dawn Phenomenon Management

Dawn phenomenon causes early morning glucose elevation due to natural hormone fluctuations. Management strategies include adjusting basal insulin timing, using different basal insulin formulations, or adding morning correction doses.

Alternative Insulin Options and Adjunct Therapies

GLP-1 Receptor Agonists

GLP-1 receptor agonists like Lixisenatide can complement basal-bolus insulin therapy by improving post-meal glucose control and potentially reducing insulin requirements. These medications may help optimize glucose control while minimizing weight gain often associated with insulin therapy.

Inhaled Insulin Options

Inhaled insulin provides rapid-acting mealtime coverage without injections, offering an alternative bolus insulin delivery method for patients with injection concerns or difficulties.

Key Takeaways for Basal vs Bolus Insulin Management

Effective diabetes management through basal-bolus insulin therapy requires understanding the distinct roles of each insulin type and their proper implementation. Basal insulin provides the foundation for glucose control with steady, long-acting coverage, while bolus insulin addresses specific meal-related needs and glucose corrections. The combination offers superior glucose management compared to single insulin regimens, providing lifestyle flexibility and improved quality of life for both Type 1 and Type 2 diabetes patients.

Success with basal-bolus therapy depends on proper education, including carbohydrate counting skills, insulin dosing calculations, and consistent blood glucose monitoring. Working closely with healthcare providers ensures optimal insulin adjustments and helps address challenges that may arise during treatment. Modern technology integration and continuous learning about diabetes management techniques contribute to better outcomes and enhanced daily diabetes care.

Frequently Asked Questions

What’s the Difference Between Basal and Bolus Insulin?

Basal insulin provides long-acting, steady glucose control throughout the day and night, lasting 12-24 hours or longer with minimal peak activity. It mimics the pancreas’s continuous background insulin production and helps maintain stable glucose levels between meals and during sleep. Bolus insulin offers rapid-acting coverage for meals and glucose corrections, beginning work within 15 minutes, peaking in 1-2 hours, and lasting 3-4 hours. The key difference lies in their purpose: basal insulin provides foundation glucose control while bolus insulin addresses specific glucose spikes from food or elevated glucose levels.

When to Give Basal Bolus Insulin?

Basal insulin should be administered at consistent times daily, typically once or twice per day depending on the specific formulation. Most long-acting basal insulins can be given at any convenient time but require consistency for predictable glucose control. Bolus insulin should be given before meals, typically 15-30 minutes prior to eating to allow insulin action to align with glucose absorption from food. Additional bolus doses may be needed for snacks or to correct elevated glucose levels. The timing may need adjustment based on current glucose levels and meal composition.

What Does Bolus Insulin Mean?

Bolus insulin refers to rapid-acting insulin administered to cover meals and correct elevated blood glucose levels. The term “bolus” means a single, discrete dose given at specific times rather than continuous administration. Bolus insulin mimics the pancreas’s natural response to food intake, providing quick-acting insulin coverage that prevents post-meal hyperglycemia. Common bolus insulins include Lispro, Aspart, and Glulisine, all designed to work quickly and complete their action within a few hours to match the body’s natural meal-related insulin needs.

What Are the Advantages of Basal Bolus Insulin?

Basal-bolus insulin therapy offers superior glucose control compared to conventional insulin regimens, with better hemoglobin A1c levels and reduced glucose variability. This approach provides lifestyle flexibility, allowing patients to adjust meal timing and carbohydrate intake while maintaining good glucose control. The risk of hypoglycemia is reduced through more precise insulin dosing, and patients experience improved quality of life with increased freedom in food choices and daily activities. The therapy provides physiologic insulin replacement that closely mimics natural pancreatic function, and both basal and bolus components can be adjusted independently based on individual needs.

What is the Best Time to Inject Bolus?

The optimal time to inject bolus insulin is typically 15-30 minutes before eating to ensure insulin action aligns with glucose absorption from food. However, timing may vary based on current glucose levels, with earlier administration needed when glucose is elevated and later timing appropriate when glucose is low or trending downward. Individual response patterns may require timing adjustments, and different meal compositions may affect optimal timing. For high-fat meals, additional coverage may be needed 2-4 hours after eating due to delayed glucose absorption.

Is Bolus Insulin Only for Type 1 Diabetes?

Bolus insulin is not exclusively for Type 1 diabetes. While all individuals with Type 1 diabetes require bolus insulin as part of complete insulin replacement therapy, many people with Type 2 diabetes also benefit from bolus insulin coverage. Type 2 diabetes patients may progress from oral medications to basal insulin alone, eventually requiring basal-bolus therapy as beta cell function declines over time. Bolus insulin helps Type 2 diabetes patients achieve better glucose control, particularly around meals, and may be recommended when basal insulin alone is insufficient to maintain target glucose levels.

What is the Purpose of Basal Insulin?

The primary purpose of basal insulin is to provide steady, long-acting glucose control that mimics the pancreas’s continuous background insulin production. Basal insulin suppresses hepatic glucose production, which naturally occurs between meals and during sleep, and facilitates glucose uptake by muscles and other tissues throughout the day and night. This foundation glucose control helps maintain stable blood glucose levels during fasting periods, reduces dawn phenomenon effects, and provides consistent insulin coverage that doesn’t require precise meal timing. Basal insulin forms the cornerstone of comprehensive diabetes management by addressing background glucose control needs.

Lispro vs Regular Insulin – Understanding the Key Differences for Better Diabetes Management

Lispro vs regular insulin represents two distinct categories of insulin therapy, each designed to address specific blood sugar control needs. Lispro insulin, a rapid-acting synthetic insulin analog, begins working within 15 minutes and peaks in 1-2 hours, making it ideal for mealtime glucose control. Regular insulin, also known as short-acting insulin, takes 30 minutes to start working and peaks in 2-3 hours, providing longer-lasting coverage. The choice between these insulin types depends on your lifestyle, eating patterns, blood sugar targets, and overall diabetes management plan. Understanding their onset times, peak effects, duration, and practical applications helps you work with your healthcare provider to optimize your treatment approach and achieve better glycemic control.

How Lispro vs Regular Insulin Works in Your Body

Lispro insulin mimics the natural insulin response your pancreas would produce after eating. This rapid-acting insulin analog has been modified at the molecular level to absorb more quickly from injection sites into your bloodstream. When understanding Lispro vs Regular Insulin differences, it’s important to note that when you inject Lispro, it begins lowering blood glucose within 10-15 minutes, reaches peak effectiveness in 1-2 hours, and continues working for 3-5 hours total.

The molecular structure of Lispro has been engineered by reversing the amino acids proline and lysine at positions 28 and 29 of the B-chain. This modification prevents the insulin molecules from forming hexamers, allowing them to disperse more rapidly from the injection site. The monomeric and dimeric forms of Lispro are absorbed much faster through capillary walls, resulting in its characteristic rapid onset of action.

The fast onset makes Lispro particularly effective for controlling post-meal blood sugar spikes. Its quick action allows for flexible meal timing, as you can inject just before eating or even immediately after meals if needed. This flexibility proves especially valuable for people with unpredictable schedules or varying appetite patterns. The pharmacokinetic profile closely matches the physiological insulin response to meals, making it an excellent choice for mimicking natural pancreatic function.

Lispro’s bioavailability remains consistent across different injection sites, though absorption may vary slightly between subcutaneous tissue locations. The abdomen typically provides the fastest absorption, followed by the arms, thighs, and buttocks. Factors such as injection depth, tissue temperature, and local blood flow can influence absorption rates, but these variations are generally minimal with rapid-acting formulations.

Key Characteristics of Lispro Insulin:

  • Onset time – 10-15 minutes
  • Peak action – 1-2 hours
  • Duration – 3-5 hours
  • Best used for mealtime coverage
  • Allows flexible dosing timing
  • Bioavailability – 55-77% compared to regular insulin
  • Temperature stability – Maintains potency at room temperature for 28 days

Ready to experience better mealtime glucose control? Buy Humalog cartridge insulin Lispro from Canada and enjoy significant savings on your diabetes medications.

Understanding Regular Insulin and Its Mechanism

Making the Right Choice for Your Lifestyle

Regular insulin, also called short-acting or soluble insulin, represents the traditional form of mealtime insulin that has been used for decades. This clear, colorless solution contains human insulin that works more slowly than rapid-acting analogs like Lispro. When comparing Lispro vs Regular Insulin characteristics, Regular insulin requires 30 minutes to begin lowering blood glucose, reaches peak effectiveness in 2-3 hours, and continues working for 5-8 hours.

Regular insulin contains recombinant human insulin produced through genetic engineering in bacterial or yeast cells. The amino acid sequence is identical to naturally occurring human insulin, making it biocompatible and reducing the risk of immune reactions. Unlike rapid-acting analogs, regular insulin maintains its hexameric structure in solution, which requires time to dissociate into monomers and dimers before absorption can occur effectively.

The longer onset time means you need to inject regular insulin 30 minutes before eating to properly cover your meal. This timing requirement can make meal planning more rigid compared to rapid-acting options. However, the extended duration of action can provide better coverage for meals with slower-digesting carbohydrates or larger portions. The sustained release pattern makes regular insulin particularly effective for covering complex meals that include proteins, fats, and fiber that slow gastric emptying.

Regular insulin’s absorption characteristics remain relatively consistent across injection sites, though individual factors such as tissue thickness, blood flow, and temperature can influence uptake rates. The subcutaneous depot formed after injection gradually releases insulin into systemic circulation, creating the characteristic delayed but sustained action profile.

Regular Insulin Characteristics:

  • Onset time – 30 minutes
  • Peak action – 2-3 hours
  • Duration – 5-8 hours
  • Requires pre-meal injection timing
  • Longer-lasting glucose coverage
  • Bioavailability – 63-89% depending on injection site
  • Storage requirements – Stable at refrigeration temperatures
  • Zinc content – Contains zinc for crystallization and stability
Feature Regular Insulin Lispro Insulin
Onset Time 30 minutes 10-15 minutes
Peak Effect 2-3 hours 1-2 hours
Duration 5-8 hours 3-5 hours
Meal Timing 30 min before Just before/after
Flexibility Less flexible More flexible
Structure Hexameric Monomeric/Dimeric
Manufacturing Standard recombinant Analog technology

Speed and Timing Differences Between Lispro vs Regular Insulin

The most significant difference between Lispro vs regular insulin lies in their speed of action and timing requirements. These differences directly impact how you manage your daily diabetes care routine and meal planning strategies. Understanding these distinctions helps optimize your treatment approach and achieve better glycemic outcomes.

Lispro’s rapid onset means you can inject and eat within minutes, making it ideal for spontaneous meals or when you’re unsure about portion sizes. You can even wait to see how much you actually eat before determining your final dose. This flexibility reduces the risk of hypoglycemia from taking insulin for food you don’t end up consuming. The ability to dose post-meal is particularly valuable for children, elderly patients, or anyone with variable appetite patterns.

Regular insulin’s 30-minute delay requires more planning but offers advantages for certain situations. The key distinction in Lispro vs Regular Insulin usage is that regular insulin’s longer duration provides better coverage for high-fat meals that slow gastric emptying, extended social meals, or grazing-style eating patterns. The sustained action can also help bridge between meals when used in combination with longer-acting insulins.

The extended action profile of regular insulin can be beneficial for managing dawn phenomenon, where blood glucose naturally rises in the early morning hours. When used as part of conventional insulin therapy, regular insulin’s longer duration helps maintain glucose control between meals without requiring additional intermediate-acting insulin doses.

Timing Considerations:

  • Lispro – Inject 0-15 minutes before eating
  • Regular – Inject 30 minutes before eating
  • Flexibility – Lispro allows post-meal dosing adjustments
  • Duration – Regular insulin covers longer eating windows
  • Exercise considerations – Lispro provides better control during physical activity
  • Stress response – Regular insulin may offer more stable coverage during illness
  • Travel adjustments – Lispro adapts better to changing meal schedules

Discover the convenience of rapid-acting insulin. Browse our complete insulin Lispro collection to find the right option for your lifestyle.

Effectiveness Comparison for Blood Sugar Control

Both Lispro and regular insulin effectively lower blood glucose, but their different action profiles make them suitable for different glycemic control strategies. When evaluating Lispro vs Regular Insulin effectiveness, clinical studies show that rapid-acting insulins like Lispro typically provide better post-meal glucose control with lower risk of late hypoglycemia compared to regular insulin.

Lispro’s quick onset and peak action align more closely with natural insulin response patterns, leading to improved HbA1c levels in many patients. The reduced risk of hypoglycemia occurs because Lispro clears from your system faster, decreasing the chance of overlapping insulin action between meals. Research demonstrates that patients using rapid-acting insulins experience fewer severe hypoglycemic episodes while achieving similar or better overall glucose control.

The improved post-prandial glucose control with Lispro translates to better management of glucose excursions that contribute to diabetic complications. Studies show reductions in post-meal glucose spikes of 20-30% compared to regular insulin when proper timing is maintained. This improvement in glucose variability correlates with reduced oxidative stress and lower cardiovascular risk markers.

Regular insulin may provide superior control for individuals who experience delayed gastric emptying, eat high-fiber meals, or have gastroparesis. Its longer action profile can better match slower carbohydrate absorption patterns in these situations. The extended coverage is particularly valuable for patients with autonomic neuropathy affecting digestion or those taking medications that slow gastric motility.

Patient satisfaction scores consistently favor rapid-acting insulins due to improved lifestyle flexibility and reduced meal planning constraints. Quality of life measures show significant improvements in treatment satisfaction, dietary freedom, and overall diabetes management burden when patients switch from regular to rapid-acting insulin formulations.

Long-term cardiovascular outcomes data suggests similar benefits between insulin types when used appropriately, though the improved glucose control achieved with rapid-acting insulins may translate to reduced microvascular complication risk over time. The key factor remains consistent use and appropriate dosing rather than insulin type selection alone.

Effectiveness Factors:

  • Post-meal control – Lispro generally superior
  • HbA1c improvement – Lispro shows slight advantage
  • Hypoglycemia risk – Lower with Lispro
  • Special circumstances – Regular insulin may be preferred
  • Glucose variability – Better control with rapid-acting formulations
  • Patient satisfaction – Higher ratings for flexibility with Lispro
  • Quality of life – Improved dietary freedom with rapid-acting insulins

Side Effects and Safety Profiles

Lispro vs Regular Insulin

Both insulin types share fundamental safety profiles since they perform the same basic function of lowering blood glucose. However, their different timing characteristics create distinct patterns of potential side effects and adverse reactions.

Lispro Insulin Side Effects:

  • Common: Hypoglycemia, injection site reactions (pain, redness, swelling), weight gain, lipodystrophy
  • Less Common: Allergic reactions (rash, itching, difficulty breathing), hypokalemia (low potassium), peripheral edema
  • Rare: Severe hypoglycemia, anaphylaxis, insulin antibody formation
  • Injection Site: Localized fat loss or thickening, bruising, bleeding
  • Metabolic: Fluid retention, electrolyte imbalances

Regular Insulin Side Effects:

  • Common: Hypoglycemia, injection site reactions, weight gain, lipodystrophy
  • Less Common: Allergic skin reactions, hypokalemia, sodium retention, blurred vision
  • Rare: Severe allergic reactions, insulin resistance, lipoatrophy
  • Gastrointestinal: Nausea (especially during hypoglycemia), abdominal discomfort
  • Neurological: Headache, dizziness, confusion during low blood sugar episodes

Timing-Related Safety Differences:

Lispro’s rapid action increases the risk of immediate post-injection hypoglycemia if you delay eating or consume less food than expected. The quick onset means symptoms can develop suddenly within 15-30 minutes of injection. However, the shorter duration reduces late-onset hypoglycemia risk, particularly overnight or between meals.

Regular insulin’s delayed onset can lead to hypoglycemia 2-4 hours after injection, especially if meals are delayed or smaller than anticipated. The longer duration increases the risk of insulin stacking when doses are given too close together, potentially causing prolonged hypoglycemic episodes.

Critical Safety Considerations:

  • Monitor blood glucose more frequently when starting either insulin
  • Recognize early hypoglycemia symptoms (sweating, shakiness, rapid heartbeat)
  • Adjust doses gradually based on response patterns and blood sugar logs
  • Maintain consistent carbohydrate intake during initial therapy
  • Rotate injection sites systematically to prevent lipodystrophy
  • Keep fast-acting carbohydrates readily available for hypoglycemia treatment
  • Report persistent injection site reactions or unusual symptoms to healthcare providers

Accessibility Factors to Consider:

  • Global availability – Regular insulin more universally accessible
  • Generic availability – Regular insulin has more generic alternatives
  • Delivery options – Both available in multiple formats
  • Provider familiarity – Regular insulin has longer prescribing history
  • Supply chain stability – Both have established distribution networks

Formulation Options:

  • Vials – Traditional option for both insulin types
  • Pre-filled pens – Convenient for both Lispro and regular insulin
  • Cartridges – Refillable pen systems available
  • Concentrated formulations – Higher strength options when needed

Humalog Junior KwikPen is $112.8 in BetterYouRx, providing an accessible option for those seeking reliable Lispro insulin therapy. Access affordable diabetes medication through reliable Canadian sources. Order Humalog Junior KwikPen from Canada and enjoy convenient delivery options.

Making the Right Choice for Your LifestyleEffectiveness Comparison for Blood Sugar Control


Selecting between Lispro vs regular insulin depends on multiple personal factors including your daily routine, eating habits, glucose targets, and lifestyle preferences. Neither insulin type is universally superior – the best choice is the one that fits your specific needs and helps you achieve optimal glucose control while maintaining quality of life and treatment adherence.

The decision process should involve careful consideration of your individual circumstances, medical history, and treatment goals. Healthcare providers typically evaluate factors such as current glucose control patterns, hypoglycemia frequency, meal timing consistency, physical activity levels, and personal preferences when recommending insulin therapy options.

Choose Lispro If You:

  • Have unpredictable meal timing due to work or lifestyle demands
  • Prefer flexibility in dosing and meal planning
  • Experience frequent hypoglycemia with regular insulin regimens
  • Want to dose after seeing portion sizes or appetite levels
  • Have gastroparesis or delayed gastric emptying conditions
  • Lead an active lifestyle with varying schedules and activities
  • Struggle with pre-meal timing requirements of regular insulin
  • Experience significant post-meal glucose spikes despite proper timing
  • Travel frequently or have irregular work schedules

Choose Regular Insulin If You:

  • Maintain consistent meal timing and structured daily routines
  • Have budget constraints that favor more affordable insulin options
  • Experience good glucose control with your current regular insulin regimen
  • Eat larger or high-fat meals frequently that require extended coverage
  • Have slower gastric emptying that benefits from longer insulin action
  • Prefer established, well-studied treatments with decades of safety data
  • Live in areas where rapid-acting analogs have limited availability
  • Experience adequate glucose control without flexibility requirements

Your healthcare provider can help evaluate these factors and may recommend starting with one type while keeping the option to switch based on your response and lifestyle changes. Many people find success with either option when properly dosed and timed according to their specific needs. The transition between insulin types should always be done under medical supervision with appropriate glucose monitoring adjustments.

Optimizing Your Insulin Therapy Choice

The decision between Lispro vs regular insulin centers on matching insulin action to your individual needs. Lispro offers rapid onset and flexible timing, ideal for variable lifestyles and improved post-meal control. Regular insulin provides longer duration and established protocols, suitable for structured routines and extended coverage needs. Both effectively lower blood glucose when used appropriately. Success depends on consistent use, proper timing, and regular monitoring. Healthcare provider guidance ensures optimal selection based on your lifestyle, medical circumstances, and glucose targets. Individual responses vary, making personalized approaches essential. Treatment satisfaction improves when insulin choice aligns with daily routines and preferences. Regular reassessment ensures continued effectiveness as circumstances change over time.

Frequently Asked Questions

Is Lispro Safe in Pregnancy?

Lispro insulin is generally considered safe during pregnancy and is often preferred over regular insulin for pregnant women with diabetes. The rapid-acting nature helps control post-meal glucose spikes that can be particularly harmful during pregnancy. Always consult your healthcare provider before making any insulin changes during pregnancy, as individual circumstances vary significantly.

Can Humalog Cause Diarrhea?

Diarrhea is not a common direct side effect of Humalog (insulin Lispro), but it can occur in some individuals. More often, digestive issues result from blood sugar fluctuations rather than the insulin itself. If you experience persistent diarrhea after starting Humalog, discuss this with your healthcare provider to rule out other causes.

What Kind of Insulin Is Lispro?

Lispro is a rapid-acting insulin analog, meaning it’s a modified form of human insulin designed to work faster than natural insulin. It’s created by reversing two amino acids in the insulin molecule, which prevents it from clumping together and allows for quicker absorption. Lispro is classified as mealtime or bolus insulin, used primarily to control blood sugar spikes after eating.

What Are the Advantages of Lispro Insulin?

Lispro insulin offers several key advantages including rapid onset within 10-15 minutes, allowing flexible meal timing and the ability to dose just before or even after eating. It provides better post-meal glucose control with reduced risk of late hypoglycemia compared to regular insulin. The shorter duration of action (3-5 hours) means less risk of insulin stacking and allows for more precise dose timing.

What Is the Difference Between Lispro and Regular Insulin?

The primary differences lie in onset time, peak action, and duration. Lispro begins working in 10-15 minutes, peaks in 1-2 hours, and lasts 3-5 hours, while regular insulin starts in 30 minutes, peaks in 2-3 hours, and continues for 5-8 hours. This means Lispro requires injection closer to meal time but offers more flexibility, while regular insulin needs 30-minute pre-meal timing but provides longer coverage.

Who Should Not Take Insulin Lispro?

People with known hypersensitivity or allergy to Lispro or any of its components should not use this insulin. Those experiencing hypoglycemia should not inject additional Lispro until blood sugar levels normalize. Individuals with severe kidney or liver disease may need dose adjustments or alternative treatments.

Which Insulin Is Better, Humalog or Lispro?

Humalog is actually a brand name for insulin Lispro, so they are the same medication. Generic insulin Lispro and brand-name Humalog contain the same active ingredient and work identically in your body. The choice between them typically comes down to availability and personal preference for delivery devices.


Insulin Dosing Weight-Based – Guide for Safe Diabetes Management

Weight-based insulin dosing represents a fundamental approach to diabetes management that helps healthcare providers determine appropriate insulin doses based on a patient’s body weight. This comprehensive guide explores the essential principles of calculating weight-based insulin doses, understanding different insulin types, and implementing safe dosing strategies for effective blood sugar control.

The weight-based dosing method provides a starting point for insulin therapy by establishing baseline requirements typically ranging from 0.4 to 1.0 units per kilogram of body weight daily. This approach considers individual factors such as insulin sensitivity, activity levels, and disease progression while offering healthcare providers a systematic framework for initiating and adjusting insulin therapy.

Understanding Weight-Based Insulin Calculations

Weight-based insulin dosing serves as the foundation for establishing appropriate insulin therapy in diabetes management. The calculation process begins with determining total daily insulin requirements based on body weight, typically measured in kilograms. Healthcare providers use established formulas that account for different patient populations and insulin sensitivity levels.

The basic calculation starts with multiplying body weight in kilograms by a predetermined factor ranging from 0.4 to 1.0 units per kilogram. Newly diagnosed patients with type 1 diabetes often begin with lower doses around 0.4-0.6 units per kilogram, while patients with insulin resistance or type 2 diabetes may require higher doses approaching 0.8-1.0 units per kilogram or more.

Patient factors significantly influence these calculations including age, physical activity level, eating patterns, and concurrent medications. Younger patients typically demonstrate higher insulin sensitivity requiring lower doses per kilogram, while older adults or those with additional health conditions may need adjusted calculations. The presence of other medications, particularly corticosteroids or certain psychiatric medications, can increase insulin requirements substantially.

Looking to optimize your diabetes management with reliable insulin options? Consider Humalog Junior KwikPen for precise pediatric dosing needs.

How to Calculate Weight-Based Insulin Dosing

Safety Considerations and Monitoring

Calculating weight-based insulin dosing involves several systematic steps that healthcare providers follow to establish safe and effective insulin regimens. The process requires accurate body weight measurements, understanding of insulin types, and consideration of individual patient factors.

Step 1 – Determine Total Daily Insulin Dose (TDID) Begin by calculating the total daily insulin dose using the formula: TDID = Body weight (kg) × Units per kg factor. For most patients, start with 0.5 units per kilogram as a baseline, adjusting based on individual circumstances.

Step 2 – Distribute Between Basal and Bolus Insulin Divide the total daily dose between basal (background) insulin and bolus (mealtime) insulin. Typically, 40-50% of the total dose serves as basal insulin, while the remaining 50-60% covers bolus needs distributed across meals.

Step 3 – Calculate Individual Meal Bolus Doses Distribute bolus insulin across meals based on carbohydrate content and individual insulin-to-carbohydrate ratios. Start with dividing bolus insulin equally across three meals, then adjust based on actual carbohydrate intake and blood glucose responses.

Step 4 – Apply Correction Factors Establish correction factors for high blood glucose levels, typically starting with 1 unit of rapid-acting insulin for every 50 mg/dL above target glucose levels. Adjust this sensitivity factor based on individual response patterns and total daily insulin requirements.

The calculation process requires ongoing monitoring and adjustment based on blood glucose patterns, lifestyle changes, and patient response to initial dosing recommendations.

Types of Weight-Based Insulin Dosing Regimens

Different insulin regimens utilize weight-based calculations while addressing varying patient needs and diabetes management goals. Understanding these regimens helps healthcare providers select appropriate approaches for individual patients.

Basal-Bolus Regimens Basal-bolus regimens provide the most physiologic approach to insulin replacement therapy. Long-acting insulin such as Glargine or Detemir covers basal needs, while rapid-acting insulin like Lispro or Aspart addresses mealtime requirements. Weight-based calculations determine both components with typical distributions of 40-50% basal and 50-60% bolus insulin.

Mixed Insulin Regimens Pre-mixed insulin combinations like 70/30 or 75/25 formulations offer convenience for patients requiring simplified regimens. Weight-based dosing for mixed insulins typically starts with 0.6-0.8 units per kilogram daily, divided between morning and evening doses based on individual meal patterns and glucose responses.

Sliding Scale Approaches While less preferred for routine management, sliding scale insulin protocols use weight-based corrections for hospitalized patients or temporary situations. These protocols establish correction doses based on current blood glucose levels and total daily insulin requirements calculated from patient weight.

Continuous Insulin Infusion Insulin pump therapy utilizes sophisticated weight-based calculations for programming basal rates and bolus doses. Initial pump settings derive from total daily injection requirements, with basal rates typically programmed as 40-50% of total daily needs distributed across 24-hour periods.

Factors Affecting Weight-Based Insulin Requirements

Insulin Dosing Weight-Based

Multiple factors influence individual insulin requirements beyond simple weight-based calculations. Understanding these variables helps healthcare providers make appropriate adjustments and set realistic expectations for diabetes management outcomes.

Insulin Sensitivity Variations Individual insulin sensitivity varies significantly based on factors including genetics, physical fitness, body composition, and hormonal status. Athletes or physically active individuals often demonstrate higher insulin sensitivity requiring lower doses per kilogram, while sedentary patients may need higher doses to achieve similar glucose control.

Age-Related Considerations Age significantly impacts insulin requirements with children and adolescents often requiring higher doses per kilogram due to growth hormone effects and pubertal changes. Elderly patients may need lower starting doses due to decreased kidney function, reduced caloric intake, or increased risk of hypoglycemia.

Honeymoon Period Effects Newly diagnosed type 1 diabetes patients may experience a honeymoon period where remaining beta cell function reduces insulin requirements. During this phase, weight-based calculations may overestimate needs, requiring careful monitoring and dose reductions to prevent hypoglycemia.

Concurrent Medical Conditions Various medical conditions affect insulin requirements including kidney disease, liver dysfunction, thyroid disorders, and infections. Kidney disease may reduce insulin clearance requiring dose adjustments, while hyperthyroidism can increase insulin needs substantially.

Medication Interactions Certain medications significantly impact insulin requirements including corticosteroids (increase needs), beta-blockers (may mask hypoglycemia symptoms), and some psychiatric medications (increase insulin resistance). Weight-based calculations must account for these interactions.

Safety Considerations and Monitoring

Safe implementation of weight-based insulin dosing requires comprehensive monitoring protocols and awareness of potential complications. Healthcare providers must establish clear guidelines for dose adjustments and patient education regarding hypoglycemia recognition and treatment.

Blood Glucose Monitoring Requirements Patients beginning weight-based insulin regimens require frequent blood glucose monitoring to assess dose appropriateness and identify patterns requiring adjustment. Initial monitoring typically includes pre-meal and bedtime glucose checks, with additional testing during illness or routine changes.

Hypoglycemia Prevention Weight-based dosing calculations provide starting points that require individualization to prevent hypoglycemia. Healthcare providers must educate patients about hypoglycemia symptoms, treatment protocols, and situations requiring immediate medical attention. Glucagon prescriptions become essential safety measures for patients using insulin.

Dose Adjustment Protocols Systematic dose adjustment protocols help healthcare providers make safe modifications to weight-based insulin regimens. Typical adjustment increments range from 10-20% of current doses, with changes made every 3-5 days based on glucose pattern analysis rather than isolated high or low readings.

Special Population Considerations Pregnant women, elderly patients, and those with kidney or liver disease require modified approaches to weight-based insulin dosing. These populations often need more conservative starting doses and more frequent monitoring to ensure safety while achieving glucose targets.

Insulin Types and Weight-Based Applications

Insulin Type Onset Peak Duration Weight-Based Dosing Application
Rapid-Acting (Lispro, Aspart) 15-30 min 1-2 hours 3-5 hours Bolus dosing: 50-60% of TDID
Short-Acting (Regular) 30-60 min 2-4 hours 6-8 hours Mealtime coverage: 0.1-0.3 u/kg per meal
Intermediate-Acting (NPH) 1-3 hours 6-8 hours 12-16 hours Basal coverage: 40-50% of TDID
Long-Acting (Glargine, Detemir) 1-4 hours Minimal peak 20-24 hours Basal dosing: 0.2-0.5 u/kg daily
Pre-Mixed (70/30, 75/25) 15-30 min 2-8 hours 16-20 hours Twice daily: 0.3-0.4 u/kg per dose

Different insulin types require specific considerations when applying weight-based dosing calculations. Rapid-acting insulins like Lispro and Aspart work quickly to cover mealtime glucose rises, while long-acting formulations provide steady background insulin coverage throughout the day.

Understanding pharmacokinetic profiles helps healthcare providers optimize timing and dosing for individual patient needs. The table above illustrates how different insulin types fit into weight-based regimens and typical dosing ranges for each category.

Special Dosing Situations and Adjustments

Certain situations require modifications to standard weight-based insulin dosing approaches. These circumstances demand careful consideration and often more intensive monitoring to ensure patient safety and optimal glucose control.

Sick Day Management Illness typically increases insulin requirements due to stress hormones and reduced food intake patterns. Patients may need 10-20% increases in total daily insulin doses during illness, with emphasis on maintaining basal insulin even when unable to eat normally. Blood glucose monitoring becomes more frequent during sick days.

Exercise and Physical Activity Regular exercise affects insulin sensitivity and may require dose adjustments to prevent hypoglycemia. Patients engaging in prolonged or intense physical activity often need 25-50% reductions in rapid-acting insulin doses for meals preceding exercise. Long-term exercise programs may reduce overall insulin requirements.

Travel and Schedule Changes Time zone changes and altered meal schedules require insulin timing adjustments while maintaining appropriate total daily doses. Patients crossing multiple time zones may need temporary intermediate adjustments before resuming normal schedules in new locations.

Pregnancy Considerations Pregnancy significantly alters insulin requirements with needs typically increasing throughout gestation. First trimester may see decreased requirements, while second and third trimesters often require substantial dose increases. Weight-based calculations must account for both pre-pregnancy weight and gestational changes.

Ready to start your Insulin Dosing Weight-Based journey? Explore Humulin N KwikPen for reliable intermediate-acting insulin coverage that fits seamlessly into your diabetes management plan.

Advanced Dosing Strategies

Advanced Dosing Strategies

Advanced weight-based insulin dosing strategies incorporate sophisticated approaches that address complex diabetes management situations. These strategies often combine multiple calculation methods and require experienced healthcare provider guidance.

Carbohydrate-to-Insulin Ratios Individual carbohydrate-to-insulin ratios determine how much rapid-acting insulin patients need for specific amounts of dietary carbohydrates. Starting ratios often derive from weight-based calculations using the 450 rule (450 divided by total daily insulin dose) or 500 rule for more insulin-sensitive patients.

Correction Factor Calculations Correction factors help patients adjust insulin doses for elevated blood glucose levels. The 1800 rule (1800 divided by total daily insulin dose) provides starting correction factors, indicating how much blood glucose decreases per unit of rapid-acting insulin.

Pattern Management Advanced dosing involves analyzing blood glucose patterns over multiple days to identify consistent trends requiring systematic dose adjustments. Dawn phenomenon, post-meal spikes, and overnight lows each require specific modification strategies based on pattern timing and magnitude.

Technology Integration Modern diabetes technology including continuous glucose monitors and insulin pumps utilize weight-based calculations as starting points for automated dosing adjustments. These systems learn individual response patterns and modify doses based on real-time glucose data and historical patterns.

Need rapid-acting insulin for precise mealtime control? Discover Admelog Vial – the trusted choice for effective insulin dosing weight-based management that adapts to your lifestyle.

Key Takeaways for Successful Weight-Based Insulin Management

Successful weight-based insulin dosing requires systematic approaches combining accurate calculations with individualized adjustments based on patient response patterns. Healthcare providers must balance standard dosing formulas with patient-specific factors including lifestyle, concurrent medications, and individual insulin sensitivity variations.

Regular monitoring and systematic dose adjustments ensure optimal glucose control while minimizing hypoglycemia risks. Patients require comprehensive education about their insulin regimens including proper timing, dose calculations, and emergency management procedures for both high and low blood glucose situations.

The integration of modern diabetes technology with traditional weight-based calculations offers enhanced precision and safety for insulin dose management. Continuous glucose monitoring and insulin delivery systems provide real-time feedback for optimizing doses while maintaining the fundamental principles of weight-based dosing as starting points.

Long-term success with weight-based insulin dosing depends on consistent healthcare provider collaboration, patient education, and willingness to make appropriate adjustments based on changing circumstances and individual response patterns.

Frequently Asked Questions

What Is the 70 30 Rule Insulin?

The 70/30 rule refers to pre-mixed insulin containing 70% intermediate-acting insulin (NPH) and 30% short-acting regular insulin. Weight-based dosing typically starts with 0.6-0.8 units per kilogram daily, divided between morning (60-70%) and evening (30-40%) doses.

How Much Insulin per Kg Body Weight?

Type 1 diabetes patients typically need 0.4-1.0 units per kilogram daily. Newly diagnosed patients start at 0.4-0.6 u/kg, while established patients require 0.6-1.0 u/kg. Type 2 diabetes patients may need 0.8-2.0 units per kilogram daily due to insulin resistance.

What Is the 2/3 1/3 Rule for Insulin?

The 2/3 1/3 rule distributes total daily insulin dose with two-thirds given in the morning and one-third in the evening. This accounts for higher daytime insulin needs when cortisol levels and food intake are greater.

What Is the 30 60 90 Rule for Insulin?

The 30 60 90 rule refers to blood glucose monitoring times after insulin injection. Check at 30 minutes for immediate effects, 60 minutes for peak action, and 90 minutes for overall effectiveness. This helps determine if ratios need adjustment.

How Does Weight Affect Insulin Needs?

Higher body weight often increases insulin resistance, requiring more units per kilogram. Muscle mass increases insulin sensitivity while fat tissue decreases it. Weight changes typically require 10% dose adjustments for every 10% weight change.

How Much Insulin Should I Take if My Sugar Is 300?

Correction doses depend on individual factors. A typical correction might be 1 unit per 50 mg/dL above target. For 300 mg/dL with a 120 mg/dL target: (300-120)/50 = 4 units. Healthcare providers must determine individual correction factors.

What Is the 3 Hour Rule for Diabetes?

Rapid-acting insulin remains active for approximately 3 hours. Avoid giving additional doses within 3 hours of the previous injection unless directed by healthcare providers to prevent dangerous insulin stacking and hypoglycemia.


Insulin 70/30 Dosage Calculation: Step-by-Step Guide

Understanding proper insulin dosing, particularly insulin 70/30 dosage calculation, is essential for effective diabetes management. Weight-based insulin dosing provides a systematic approach to determining the right amount of insulin your body needs throughout the day. This comprehensive guide covers everything from basic dosing principles to advanced calculation methods, helping you work with your healthcare provider to achieve optimal blood sugar control. Whether you’re newly diagnosed or looking to refine your current regimen, mastering these dosing concepts will empower you to make informed decisions about your diabetes care while minimizing the risk of dangerous blood sugar fluctuations.

Understanding Insulin 70/30 Formulations

Insulin 70/30 represents a premixed insulin combination that contains 70% intermediate-acting insulin and 30% rapid-acting insulin in a single injection. This formulation simplifies diabetes management by providing both basal (background) and bolus (mealtime) insulin coverage in one convenient dose.

The 70% intermediate-acting component typically consists of NPH (Neutral Protamine Hagedorn) insulin, which provides steady insulin release for approximately 12 to 18 hours. This component helps maintain baseline blood sugar control between meals and overnight.

The 30% rapid-acting component begins working within 15 to 30 minutes after injection, peaks in 1 to 3 hours, and lasts for 3 to 5 hours. This portion covers the blood sugar rise that occurs after meals.

Different manufacturers produce various 70/30 insulin formulations. Popular brands include Humulin 70/30, Novolin 70/30, and Humalog Mix 75/25. Each has slightly different onset, peak, and duration characteristics, though the basic principle remains the same.

Understanding these timing patterns is crucial for proper insulin 70/30 dosage calculation because you need to coordinate your injections with meal timing to achieve optimal blood sugar control while avoiding hypoglycemia.

Looking for consistent intermediate-acting insulin coverage? Order Humulin N KwikPen now and enjoy convenient, accurate dosing with every injection. Perfect for your basal insulin needs with reliable 12-18 hour coverage.

Basic Insulin Dosage Calculation Methods

Insulin 70/30 Dosage Calculation

Several established methods exist for calculating insulin doses, each with specific applications and benefits. The most common approaches include the weight-based method, carbohydrate ratio method, and correction factor method.

Weight-Based Method

This fundamental approach calculates total daily insulin needs using the formula – Total Daily Dose (TDD) = Body Weight (kg) × Units per kg. For most adults with Type 2 diabetes, the multiplier ranges from 0.4 to 0.6 units per kg, while those with Type 1 diabetes or insulin resistance may require 0.7 to 1.0 units per kg.

Carbohydrate Ratio Method

This method determines how much insulin you need to cover carbohydrates in your meals. The insulin-to-carbohydrate ratio is calculated as 500 ÷ TDD = grams of carbohydrate covered by 1 unit of insulin. For example, if your TDD is 50 units, your ratio would be 500 ÷ 50 = 10 grams of carbohydrate per unit of insulin.

Correction Factor Method

Also known as the sensitivity factor, this calculates how much one unit of insulin will lower your blood glucose. The formula is 1800 ÷ TDD = mg/dL decrease per unit of insulin. Using the previous example, 1800 ÷ 50 = 36 mg/dL decrease per unit.

These methods work together to create a comprehensive dosing strategy that addresses both scheduled insulin needs and corrections for high blood sugar levels.

Shop Admelog Vial for Mealtime Control Need effective rapid-acting insulin for your insulin 70/30 dosage calculation routine? Purchase Admelog Vial today for superior mealtime glucose management. Fast-acting formula begins working in 15 minutes.

Calculating your insulin 70/30 dosage requires a systematic approach that considers your individual needs and circumstances. Here’s a detailed step-by-step process:

Step 1 – Calculate Total Daily Dose (TDD)

Begin by determining your total daily insulin requirement using the weight-based formula. Convert your weight to kilograms (weight in pounds ÷ 2.2 = kg), then multiply by the appropriate units per kg factor based on your diabetes type and insulin sensitivity.

Step 2 – Determine Injection Frequency

Most people using 70/30 insulin take two injections daily – before breakfast and before dinner. Some may require three injections, adding a lunchtime dose. Your healthcare provider will determine the best schedule based on your blood sugar patterns.

Step 3 – Divide Total Daily Dose

For twice-daily dosing, typically 2/3 of the TDD is given before breakfast and 1/3 before dinner. For example, if your TDD is 60 units, you would take approximately 40 units in the morning and 20 units in the evening.

Step 4 – Account for Individual Factors

Adjust the calculated dose based on your specific needs. Factors like dawn phenomenon (morning blood sugar rise), exercise patterns, work schedule, and meal timing may require dose modifications.

Step 5 – Monitor and Adjust

Start with the calculated dose and monitor blood sugar levels closely. Your healthcare provider will help you adjust the dose based on your actual blood sugar responses, typically making small changes of 2-4 units at a time.

Factors Affecting Insulin Dosage Requirements

insulin

Multiple factors influence how much insulin your body needs, making individualized dosing essential for optimal diabetes management. Understanding these factors helps explain why insulin 70/30 dosage calculation varies significantly between individuals.

Body Weight and Composition

Larger individuals generally require more insulin, but body composition also matters. People with higher muscle mass may be more insulin sensitive than those with higher body fat percentages. Additionally, weight changes require dose adjustments – weight loss typically reduces insulin needs while weight gain increases them.

Physical Activity Level

Regular exercise increases insulin sensitivity, potentially reducing your insulin requirements. However, the timing and intensity of exercise affect how much adjustment is needed. Aerobic exercise typically increases insulin sensitivity for 12-48 hours, while resistance training may have different effects.

Dietary Patterns

Your eating habits significantly impact insulin needs. Higher carbohydrate intake requires more insulin, while low-carb diets may reduce requirements. Meal timing consistency helps optimize insulin effectiveness, especially with fixed-ratio formulations like 70/30.

Hormonal Changes

Hormones affect insulin sensitivity throughout the day and across longer time periods. Dawn phenomenon causes increased insulin needs in the morning, while some people experience increased sensitivity in the afternoon. Women may notice cyclical changes related to menstrual cycles, pregnancy, or menopause.

Stress and Illness

Both physical and emotional stress can increase blood sugar levels and insulin resistance. During illness, insulin requirements often increase due to stress hormones and reduced activity levels. Some medications also affect insulin sensitivity.

Age and Diabetes Duration

Insulin requirements may change over time as beta cell function continues to decline in Type 2 diabetes or as growth patterns change in younger individuals. Regular reassessment ensures your dosing remains appropriate.

Safe Administration Guidelines

Proper insulin administration is just as important as correct dosing calculations. Following established safety guidelines helps prevent dangerous complications while maximizing insulin effectiveness.

Injection Site Selection and Rotation

Choose injection sites with adequate subcutaneous tissue – abdomen, thighs, upper arms, and buttocks. Rotate injection sites within the same anatomical region to prevent lipodystrophy (tissue changes that affect insulin absorption). The abdomen typically provides the most consistent absorption.

Timing Considerations

70/30 insulin should be injected 15-30 minutes before meals to allow the rapid-acting component to begin working when food is consumed. Consistent timing helps maintain stable blood sugar levels and reduces the risk of hypoglycemia or hyperglycemia.

Proper Injection Technique

Use the correct needle length for your body type – typically 4-6mm for most adults. Inject at a 90-degree angle (45 degrees if very thin) and hold for 10 seconds after injection to ensure complete delivery. Never reuse needles, as this can cause pain and affect insulin delivery.

Storage and Handling

Store unopened insulin in the refrigerator but allow it to reach room temperature before injection. Once opened, most insulin can be stored at room temperature for 28 days. Never freeze insulin or expose it to extreme heat, as this destroys its effectiveness.

Mixing Technique

70/30 insulin requires gentle mixing before each injection to ensure proper distribution of the different insulin types. Roll the pen or vial between your palms 10-20 times, then gently invert 10-20 times until the solution appears evenly cloudy.

Monitoring and Adjusting Your Insulin Dose

Effective diabetes management requires ongoing monitoring and dose adjustments based on blood sugar patterns and changing life circumstances. Regular monitoring helps optimize your insulin 70/30 dosage calculation and prevent complications.

Blood Sugar Testing Schedule

Test blood sugar levels at key times – before meals, 2 hours after meals, at bedtime, and occasionally during the night. This pattern helps identify how well your current dose is working and where adjustments might be needed.

Record Keeping

Maintain detailed records of blood sugar levels, insulin doses, meals, exercise, and any unusual circumstances. Many smartphone apps can help track this information and identify patterns that might not be obvious day-to-day.

When to Contact Your Healthcare Provider

Contact your provider if you experience repeated blood sugar readings outside your target range, frequent hypoglycemic episodes, unexplained high blood sugar levels, or significant changes in weight, activity, or eating patterns.

Making Safe Adjustments

Never make large dose changes on your own. Small adjustments of 10% of your current dose (or 2-4 units) are generally safer. Wait 3-4 days between adjustments to see the full effect, unless experiencing dangerous blood sugar levels.

Sick Day Management

During illness, blood sugar levels often run higher than normal. Continue taking insulin even if not eating well, and contact your healthcare provider for guidance on temporary dose adjustments. Never stop insulin completely during illness.

Need effective rapid-acting insulin for your insulin 70/30 dosage calculation routine? Purchase Admelog Vial today for superior mealtime glucose management. Fast-acting formula begins working in 15 minutes.

Common Dosing Mistakes to Avoid

Understanding common insulin dosing errors helps prevent dangerous complications and improves overall diabetes management outcomes.

Calculation Errors

Double-check all calculations, especially when converting between units or adjusting doses. Use the same measurement system consistently (metric vs. imperial) to avoid confusion. Write down calculations rather than doing them entirely in your head.

Timing Problems

Taking insulin too close to or too far from meals can cause blood sugar swings. Set reminders to help maintain consistent timing, and adjust meal schedules when necessary to accommodate your insulin schedule.

Injection Site Issues

Repeatedly injecting in the same spot can cause tissue damage and unpredictable insulin absorption. Develop a systematic rotation plan and inspect injection sites regularly for signs of problems.

Remember that insulin takes time to work – rapid-acting insulin peaks in 1-3 hours, so wait before taking additional doses unless directed by your healthcare provider.

Looking for affordable long-acting insulin options? Buy cheap Humulin N KwikPen online through Better You RX for reliable 24-hour glucose control. Get quality insulin at competitive prices with convenient home delivery.

Advanced Calculation Considerations

Step-By-Step Insulin 70/30 Dosage Calculation

More complex dosing scenarios require additional considerations beyond basic weight-based calculations. These situations often arise in people with varying schedules, multiple health conditions, or unique physiological needs.

Calculation Factor Standard Range High-Risk Conditions Adjustment Needed
Units per kg body weight 0.4-0.6 units/kg Kidney disease, elderly Reduce by 25-50%
Morning dose percentage 60-67% of TDD Dawn phenomenon Increase to 70-75%
Evening dose percentage 33-40% of TDD Night shift workers May need reversal
Meal spacing hours 4-6 hours apart Irregular schedules Individual timing
Exercise adjustment 25-50% reduction High-intensity training Up to 75% reduction

Variable Schedule Management

People with rotating work shifts, irregular meal times, or frequent travel need flexible dosing strategies. This might involve splitting doses differently or using alternative insulin regimens during certain periods.

Special Population Considerations

Elderly individuals, those with kidney or liver disease, and people taking multiple medications may require modified dosing approaches. These populations often need lower starting doses with more gradual adjustments.

Technology Integration

Continuous glucose monitors and insulin pumps can provide additional data for fine-tuning dosing calculations. However, traditional calculation methods remain important for understanding the underlying principles and troubleshooting problems.

Seasonal Adjustments

Some people require different insulin doses during different seasons due to activity level changes, dietary pattern shifts, or seasonal affective disorder. Plan ahead for these predictable changes.

Working With Your Healthcare Team

Successful insulin management requires collaborative effort between you and your healthcare providers. Building strong relationships and maintaining open communication ensures the best possible outcomes.

Regular Appointment Schedule

Schedule regular check-ups every 3-4 months, or more frequently when starting new medications or experiencing problems. Bring your blood sugar records, questions, and concerns to each appointment.

Communication Strategies

Prepare specific questions about your insulin regimen and be honest about any difficulties you’re experiencing with dosing, timing, or blood sugar control. Your healthcare team can only help if they understand your complete situation.

Emergency Planning

Develop clear plans for handling both high and low blood sugar emergencies. Know when to contact your healthcare provider versus when to seek immediate medical attention. Keep emergency supplies readily available.

Technology Training

If using glucose meters, continuous monitors, or insulin pens with memory functions, ensure you understand how to use these tools effectively and interpret the information they provide.

Require enhanced dosing accuracy for your diabetes management? Buy Humalog Junior KwikPen now for half-unit dosing precision. Ideal for fine-tuning your insulin 70/30 dosage calculation with pediatric-friendly design and adult precision.

Key Takeaways for Optimal Insulin Management

Mastering insulin 70/30 dosage calculation and weight-based dosing principles empowers you to take control of your diabetes management while working effectively with your healthcare team. Remember that dosing calculations provide starting points, not absolute rules – your individual response and changing circumstances require ongoing adjustments and monitoring.

Success in insulin management comes from understanding the fundamental principles while remaining flexible enough to adapt to your unique needs and life circumstances. Regular monitoring, careful record-keeping, and open communication with your healthcare providers form the foundation of safe and effective insulin therapy.

The investment in learning proper dosing techniques pays dividends in improved blood sugar control, reduced complications, and enhanced quality of life. Start with conservative doses, make gradual adjustments, and never hesitate to seek guidance when facing challenges or uncertainties.

Frequently Asked Questions

How Do I Calculate My Starting Insulin 70/30 Dose Based on Weight?

Start by converting your weight to kilograms (divide pounds by 2.2). Multiply by 0.4-0.6 units per kg for most adults with Type 2 diabetes. For example, a 180-pound person (82 kg) would need approximately 33-49 units daily. Typically, give 2/3 in the morning and 1/3 in the evening. Always work with your healthcare provider to determine your specific starting dose.

When Should I Take My Insulin 70/30 Injections for Best Results?

Take 70/30 insulin 15-30 minutes before your largest meals, typically breakfast and dinner. This timing allows the rapid-acting component to begin working when food enters your system. Maintain consistent timing daily – if you eat breakfast at 7 AM, try to inject around 6:30-6:45 AM every day.

What Factors Require Me to Adjust My Insulin 70/30 Dosage?

Several factors may require dose adjustments including weight changes, increased or decreased physical activity, changes in eating patterns, illness or stress, new medications, and seasonal variations in routine. Always make small adjustments (2-4 units) and wait 3-4 days to see the full effect before making additional changes.

How Often Should I Check My Blood Sugar When Using Insulin 70/30?

Test blood sugar before meals, 2 hours after meals, and at bedtime initially. Once your doses are stable and blood sugars well-controlled, you may reduce testing frequency as recommended by your healthcare provider. Always test more frequently during illness, stress, or when making dose adjustments.

What Should I Do if I Miss an Insulin 70/30 Dose?

If you miss a dose and it’s close to your next scheduled injection time, skip the missed dose and continue with your regular schedule. Never take two doses at once. If you miss a morning dose but remember within 2-3 hours, you can take a reduced dose. Contact your healthcare provider for specific guidance on your situation.

Can I Adjust My Insulin 70/30 Dose for Different Meal Sizes?

Unlike rapid-acting insulin alone, 70/30 contains fixed proportions of different insulin types, making it less flexible for varying meal sizes. Maintain consistent meal sizes and carbohydrate content for best results. If you need more flexibility for varying meals, discuss alternative insulin regimens with your healthcare provider.

How Do I Know if My Insulin 70/30 Dose is Working Properly?

Signs of proper dosing include blood sugars within your target range (typically 80-130 mg/dL before meals, less than 180 mg/dL two hours after meals), stable energy levels throughout the day, and minimal episodes of high or low blood sugar. Regular pattern recognition in your blood sugar logs helps identify if adjustments are needed.


Short vs Long Acting Insulin: Which Type is Right for You?

Managing diabetes effectively means understanding the different types of insulin and how they work in your body. The choice between short vs long acting insulin can significantly impact your blood sugar control, daily routine, and overall quality of life.

Short-acting insulin works quickly to manage blood sugar spikes after meals, while long-acting insulin provides steady glucose control throughout the day. Each type serves a specific purpose in diabetes management, and many people use both as part of their treatment plan.

In this guide, we’ll break down the key differences between short and long acting insulin, help you understand which type might work best for your lifestyle, and explain how to use them effectively for optimal blood sugar control.

Need reliable insulin options? Browse our insulin collection for fast-acting and long-lasting solutions.

What Is Short Acting Insulin

Short acting insulin is designed to work quickly in your body, typically starting to lower blood sugar within 30 minutes to 2 hours after injection. This type of insulin is essential for managing blood glucose spikes that occur after eating meals.

Unlike long acting insulin, short acting insulin has a relatively brief duration of action, making it perfect for covering the immediate rise in blood sugar from food consumption.

Basic Definition and Purpose

Short acting insulin, also called regular insulin, is a fast-working medication that helps your body process glucose from meals. It mimics the natural insulin response your pancreas would normally produce when you eat.

You’ll typically inject short acting insulin 30 minutes before meals to ensure it’s working when your blood sugar begins to rise. The timing is crucial because this insulin needs to align with your body’s natural digestion process.

Common brand names include Humulin R, Novolin R, and rapid-acting options like Apidra. Each has slightly different onset times and durations, but all serve the same basic function of managing post-meal glucose levels.

How It Works in Your Body

Short vs Long-Acting Insulin

When you inject short acting insulin, it enters your bloodstream and helps cells absorb glucose from your blood. This process typically begins within 30 minutes to 1 hour, peaks at 2-4 hours, and lasts for 6-8 hours total.

The insulin works by binding to insulin receptors on your cells, essentially “unlocking” them to accept glucose. Without this process, glucose would remain in your bloodstream, leading to dangerous high blood sugar levels.

Your body absorbs short acting insulin at different rates depending on injection site, activity level, and individual metabolism. Injecting into the abdomen usually provides the fastest absorption, while thigh injections tend to work more slowly.

Types and Brand Options

Several types of short acting insulin are available, each with specific characteristics:

  • Regular insulin (Humulin R, Novolin R): Traditional short acting insulin that starts working in 30-60 minutes
  • Rapid-acting insulin (Humalog, Novolog, Apidra): Newer formulations that begin working within 15 minutes
  • Ultra-rapid insulin: The newest category that starts working in as little as 5-10 minutes

The choice between these options depends on your eating schedule, lifestyle, and how your body responds to different formulations. Many people find rapid-acting insulin more convenient because it can be taken just before or even during meals.

What Is Long Acting Insulin

Long acting insulin provides steady, consistent blood sugar control for 18-24 hours or longer. This type of insulin works as your body’s “background” insulin, mimicking the slow, continuous insulin release a healthy pancreas produces throughout the day and night.

Unlike short acting insulin that handles meal-related glucose spikes, long acting insulin maintains stable blood sugar levels between meals and while you sleep.

Basic Definition and Purpose

Long acting insulin, often called basal insulin, is designed to provide a steady release of insulin over an extended period. It helps control your baseline blood sugar levels when you’re not eating, preventing dangerous glucose fluctuations throughout the day.

You typically inject long acting insulin once or twice daily, usually at the same time each day to maintain consistent levels in your bloodstream. This predictable dosing schedule makes it easier to manage your diabetes routine.

Popular options include Basaglar, Lantus, Levemir, and Tresiba. Each has a different duration and release pattern, but all provide the extended coverage your body needs for optimal glucose control.

How It Works in Your Body

Long acting insulin is formulated to release slowly and steadily into your bloodstream over many hours. The insulin molecules are modified to delay absorption, creating a smooth, consistent effect rather than sharp peaks and valleys.

Most long acting insulins begin working within 1-2 hours after injection and maintain steady levels for 18-24 hours. Some newer formulations like Tresiba can last up to 42 hours, providing even more flexibility in dosing times.

The steady release helps your liver regulate glucose production and assists your cells in maintaining proper glucose uptake throughout periods when you’re not eating. This background insulin activity is essential for preventing both high and low blood sugar episodes.

Types and Brand Options

Several long acting insulin options are available, each with unique characteristics:

  • Insulin glargine (Lantus, Basaglar): 24-hour duration with steady release
  • Insulin detemir (Levemir): 18-24 hour duration, may need twice-daily dosing
  • Insulin degludec (Tresiba): Ultra-long acting, lasts up to 42 hours
  • NPH insulin: Intermediate-acting option that bridges short and long acting categories

Your healthcare provider will help determine which long acting insulin works best based on your blood sugar patterns, lifestyle, and individual response to different formulations.

Short vs Long Acting Insulin: Key Differences

How to Use Short and Long Acting Insulin

Understanding the distinctions between short and long acting insulin is crucial for effective diabetes management. These two types serve completely different purposes and work on different timelines in your body.

Here’s a comprehensive comparison of how they stack up:

Feature Short Acting Insulin Long Acting Insulin
Onset Time 15 minutes to 2 hours 1-2 hours
Peak Effect 2-4 hours after injection No significant peak (steady release)
Duration 6-8 hours 18-42 hours depending on type
Primary Purpose Control post-meal blood sugar spikes Provide baseline glucose control
Injection Timing Before or with meals Once or twice daily, same time
Flexibility Must coordinate with meals More flexible timing
Blood Sugar Pattern Rapid drop, then returns to baseline Steady, consistent control
Common Uses Meal coverage, correction doses Overnight control, between-meal stability

When to Use Each Type

The timing and purpose of each insulin type determines when you’ll use them:

Short Acting Insulin:

  • Before meals to cover expected blood sugar rise
  • As correction doses when blood sugar is already high
  • During illness when blood sugar is unpredictable
  • For fine-tuning glucose control throughout the day

Long Acting Insulin:

  • Daily baseline coverage, usually at bedtime or morning
  • Maintaining stable glucose during sleep
  • Preventing blood sugar spikes between meals
  • Providing consistent control for people with irregular eating patterns

Combining Both Types

Many people with diabetes use both short and long acting insulin as part of a comprehensive treatment plan. This combination therapy allows for:

  • Precise control over both baseline and meal-related blood sugar
  • Flexibility in eating schedules while maintaining steady background control
  • Better overall glucose management compared to using either type alone
  • Reduced risk of both high and low blood sugar episodes

Your healthcare provider will determine the right combination and dosing schedule based on your individual needs, blood sugar patterns, and lifestyle factors.

Benefits and Considerations

Both short and long acting insulin offer specific advantages depending on your diabetes management needs. Understanding these benefits helps you work with your healthcare provider to choose the most effective treatment approach.

Short Acting Insulin Benefits

Short acting insulin provides several key advantages for managing blood glucose:

Precise Meal Control: You can adjust doses based on what and how much you plan to eat, giving you more flexibility in your diet and meal timing.

Quick Correction: When blood sugar runs high, short acting insulin can bring levels down relatively quickly, usually within a few hours.

Predictable Timing: The effects are relatively short-lived, so you know when the insulin will be most active and when it will wear off.

Reduced Post-Meal Spikes: By taking insulin before eating, you can prevent the dangerous blood sugar spikes that occur after meals.

Long Acting Insulin Benefits

Long acting insulin offers different but equally important advantages:

Steady Background Control: Provides consistent glucose management throughout the day and night without frequent injections.

Simplified Dosing: Usually requires only one or two injections per day at consistent times, making it easier to maintain your routine.

Sleep Security: Helps prevent dangerous blood sugar drops or spikes while you sleep, when you can’t monitor or treat glucose changes.

Lifestyle Flexibility: Since it works independently of meals, you have more freedom in when and what you eat without compromising glucose control.

Important Considerations

Each type of insulin also comes with specific considerations:

Short Acting Insulin Considerations:

  • Requires careful timing with meals
  • Risk of low blood sugar if you don’t eat as planned
  • Multiple daily injections needed
  • Must carry supplies when eating away from home

Long Acting Insulin Considerations:

  • Takes longer to adjust if dose needs changing
  • May not fully cover meal-related glucose spikes alone
  • Timing consistency is important for optimal effect
  • Individual response varies significantly between people

Safety reminders: Always follow your healthcare provider’s instructions for dosing and timing. Both types of insulin can cause low blood sugar if not used properly.

Looking for additional diabetes management options? Explore Byetta for complementary blood sugar control.

How to Use Short and Long Acting Insulin

Short vs Long Acting Insulin- Key Differences

Proper insulin injection technique and timing are essential for safe and effective diabetes management. Whether you’re using short acting, long acting, or both types of insulin, following correct procedures ensures optimal blood sugar control.

Injection Technique and Sites

Start by washing your hands thoroughly and gathering all necessary supplies: insulin, syringe or pen, alcohol swabs, and a sharps container for disposal.

Choose your injection site carefully. The best areas include the abdomen (fastest absorption), outer thighs, upper arms, and buttocks. Rotate injection sites regularly to prevent lipodystrophy, which can affect insulin absorption.

Clean the injection site with an alcohol swab and let it dry. Insert the needle at a 90-degree angle for most people, or 45 degrees if you’re thin. Inject the insulin slowly and steadily, then wait 5-10 seconds before removing the needle to prevent insulin from leaking back out.

Never reuse needles or share insulin pens with others, as this can lead to infections or blood-borne disease transmission. Dispose of needles properly in a puncture-resistant sharps container.

Timing Guidelines

Short Acting Insulin Timing:

  • Regular insulin: Inject 30 minutes before meals
  • Rapid-acting insulin: Inject 5-15 minutes before eating
  • Can be taken during or immediately after meals if needed
  • Use for correction doses any time blood sugar is elevated

Long Acting Insulin Timing:

  • Take at the same time every day for consistent coverage
  • Many people prefer bedtime dosing for overnight control
  • Morning dosing works well for some people
  • Don’t worry about meal timing – this insulin works independently

Storage and Handling

Store unopened insulin in the refrigerator between 36-46°F, but never freeze it. Frozen insulin becomes ineffective and should be discarded immediately.

Once opened, most insulin can be stored at room temperature for 28 days, making it more comfortable to inject. Keep insulin away from extreme heat, direct sunlight, and freezing temperatures.

Always check insulin before using. Clear insulins should be colorless and free of particles. If you notice clumping, frosting, or discoloration, don’t use that insulin and contact your pharmacy for a replacement.

Monitoring and Adjusting

Regular blood glucose monitoring helps you understand how well your insulin regimen is working. Check blood sugar:

  • Before meals and at bedtime for baseline readings
  • 2 hours after meals to see how well short acting insulin is working
  • Occasionally during the night to ensure long acting insulin is providing steady coverage
  • Any time you feel symptoms of high or low blood sugar

Keep detailed records of blood glucose readings, insulin doses, meals, and physical activity. This information helps your healthcare provider make necessary adjustments to your insulin regimen.

Work closely with your diabetes care team to fine-tune your insulin doses. Never make significant changes to your insulin regimen without medical supervision, as this can lead to dangerous blood sugar fluctuations.

Wrapping Up

Choosing between short vs long acting insulin isn’t usually an either-or decision. Most people with diabetes benefit from understanding both types and how they work together to provide comprehensive blood glucose control throughout the day and night.

Short acting insulin handles the immediate challenge of post-meal blood sugar spikes, while long acting insulin provides the steady background control your body needs between meals and during sleep. Together, they can help you achieve the stable blood sugar levels that are essential for long-term health.

The key is working with your healthcare provider to find the right combination, timing, and doses that fit your individual needs, lifestyle, and blood sugar patterns. With proper education and consistent monitoring, both types of insulin can be powerful tools in managing your diabetes effectively.

Ready to take the next step in your diabetes management? Consult with your healthcare provider about which insulin types and insulin products might work best for your specific situation.

Frequently Asked Questions

Can Lantus cause dizziness?

Yes, Lantus can cause dizziness, particularly if it leads to low blood sugar (hypoglycemia). Dizziness is often one of the first symptoms people notice when their blood glucose drops too low. If you experience dizziness while taking Lantus, check your blood sugar immediately and follow your healthcare provider’s guidelines for treating low blood sugar.

Is Ozempic a short-acting insulin?

No, Ozempic is not insulin at all. Ozempic (semaglutide) is a GLP-1 receptor agonist that helps control blood sugar by increasing insulin production when blood sugar is high and slowing digestion. Unlike short-acting insulin that works within minutes to hours, Ozempic is taken once weekly and works differently to help manage diabetes.

Do type 2 diabetics take short-acting insulin?

Many people with type 2 diabetes do use short-acting insulin, especially those who have had diabetes for several years or need precise blood sugar control. Short-acting insulin is often prescribed when other medications aren’t providing adequate control, particularly for covering meals or correcting high blood sugar episodes. The decision depends on individual blood sugar patterns and overall diabetes management needs.

Can Lantus cause skin rash?

Yes, Lantus can cause skin reactions including rash, redness, or itching at the injection site. These reactions are usually mild and temporary, but persistent or severe skin reactions could indicate an allergy to the insulin. If you develop a widespread rash or other allergic symptoms, contact your healthcare provider immediately as this could be a serious allergic reaction.

What does an insulin allergy look like?

An insulin allergy can range from mild local reactions to severe systemic responses. Mild symptoms include redness, swelling, or itching at the injection site. More serious allergic reactions may cause widespread rash, hives, difficulty breathing, rapid heartbeat, or swelling of the face and throat. Severe insulin allergies are rare but require immediate medical attention.

Does insulin affect eyesight?

Insulin can temporarily affect eyesight, particularly when blood sugar levels change rapidly. When starting insulin or adjusting doses, some people experience blurry vision as their eyes adjust to changing glucose levels. This usually resolves within a few weeks. However, consistently high blood sugar over time can cause permanent eye damage, so proper insulin use actually helps protect your vision long-term.


Insulin Resistance vs Prediabetes: Understanding the Key Differences

Confused about insulin resistance vs prediabetes? You’re not alone. These two conditions are closely related but distinct, and understanding the difference can be crucial for your health management. While both involve problems with how your body handles blood sugar, they represent different stages and mechanisms in the journey toward type 2 diabetes.

Insulin resistance is the underlying process where your cells don’t respond properly to insulin, while prediabetes is a diagnosed condition with specific blood sugar ranges. Knowing which one you’re dealing with or if you have both can help guide your treatment decisions and lifestyle changes.

Take control of your blood sugar management. Explore our insulin products for comprehensive diabetes care.

What Is Insulin Resistance?

Insulin resistance occurs when your body’s cells don’t respond effectively to insulin, the hormone responsible for helping glucose enter cells for energy. When this happens, your pancreas produces more insulin to try to overcome this resistance, but over time, this system can become overwhelmed.

Think of insulin resistance as a key that’s getting harder to turn in a lock. Your body keeps making more keys (insulin), but the locks (your cells) are becoming increasingly difficult to open.

Basic Definition and Mechanism

Insulin resistance is a metabolic condition where cells in your muscles, fat, and liver don’t respond properly to insulin. Normally, insulin acts like a key, unlocking cells so glucose can enter and provide energy.

When insulin resistance develops, these cells become less sensitive to insulin’s signals. Your pancreas compensates by producing more insulin, leading to higher insulin levels in your blood. This extra insulin can eventually maintain normal blood glucose levels, but only temporarily.

The condition often develops gradually over years. Initially, your pancreas can keep up with the increased demand, but eventually, it may struggle to produce enough insulin to overcome the resistance.

Common Causes and Risk Factors

Several factors contribute to insulin resistance development:

  • Excess weight: Particularly abdominal fat, which releases inflammatory substances that interfere with insulin function
  • Physical inactivity: Regular exercise helps cells use glucose more efficiently
  • Poor diet: High intake of processed foods, refined sugars, and saturated fats
  • Genetics: Family history of type 2 diabetes increases your risk
  • Age: Insulin sensitivity typically decreases with age
  • Sleep disorders: Poor sleep quality affects hormone regulation
  • Chronic stress: Elevates cortisol levels, which can interfere with insulin function
  • Certain medications: Some drugs can affect insulin sensitivity

Understanding these risk factors helps identify who might be more susceptible to developing insulin resistance and what lifestyle modifications might help.

Signs and Symptoms to Watch For

Insulin resistance often develops silently, but some signs may indicate its presence:

Early symptoms include frequent hunger, especially after meals, fatigue or drowsiness after eating, and difficulty concentrating. You might also notice increased cravings for sugary or starchy foods.

Physical signs can include darkened patches of skin (acanthosis nigricans) around the neck, armpits, or groin areas. Some people experience skin tags in these same areas.

Many people with insulin resistance also struggle with weight gain, particularly around the midsection, and find it difficult to lose weight despite diet and exercise efforts.

It’s important to note that many people with insulin resistance have no obvious symptoms, which is why regular health screenings are crucial for early detection.

What Is Prediabetes?

Treatment and Management Strategies

Prediabetes is a diagnosed condition where blood sugar levels are higher than normal but not yet high enough to be classified as type 2 diabetes. It represents a critical warning stage that gives you an opportunity to prevent or delay the onset of type 2 diabetes through lifestyle changes.

Unlike insulin resistance, which describes a biological process, prediabetes is defined by specific blood test results and represents a measurable progression toward diabetes.

Medical Definition and Diagnostic Criteria

Prediabetes is diagnosed using three main blood tests, each with specific ranges:

Fasting Plasma Glucose (FPG): Measures blood sugar after fasting for at least 8 hours. Prediabetes range is 100-125 mg/dL (normal is less than 100 mg/dL).

Oral Glucose Tolerance Test (OGTT): Measures blood sugar 2 hours after drinking a glucose solution. Prediabetes range is 140-199 mg/dL (normal is less than 140 mg/dL).

Hemoglobin A1C: Reflects average blood sugar over 2-3 months. Prediabetes range is 5.7-6.4% (normal is less than 5.7%).

Healthcare providers typically use at least one of these tests, and often multiple tests, to confirm a prediabetes diagnosis. The A1C test is particularly useful because it doesn’t require fasting.

Risk Factors and Demographics

Certain groups face higher risks for developing prediabetes:

Adults over 45 years old should be tested regularly, especially if they’re overweight. However, younger adults with risk factors should also be screened.

Ethnic minorities, including African Americans, Hispanic Americans, Native Americans, and Asian Americans, face increased risks. Family history of type 2 diabetes significantly raises your chances.

Other risk factors include having gestational diabetes during pregnancy, polycystic ovary syndrome (PCOS), high blood pressure, abnormal cholesterol levels, and a history of cardiovascular disease.

Lifestyle factors like physical inactivity, poor diet, and carrying excess weight, particularly around the midsection, also increase prediabetes risk.

Progression Without Intervention

Without lifestyle changes or medical intervention, prediabetes often progresses to type 2 diabetes. Studies show that 15-30% of people with prediabetes will develop type 2 diabetes within 5 years.

The progression isn’t inevitable, though. Research demonstrates that losing 5-7% of body weight and exercising regularly can reduce diabetes risk by 58%. Even modest lifestyle changes can make a significant difference.

During the prediabetes stage, your body is still producing insulin, but either not enough or your cells aren’t using it effectively. This is your window of opportunity to reverse course before permanent damage occurs.

Need reliable insulin therapy options? Check out our Admelog vial for fast-acting insulin support.

Insulin Resistance vs Prediabetes: Key Differences

While insulin resistance and prediabetes are closely connected, understanding their differences helps clarify where you stand and what actions to take. These conditions can coexist, but they represent different aspects of metabolic health.

Here’s how insulin resistance and prediabetes compare across key areas:

Aspect Insulin Resistance Prediabetes
Nature A biological process where cells don’t respond well to insulin A diagnosed condition based on elevated blood sugar levels
Diagnosis No specific test; inferred from symptoms and risk factors Specific blood tests with defined ranges (A1C, fasting glucose, OGTT)
Blood Sugar May be normal initially due to compensatory insulin production Elevated but below diabetes threshold
Symptoms Often silent; may include fatigue, cravings, difficulty losing weight Usually no symptoms; detected through screening
Timing Can develop years before blood sugar elevation Represents measurable progression toward diabetes
Reversibility Often reversible with lifestyle changes Can be reversed or progression delayed with intervention
Treatment Focus Improving insulin sensitivity through diet, exercise, and weight management Preventing progression to type 2 diabetes
Monitoring Regular health assessments and symptom awareness Routine blood sugar testing and medical follow-up

How They’re Connected

Insulin resistance typically comes first in the progression toward type 2 diabetes. When your cells become resistant to insulin, your pancreas works harder to produce more insulin to maintain normal blood sugar levels.

For a while, this compensation works, and your blood sugar remains normal despite having insulin resistance. However, over time, your pancreas may struggle to keep up with the increased demand.

When your pancreas can no longer produce enough insulin to overcome the resistance, blood sugar levels begin to rise. This elevation in blood sugar is when prediabetes is diagnosed.

Not everyone with insulin resistance develops prediabetes, and the timeline varies significantly between individuals. Some people may have insulin resistance for years without progressing, while others move more quickly through the stages.

Can You Have Both Conditions

Prevention Strategies

Yes, many people have both insulin resistance and prediabetes simultaneously. In fact, insulin resistance is often the underlying cause of prediabetes.

When you have both conditions, it means your cells aren’t responding well to insulin (insulin resistance) and your blood sugar levels have risen above normal ranges (prediabetes).

Having both conditions doesn’t mean you’ll automatically develop type 2 diabetes, but it does indicate a higher risk and the need for more aggressive intervention strategies.

The good news is that treatments addressing one condition often help the other, since they share similar underlying mechanisms and respond to similar lifestyle interventions.

Diagnosis and Testing

Getting properly diagnosed is crucial for understanding your metabolic health and taking appropriate action. The testing approaches for insulin resistance and prediabetes differ, but both provide valuable information for managing your health.

Testing for Insulin Resistance

Unlike prediabetes, there’s no single standard test specifically for insulin resistance. Healthcare providers typically assess insulin resistance through a combination of approaches:

Clinical Assessment: Your doctor evaluates risk factors, symptoms, and physical signs like acanthosis nigricans (dark skin patches) or difficulty losing weight.

HOMA-IR Test: This calculation uses fasting glucose and insulin levels to estimate insulin resistance. While not routinely used in clinical practice, it’s valuable for research and some specialized assessments.

Metabolic Panel: Includes tests for triglycerides, HDL cholesterol, and blood pressure. High triglycerides and low HDL often accompany insulin resistance.

Glucose Tolerance Test with Insulin Measurement: Some specialists measure both glucose and insulin levels during an oral glucose tolerance test to assess how much insulin your body needs to handle glucose.

Many healthcare providers diagnose insulin resistance based on a constellation of factors rather than a single test, including your medical history, physical examination, and related metabolic markers.

Testing for Prediabetes

Prediabetes diagnosis relies on specific, standardized blood tests with established ranges:

Hemoglobin A1C: The most convenient test since it doesn’t require fasting. It measures your average blood sugar over 2-3 months. Prediabetes range: 5.7-6.4%.

Fasting Plasma Glucose: Requires fasting for at least 8 hours. Prediabetes range: 100-125 mg/dL. This test is widely available and relatively inexpensive.

Oral Glucose Tolerance Test (OGTT): You drink a glucose solution, then blood sugar is measured after 2 hours. Prediabetes range: 140-199 mg/dL. This test is more time-consuming but can detect prediabetes that other tests might miss.

Healthcare providers often use multiple tests to confirm diagnosis, especially if results are borderline or if you have risk factors that suggest testing a particular method.

When to Get Tested

For Prediabetes: The American Diabetes Association recommends screening for all adults 35 and older, regardless of weight. Adults younger than 35 should be tested if they’re overweight and have additional risk factors.

Testing frequency depends on results and risk factors. If tests are normal, repeat screening every 3 years. If you have prediabetes, test annually to monitor progression.

For Insulin Resistance: Consider evaluation if you have multiple risk factors, unexplained difficulty losing weight, family history of diabetes, or signs like dark skin patches.

Women with a history of gestational diabetes or polycystic ovary syndrome should discuss insulin resistance screening with their healthcare provider.

Take charge of your glucose management. Our Apidra cartridge offers convenient rapid-acting insulin delivery.

Treatment and Management Strategies

Insulin Resistance vs Prediabetes- Key Differences

Both insulin resistance and prediabetes respond well to similar treatment approaches, with lifestyle modifications forming the foundation of management. The goal is to improve your body’s ability to use insulin effectively and prevent progression to type 2 diabetes.

Lifestyle Modifications That Work

Dietary Changes: Focus on a balanced diet rich in whole foods, lean proteins, healthy fats, and complex carbohydrates. Limit processed foods, refined sugars, and excessive portions.

The Mediterranean diet and low-glycemic eating patterns show particular promise for improving insulin sensitivity. Consider working with a registered dietitian to develop a sustainable eating plan.

Regular Physical Activity: Exercise is one of the most effective interventions for both conditions. Aim for at least 150 minutes of moderate-intensity aerobic activity per week, plus muscle-strengthening activities twice weekly.

Both aerobic exercise and resistance training improve insulin sensitivity. Even modest increases in activity, like a 30-minute daily walk, can make a significant difference.

Weight Management: Losing even 5-7% of your body weight can dramatically improve insulin sensitivity and reduce prediabetes risk. Focus on gradual, sustainable weight loss rather than extreme measures.

Sleep Improvement: Poor sleep affects hormone regulation and insulin sensitivity. Aim for 7-9 hours of quality sleep nightly and address sleep disorders if present.

Stress Management: Chronic stress elevates cortisol levels, which can worsen insulin resistance. Incorporate stress-reduction techniques like meditation, yoga, or regular relaxation practices.

Medical Treatment Options

While lifestyle changes are primary, some people benefit from medical interventions:

Metformin: Often prescribed for prediabetes, especially in younger adults, those with BMI over 35, or women with a history of gestational diabetes. It improves insulin sensitivity and can help prevent progression to diabetes.

Other Medications: Depending on individual circumstances, healthcare providers might consider other medications that improve insulin sensitivity or help with related conditions like high blood pressure or abnormal cholesterol levels.

For those who already require insulin therapy for diabetes management, newer options like Adlyxin (lixisenatide) can help optimize blood sugar control.

Regular Monitoring: Whether or not you take medication, regular follow-up with your healthcare provider is crucial for tracking progress and adjusting treatment plans.

Creating Your Action Plan

Start by working with your healthcare team to establish clear goals and monitoring schedules. This might include target weight ranges, blood sugar goals, and specific lifestyle objectives.

Implement changes gradually rather than attempting everything at once. Start with one or two modifications, master them, then add others. This approach increases your likelihood of long-term success.

Consider joining support groups, working with healthcare professionals like dietitians or exercise physiologists, or using apps and tools that help track your progress.

Remember that managing insulin resistance and prediabetes is a marathon, not a sprint. Focus on building sustainable habits rather than seeking quick fixes.

Prevention Strategies

Prevention remains the most effective approach for both insulin resistance and prediabetes. Even if you have risk factors you can’t change, like family history or age, many prevention strategies can significantly reduce your risk or slow progression.

Diet and Nutrition Guidelines

Choose Complex Carbohydrates: Opt for whole grains, legumes, and vegetables over refined grains and processed foods. These foods provide steady energy without causing blood sugar spikes.

Prioritize Fiber: High-fiber foods slow glucose absorption and improve insulin sensitivity. Aim for 25-35 grams of fiber daily from sources like vegetables, fruits, beans, and whole grains.

Include Healthy Fats: Omega-3 fatty acids from fish, nuts, and seeds can improve insulin sensitivity. Limit saturated and trans fats, which can worsen insulin resistance.

Practice Portion Control: Use smaller plates, measure portions initially to learn appropriate sizes, and pay attention to hunger and fullness cues.

Stay Hydrated: Choose water over sugary drinks. If you want variety, try unsweetened tea, coffee, or sparkling water with lemon.

Exercise and Physical Activity

Start Where You Are: If you’re sedentary, begin with 10-15 minutes of walking daily and gradually increase duration and intensity.

Mix It Up: Combine aerobic exercise (walking, swimming, cycling) with strength training (weights, resistance bands, bodyweight exercises) for maximum benefit.

Find Activities You Enjoy: You’re more likely to stick with exercise you enjoy. Try dancing, hiking, gardening, or sports to make movement fun.

Build Activity Into Daily Life: Take stairs instead of elevators, park farther away, walk during phone calls, or do household chores more vigorously.

Set Realistic Goals: Aim for progress, not perfection. Consistency matters more than intensity when you’re building new habits.

Long-term Health Management

Regular Health Screenings: Stay up-to-date with recommended screenings for blood pressure, cholesterol, and blood sugar levels.

Maintain a Healthy Weight: If you need to lose weight, aim for 1-2 pounds per week through a combination of diet and exercise modifications.

Manage Other Health Conditions: Work with your healthcare provider to control conditions like high blood pressure or abnormal cholesterol that can worsen insulin resistance.

Stay Informed: Keep up with current research and recommendations, but be wary of fad diets or quick fixes that promise unrealistic results.

Build Your Support Network: Surround yourself with family, friends, or support groups who encourage your healthy lifestyle choices.

Conclusion

Understanding insulin resistance vs prediabetes empowers you to take control of your metabolic health. While these conditions are related, recognizing their differences helps you work more effectively with your healthcare team and make informed decisions about your care.

Insulin resistance often comes first, representing the underlying process where your cells don’t respond well to insulin. Prediabetes is the measurable result when blood sugar levels rise above normal ranges. Both conditions serve as important warnings, giving you the opportunity to make changes before type 2 diabetes develops.

The encouraging news is that both insulin resistance and prediabetes respond well to lifestyle modifications. Through strategic dietary changes, regular physical activity, weight management, and stress reduction, many people can improve their insulin sensitivity and even reverse prediabetes.

Whether you’re dealing with insulin resistance, prediabetes, or both, remember that small, consistent changes often lead to significant improvements over time. Work with your healthcare provider to develop a comprehensive plan that fits your lifestyle and health goals.

Ready to take the next step in managing your blood sugar health? Explore our comprehensive insulin products to support your diabetes management journey.

Frequently Asked Questions

Can you have insulin resistance without prediabetes?

Yes, you can have insulin resistance without prediabetes. Insulin resistance often develops first, and your pancreas may initially produce enough extra insulin to keep blood sugar levels normal. This compensation can last for years before blood sugar levels rise enough to be diagnosed as prediabetes.

Is insulin resistance the same as prediabetes?

No, insulin resistance and prediabetes are not the same. Insulin resistance is a biological process where cells don’t respond effectively to insulin. Prediabetes is a diagnosed condition based on elevated blood sugar levels. However, insulin resistance often causes prediabetes.

Can prediabetes be reversed?

Yes, prediabetes can often be reversed through lifestyle changes. Studies show that losing 5-7% of body weight and exercising regularly can reduce diabetes risk by 58%. With sustained lifestyle modifications, many people can return their blood sugar levels to normal ranges.

What comes first, insulin resistance or prediabetes?

Insulin resistance typically comes first. When cells become resistant to insulin, the pancreas produces more insulin to compensate. Over time, when the pancreas can’t keep up with the increased demand, blood sugar levels rise, leading to prediabetes diagnosis.

How long does it take for prediabetes to become diabetes?

The progression varies significantly between individuals. Studies show that 15-30% of people with prediabetes develop type 2 diabetes within 5 years. However, with lifestyle interventions, many people never progress to diabetes or significantly delay its onset.

What foods should I avoid if I have insulin resistance?

Limit refined carbohydrates, sugary drinks, processed foods, and foods high in saturated fats. Focus instead on whole grains, lean proteins, healthy fats, and plenty of vegetables. Working with a registered dietitian can help you develop a personalized eating plan.

Does Insulin Need to Be Refrigerated: Your Complete Storage Guide

Managing diabetes means keeping your insulin in perfect condition, and proper storage is absolutely critical for maintaining its effectiveness. If you’ve ever wondered “does insulin need to be refrigerated,” you’re asking the right question. The answer affects not just your medication’s potency, but your overall health and blood sugar control.

Insulin is a delicate protein that can lose its effectiveness when exposed to extreme temperatures, light, or improper storage conditions. Getting the storage basics right means your medication works as intended, your blood sugar stays stable, and you avoid potentially dangerous complications from degraded insulin.

In this guide, we’ll walk you through everything you need to know about insulin storage, from refrigeration requirements to travel tips, so you can keep your medication safe and effective.

Need reliable insulin supplies? Browse our insulin collection for trusted diabetes management options.

Understanding Insulin and Storage Requirements

Signs Your Insulin May Be Compromised

Insulin is a hormone that helps your body regulate blood sugar levels. When you have diabetes, your body either doesn’t produce enough insulin or can’t use it effectively. That’s where insulin medications come in, providing the hormone your body needs to function properly.

The challenge with insulin is that it’s a protein-based medication, which makes it sensitive to temperature changes, light exposure, and physical stress. Unlike some medications that remain stable at room temperature, insulin requires specific storage conditions to maintain its potency.

Why Temperature Matters for Insulin

Temperature control is the most important factor in insulin storage. Here’s what happens when insulin is exposed to different temperature ranges:

  • Too Cold (Freezing): Insulin that freezes becomes completely unusable and must be discarded. The protein structure breaks down permanently, making the medication ineffective.
  • Too Hot: High temperatures cause insulin to degrade rapidly, reducing its effectiveness and potentially making it dangerous to use.
  • Proper Range: Most insulin types remain stable when stored between 36°F to 46°F (2°C to 8°C) in unopened vials or pens.

Understanding these temperature requirements helps you make informed decisions about where and how to store your insulin supplies.

Different Types of Insulin Storage Needs

Not all insulin types have identical storage requirements, though most follow similar guidelines. Here’s how different insulin categories should be handled:

Insulin Type Unopened Storage After Opening Room Temperature Duration
Rapid-acting Refrigerate 36-46°F Can stay at room temp 28 days
Short-acting Refrigerate 36-46°F Can stay at room temp 28-42 days
Intermediate-acting Refrigerate 36-46°F Can stay at room temp 42 days
Long-acting Refrigerate 36-46°F Can stay at room temp 28-42 days
Pre-mixed Refrigerate 36-46°F Can stay at room temp 10-28 days

These timeframes can vary between manufacturers, so always check your specific insulin’s packaging or insert for precise storage instructions.

Looking for specific insulin options? Check out our Basaglar Cartridge for long-acting insulin needs.

Does Insulin Need to Be Refrigerated: The Complete Answer

Signs Your Insulin May Be Compromised

The short answer is: yes, unopened insulin should be refrigerated, but opened insulin can be stored at room temperature for limited periods. However, the complete picture is more nuanced and depends on several factors.

Unopened Insulin Storage

Unopened insulin vials, pens, and cartridges must be stored in the refrigerator between 36°F to 46°F (2°C to 8°C). This keeps the medication stable until its expiration date. Key points for unopened insulin storage:

  • Store in the main body of the refrigerator, not the door where temperatures fluctuate
  • Keep insulin in its original packaging to protect from light
  • Never store insulin in the freezer compartment
  • Don’t store near the back wall where temperatures might be coldest
  • Maintain consistent temperature by avoiding frequent door opening

Opened Insulin Storage Options

Once you start using an insulin vial or pen, you have two storage options:

Option 1: Continue Refrigerating

  • Keeps insulin stable for longer periods
  • Must warm to room temperature before injecting
  • Good for people who use insulin infrequently

Option 2: Room Temperature Storage

  • More convenient for daily use
  • No need to warm before injection
  • Must be used within specific timeframes (usually 28-42 days)
  • Store between 59°F to 86°F (15°C to 30°C)

Most diabetes educators recommend room temperature storage for daily-use insulin because it’s more comfortable for injections and reduces the risk of lipodystrophy (changes in fat tissue under the skin).

Special Considerations for Different Situations

Your insulin storage approach might need adjustments based on your lifestyle and circumstances:

  • Frequent Travelers: Consider keeping unopened backup supplies refrigerated while using opened insulin at room temperature
  • Hot Climates: Room temperature storage becomes riskier in extremely hot weather
  • Irregular Use: If you don’t use insulin daily, refrigerated storage might be better for opened supplies

Need diabetes management support? Explore our Byetta for additional blood sugar control options.

Best Practices for Insulin Storage

Proper insulin storage goes beyond just temperature control. Following these best practices ensures your medication stays effective and safe to use.

Refrigeration Guidelines

When storing insulin in the refrigerator, location and method matter:

Optimal Refrigerator Placement:

  • Store in the main compartment, never the door
  • Use the crisper drawer or a dedicated medication area
  • Keep insulin toward the front where temperatures are most stable
  • Avoid areas near the cooling vents or back wall

Organization Tips:

  • Use a small container or organizer to keep insulin supplies together
  • Label opened insulin with the date you first used it
  • Rotate stock by placing newer supplies behind older ones
  • Keep a thermometer in your medication storage area

Room Temperature Storage Best Practices

For insulin stored at room temperature, consistency and protection are key:

  • Choose a cool, dark place away from direct sunlight
  • Avoid areas with temperature fluctuations like bathrooms or kitchens
  • Never leave insulin in cars, especially during hot weather
  • Use a medication organizer or small cooler for travel
  • Keep insulin in its original packaging when possible

Protecting Insulin from Light and Physical Damage

Beyond temperature, insulin needs protection from other environmental factors:

Light Protection:

  • Store in original cartons or opaque containers
  • Avoid transparent pill organizers for insulin
  • Keep away from direct sunlight and bright artificial lights

Physical Protection:

  • Handle vials and pens gently to avoid damage
  • Don’t shake insulin vigorously (gently roll if mixing is needed)
  • Inspect for cracks or damage before each use
  • Replace damaged supplies immediately

For fast-acting options, consider our Fiasp Vial for reliable rapid insulin delivery.

Signs Your Insulin May Be Compromised

Does Insulin Need to Be Refrigerated: The Complete Answer

Recognizing when insulin has been compromised is crucial for maintaining effective diabetes management. Here are the key warning signs to watch for:

Visual Inspection Signs

Regular visual checks help you identify insulin that may no longer be effective:

Clear Insulin (Rapid and Long-Acting Types):

  • Should remain completely clear and colorless
  • Any cloudiness, particles, or discoloration means discard immediately
  • Clumping or crystallization indicates the insulin is no longer safe to use

Cloudy Insulin (Intermediate-Acting and Some Mixed Types):

  • Should have a uniform, milky appearance when properly mixed
  • Clumping that doesn’t dissolve with gentle rolling indicates spoilage
  • Unusual color changes or crystal formation means replacement is needed

Physical and Performance Indicators

Beyond visual cues, pay attention to how your insulin behaves and performs:

Physical Changes:

  • Unusual thickness or consistency changes
  • Separation that doesn’t remix with gentle agitation
  • Frosted appearance (indicates previous freezing)
  • Cracks or damage to vials or pen cartridges

Performance Issues:

  • Blood sugar levels remaining consistently higher than expected
  • Insulin not working as effectively as usual
  • Unusual injection site reactions or irritation
  • Burning or stinging sensation during injection

Temperature Exposure Warning Signs

Insulin exposed to extreme temperatures shows specific signs of damage:

  • Insulin that has been frozen will often appear cloudy or have visible particles
  • Heat-exposed insulin might change color or develop an unusual odor
  • Insulin left in hot cars may appear normal but lose effectiveness
  • Any insulin with an unusual smell should be discarded immediately

If you notice any of these signs, don’t risk using potentially compromised insulin. Replace it immediately and contact your healthcare provider if you have concerns about blood sugar control.

Travel and Emergency Storage Tips

Traveling with insulin or managing emergency situations requires special planning to ensure your medication stays safe and effective.

Air Travel Guidelines

Flying with insulin involves specific considerations for both carry-on and checked luggage:

Carry-On Recommendations:

  • Always pack insulin in carry-on luggage, never checked bags
  • Bring prescription labels and a letter from your doctor
  • Pack extra supplies in case of delays or lost luggage
  • Use insulated travel cases designed for medications
  • Allow extra time for security screening procedures

TSA and International Guidelines:

  • Insulin is allowed through security checkpoints without quantity restrictions
  • Carry original prescription bottles or pen packaging
  • Declare insulin and diabetes supplies during security screening
  • Research destination country regulations for medication imports

Hot Weather Storage Solutions

High temperatures pose serious risks to insulin effectiveness, especially during summer travel or in warm climates:

Cooling Options:

  • Invest in a medical-grade insulin cooling case
  • Use cooling packs designed for medications (avoid direct ice contact)
  • Consider battery-powered medication refrigerators for extended trips
  • Plan for air conditioning failures or power outages

Heat Protection Strategies:

  • Never leave insulin in parked vehicles
  • Carry insulin in an insulated bag during outdoor activities
  • Monitor local weather forecasts and plan accordingly
  • Have backup cooling plans for emergencies

Emergency Preparedness

Natural disasters, power outages, and other emergencies require advance planning:

Emergency Kit Essentials:

  • At least 7 days’ worth of insulin and supplies
  • Battery-powered or manual cooling options
  • Non-perishable snacks and glucose tablets
  • Emergency contact information for healthcare providers
  • Copy of prescriptions and medication lists

Power Outage Planning:

  • Identify local pharmacies with backup power
  • Know locations of cooling centers or facilities with refrigeration
  • Have manual cooling options like cool wet towels
  • Understand how long your refrigerator stays cold without power (typically 4-6 hours)

Proper preparation ensures you can maintain diabetes management even during unexpected situations or travel disruptions.

Summary: Key Takeaways for Insulin Storage

Proper insulin storage isn’t just about following rules, it’s about ensuring your diabetes management remains effective and your health stays protected. The question “does insulin need to be refrigerated” has a clear answer: yes for unopened supplies, with flexible options for opened insulin based on your usage patterns and lifestyle.

Temperature control remains the most critical factor in insulin storage. Whether you choose refrigerated or room temperature storage for opened insulin, consistency and protection from extreme temperatures, light, and physical damage are essential. Regular visual inspections and awareness of performance changes help you identify when insulin may be compromised.

Remember that different insulin types have varying storage requirements and timeframes. Always check your specific medication’s packaging for precise guidelines, and don’t hesitate to replace insulin that shows any signs of deterioration. Your health depends on using medication that maintains its full effectiveness.

For reliable insulin supplies and diabetes management support, explore our comprehensive medication options and consult with healthcare professionals about the best storage practices for your specific situation.

Frequently Asked Questions About Insulin Storage

How to know if insulin is spoiled?

Spoiled insulin shows several warning signs including cloudiness in normally clear insulin, clumping or crystallization, unusual color changes, or an odd smell. If your blood sugar levels remain consistently high despite normal insulin doses, this may also indicate compromised medication. When in doubt, replace the insulin and consult your healthcare provider.

Can you put insulin back in the fridge?

Once insulin has been stored at room temperature, it’s generally not recommended to return it to the refrigerator. The temperature fluctuation can affect the medication’s stability. However, if insulin was briefly exposed to room temperature (less than a few hours) and you prefer refrigerated storage, it’s typically safe to return it to the fridge. Always check with your pharmacist for specific guidance.

How can you tell if insulin is still good?

Good insulin should be clear and colorless (for rapid and long-acting types) or uniformly cloudy (for intermediate-acting types) with no clumping, particles, or unusual odors. It should maintain its normal consistency and continue to effectively control your blood sugar levels. Check the expiration date and note how long it’s been since opening, as effectiveness decreases over time even with proper storage.

How long does it take for insulin to go bad?

Unopened insulin remains effective until its expiration date when properly refrigerated. Once opened, most insulin types stay potent for 28-42 days at room temperature or longer if kept refrigerated. However, insulin exposed to extreme heat can degrade within hours, while frozen insulin becomes immediately unusable. The exact timeframe varies by insulin type and storage conditions.

What are the symptoms of bad insulin?

Using degraded insulin typically results in poor blood sugar control, with levels remaining higher than expected despite normal dosing. You might experience increased thirst, frequent urination, fatigue, or other hyperglycemia symptoms. Some people also report unusual burning or stinging at injection sites when using compromised insulin.

What happens if you take insulin that’s gone bad?

Using spoiled insulin can lead to dangerously high blood sugar levels since the medication won’t work effectively. This can result in diabetic ketoacidosis (DKA) or other serious complications if not addressed quickly. If you suspect you’ve used compromised insulin and experience symptoms like nausea, vomiting, or very high blood glucose readings, seek immediate medical attention and replace your insulin supply.


Insulin Syringe Sizes – Complete Guide for Diabetic Patients

 Insulin syringe sizes are essential for effective diabetes management and accurate medication delivery. Different syringe capacities, needle lengths, and gauge measurements directly impact injection comfort and insulin absorption rates. The standard options include 0.3mL, 0.5mL, and 1mL syringes, each designed for specific insulin dosing requirements. Needle lengths range from 4mm to 12.7mm, while gauges typically vary between 28G and 31G, with higher numbers indicating thinner needles. Selecting the appropriate combination depends on factors including body type, injection site preferences, prescribed insulin dose, and individual comfort levels during administration.

Understanding Basic Syringe Components and Measurements

Understanding Basic Syringe Components and Measurements

Insulin syringes consist of three primary components that determine their functionality and suitability for different patients. The barrel holds the insulin and displays measurement markings, while the plunger creates the pressure needed for injection. The needle, characterized by its length and gauge, penetrates the skin to deliver medication subcutaneously.

Measurement markings on insulin syringe sizes correspond to insulin units rather than standard milliliters. Each marking represents a specific number of units, with the spacing dependent on the syringe’s total capacity. A 0.3mL syringe holds up to 30 units, a 0.5mL accommodates 50 units, and a 1mL contains 100 units.

The relationship between syringe capacity and marking clarity affects dosing accuracy significantly. Smaller capacity syringes feature wider spacing between unit markings, making precise measurements easier for patients requiring lower doses. This design element proves particularly beneficial for pediatric patients or adults with insulin sensitivity who need exact dosing.

Barrel diameter varies among different insulin syringe sizes, influencing both visual clarity and handling comfort. Narrower barrels found in lower-capacity syringes allow better visibility of markings and require less force during injection. Wider barrels in larger syringes accommodate higher insulin volumes but may challenge patients with limited hand strength or dexterity issues.

Looking for affordable diabetes management solutions? Buy cheap Lantus Solostar online from Canada through Better You Rx and save on your insulin therapy costs while ensuring quality medication delivery.

Needle Gauge Options and Pain Management

Needle gauge measurements follow an inverse relationship where higher numbers indicate thinner needles, directly affecting injection comfort levels. The most common gauges for insulin syringe sizes include 28G, 29G, 30G, and 31G options. Each gauge offers distinct advantages depending on patient preferences and physical characteristics.

31-gauge needles represent the thinnest option available, measuring approximately 0.25mm in diameter. These ultra-fine needles minimize tissue trauma and reduce injection site discomfort significantly. Patients with needle anxiety or those requiring multiple daily injections often prefer this gauge for improved comfort.

30-gauge needles measure slightly thicker at 0.30mm diameter, offering a balance between comfort and durability. The marginally larger diameter provides increased needle strength, reducing bending risk during insertion while maintaining reasonable comfort levels. This gauge suits patients who prioritize both comfort and needle stability.

28-gauge and 29-gauge needles, measuring 0.36mm and 0.33mm respectively, provide maximum durability and faster insulin flow rates. These options work well for patients with tougher skin or those using insulin suspensions that require larger needle openings. The increased diameter facilitates smoother medication flow, particularly beneficial when injecting larger insulin volumes.

  • 31G needles – Best for sensitive skin and frequent injections
  • 30G needles – Balanced comfort and strength
  • 29G needles – Suitable for most insulin types
  • 28G needles – Ideal for thick skin or suspension insulins

Needle Length Selection Based on Body Type

Needle Gauge Options and Pain Management

Selecting appropriate needle lengths among available insulin syringe sizes requires consideration of body composition, injection site preferences, and subcutaneous tissue depth. Standard needle lengths include 4mm, 5mm, 6mm, 8mm, and 12.7mm options, each designed for specific patient profiles and injection techniques.

Short Needle Options (4mm-6mm)

4mm needles represent the shortest available option and suit nearly all patients regardless of body type. Research demonstrates these ultra-short needles effectively deliver insulin to subcutaneous tissue without reaching muscle layers. Children, lean adults, and patients preferring arm injections benefit particularly from this length.

5mm and 6mm needles provide slightly deeper penetration while maintaining safety margins against intramuscular injection risks. These intermediate lengths accommodate patients with moderate subcutaneous tissue thickness and those transitioning from longer needles. The additional length offers psychological reassurance for patients concerned about adequate insulin delivery depth.

Standard and Long Needle Options (8mm-12.7mm)

8mm needles traditionally served as the standard length for insulin delivery, though recent guidelines favor shorter alternatives. Patients with significant subcutaneous tissue or those using specific injection techniques may still benefit from this length. Proper injection angle adjustment becomes crucial when using 8mm needles to prevent muscle penetration.

12.7mm needles, while less commonly recommended today, remain available for specific situations. Patients with excessive adipose tissue or those requiring deeper penetration for medical reasons might need these longer options. Healthcare providers carefully evaluate individual needs before recommending these extended needle lengths.

Choosing the Right Syringe Capacity for Your Insulin Dose

Matching syringe capacity to prescribed insulin doses ensures accurate measurement and comfortable administration. The three standard insulin syringe sizes each serve specific dosing ranges, with selection based on maximum single injection requirements rather than total daily insulin needs.

Low-Dose Syringes (0.3mL/30 Units)

0.3mL syringes feature the finest unit markings among all insulin syringe sizes, with each line representing 0.5 units. This precision proves invaluable for pediatric patients, newly diagnosed individuals starting with conservative doses, or those requiring micro-adjustments to their insulin regimen. The narrow barrel diameter enhances visibility, making half-unit measurements clearly distinguishable.

Patients administering doses below 30 units benefit from improved accuracy when using these smaller syringes. The concentrated markings reduce measurement errors common with larger capacity syringes where unit lines appear closer together. This enhanced precision particularly matters for insulin-sensitive individuals where small dosing variations significantly impact blood glucose levels.

Ready to streamline your diabetes management? Explore affordable options like Humalog Junior KwikPen through Better You Rx for convenient, pre-filled insulin delivery at competitive Canadian prices.

Standard Capacity Options (0.5mL and 1mL)

0.5mL syringes accommodate doses up to 50 units while maintaining reasonable marking clarity. Each line typically represents one unit, though some models offer half-unit markings for increased precision. These medium-capacity syringes suit patients with moderate insulin requirements who value both accuracy and convenience.

Syringe Capacity Maximum Units Marking Increment Best For
0.3mL 30 units 0.5 units Doses under 30 units
0.5mL 50 units 1 unit Doses 30-50 units
1mL 100 units 2 units Doses over 50 units

1mL syringes handle the largest insulin volumes, holding up to 100 units per injection. The increased capacity comes with wider marking intervals, typically 2 units per line, potentially compromising precision for smaller doses. Patients requiring large insulin volumes or those comfortable estimating between markings find these syringes most practical.

Injection Site Considerations for Different Syringe Specifications

Different body regions offer varying subcutaneous tissue depths, influencing optimal insulin syringe sizes for each location. Understanding site-specific characteristics helps patients select appropriate needle lengths and maintain effective rotation schedules. The abdomen, thighs, arms, and buttocks each present unique considerations for syringe selection.

Abdominal injections remain the most popular choice due to consistent absorption rates and accessible subcutaneous tissue. Most patients successfully use 4mm to 6mm needles for abdominal injections, regardless of body composition. The area’s natural padding provides comfort while minimizing intramuscular injection risks even with standard needle lengths.

Thigh injections require careful needle length selection based on individual muscle development and adipose tissue distribution. Athletic individuals with minimal thigh fat may need 4mm needles exclusively, while those with more subcutaneous tissue can use longer options. Proper site rotation within the thigh area prevents lipodystrophy development.

  • Abdomen – Most versatile site for all needle lengths
  • Outer thighs – Require careful length selection based on body composition
  • Upper arms – Best with shorter needles (4-5mm)
  • Buttocks – Can accommodate longer needles if needed
  • Rotation prevents tissue damage and maintains absorption consistency

Upper arm injections typically demand shorter needles due to limited subcutaneous tissue depth. The triceps area offers the best target zone, though reaching this site independently challenges some patients. 4mm or 5mm needles work optimally for arm injections across most body types.

Special Considerations for Pediatric and Elderly Patients

Age-specific factors significantly influence appropriate insulin syringe sizes for pediatric and elderly populations. Children’s developing bodies and seniors’ changing physiology require tailored approaches to syringe selection. Healthcare providers consider multiple variables when recommending specifications for these vulnerable groups.

Pediatric Syringe Selection

Children typically require the smallest available insulin syringe sizes due to limited subcutaneous tissue and lower insulin requirements. 0.3mL syringes with 4mm needles often provide the ideal combination for pediatric patients. The ultra-fine 31G needles minimize injection trauma and reduce anxiety associated with needle procedures.

Growth patterns and body composition changes throughout childhood necessitate regular reassessment of syringe specifications. Adolescents experiencing rapid growth may need capacity upgrades while maintaining shorter needle preferences. Parents and caregivers should monitor injection site reactions and comfort levels to guide specification adjustments.

Elderly Patient Considerations

Senior patients face unique challenges including decreased dexterity, vision changes, and altered skin characteristics affecting syringe selection. Larger barrel diameters might improve handling for those with arthritis or tremors, even if insulin requirements remain modest. Clear, widely-spaced markings become crucial for patients with compromised vision.

Skin changes associated with aging, including decreased elasticity and thinning, influence needle gauge preferences. While thinner needles reduce discomfort, some elderly patients prefer slightly thicker gauges for improved needle stability during injection. Healthcare providers balance comfort with practical handling considerations when recommending insulin syringe sizes for senior patients.

Take control of your diabetes management today with Metformin and other essential medications available through BetterYourX’s reliable Canadian prescription referral service at significant savings.

Proper Storage and Handling of Different Syringe Types

Needle Length Selection Based on Body Type

Maintaining syringe integrity through proper storage protects both needle sharpness and measurement accuracy across all insulin syringe sizes. Environmental factors including temperature, humidity, and light exposure affect syringe materials differently depending on specifications. Understanding storage requirements ensures optimal performance and safety throughout the product’s usable life.

Temperature stability proves crucial for preserving needle coating integrity and preventing barrel warping. Room temperature storage between 59-86°F maintains optimal conditions for all syringe types. Extreme temperatures compromise lubricant coatings on needles, increasing injection discomfort and potentially affecting insulin flow rates.

Humidity control prevents moisture accumulation that could compromise sterility or cause measurement marking degradation. Original packaging provides adequate protection when stored in typical indoor environments. Bathroom storage should be avoided due to shower-generated humidity fluctuations that accelerate material degradation.

Needle protection during storage maintains sharpness and prevents contamination before use. Never recap used needles or attempt to straighten bent ones, as this increases injury risk. Each insulin syringe should remain in its protective covering until immediately before use, regardless of needle specifications.

Light exposure, particularly direct sunlight, degrades plastic components over extended periods. Store syringes in opaque containers or drawers to prevent UV-related deterioration. This consideration becomes especially important for bulk purchases where extended storage periods are anticipated.

Organization systems accommodating different insulin syringe sizes improve accessibility while preventing damage. Separate compartments for various specifications prevent confusion and accidental selection of incorrect sizes. Rotation practices ensuring older stock usage first maintain inventory freshness and prevent expiration-related waste.

Key Takeaways for Optimal Syringe Selection

Selecting appropriate insulin syringe sizes requires balancing multiple factors including dosing requirements, body composition, injection site preferences, and individual comfort levels. The combination of syringe capacity, needle gauge, and needle length determines injection effectiveness and patient satisfaction. Starting with 0.3mL syringes featuring 31G, 4mm needles often provides the best initial experience for new insulin users, with adjustments made based on individual response and changing needs over time. Regular consultation with healthcare providers ensures syringe specifications continue meeting evolving requirements as treatment progresses. Patient education regarding proper technique, site rotation, and storage practices maximizes the benefits of correctly chosen insulin syringe sizes while minimizing potential complications.

Frequently Asked Questions

Is 31 Gauge or 30 Gauge Bigger?

30 gauge needles are bigger than 31 gauge needles. The gauge numbering system works inversely, meaning higher numbers indicate thinner needles. A 30G needle measures approximately 0.30mm in diameter while a 31G needle measures about 0.25mm. This difference might seem minimal, but patients often notice improved comfort with the thinner 31G option, especially during multiple daily injections.

How to Choose Needle Size for Insulin?

Choosing needle size for insulin involves evaluating body composition, injection sites, and personal comfort preferences. Start with 4mm length needles as they suit most patients regardless of body type. Consider needle gauge based on skin sensitivity – 31G for maximum comfort or 28-30G for durability. Consult your healthcare provider about specific insulin syringe sizes that match your prescribed doses and injection technique.

Which Is Smaller, 4mm or 6mm?

4mm needles are smaller than 6mm needles by 2 millimeters in length. The 4mm option represents the shortest commercially available insulin needle, designed to reach subcutaneous tissue without risk of intramuscular injection in most patients. The 6mm length provides slightly deeper penetration for patients preferring additional reassurance about insulin delivery depth.

What Is 4 Units on an Insulin Syringe?

4 units on an insulin syringe appears as the fourth marking from the zero point, though visibility varies among different insulin syringe sizes. On a 0.3mL syringe with half-unit markings, 4 units would be the eighth line. Standard 0.5mL and 1mL syringes show 4 units as the fourth or second line respectively, depending on marking increments.

Is 20 Units of Insulin a Lot?

20 units of insulin represents a moderate single dose that falls within typical ranges for many patients. Individual insulin requirements vary significantly based on factors including body weight, insulin sensitivity, and blood glucose targets. Some patients require less than 10 units per injection while others need 50+ units. Your healthcare provider determines appropriate dosing based on your specific metabolic needs.

What Is a 0.5 mL Syringe Used For?

A 0.5mL syringe accommodates insulin doses up to 50 units, making it suitable for patients with moderate insulin requirements. These medium-capacity syringes offer a balance between measurement precision and dose flexibility. Patients typically choose 0.5mL syringes when their single injection doses range between 30-50 units, as the markings remain clear while providing adequate capacity.

What Is a 2ml Syringe Used For?

2mL syringes are not standard insulin syringe sizes and are rarely used for insulin administration. These larger syringes typically serve other medical purposes including vaccine administration or drawing medications. Insulin delivery requires specialized U-100 insulin syringes (0.3mL, 0.5mL, or 1mL) designed specifically for accurate insulin measurement and subcutaneous injection.


Best Places to Inject Insulin: Complete Guide for Diabetics

Places to inject insulin include the abdomen, thighs, upper arms, and buttocks, each offering different absorption rates that affect blood sugar control. The abdomen provides the fastest and most consistent absorption, making it the preferred site for mealtime insulin doses. Rotating injection sites within each area prevents lipodystrophy, a condition causing lumpy or indented skin that impairs insulin absorption. Proper injection technique involves selecting fatty tissue areas, avoiding muscles, scars, and bruised areas while maintaining at least one inch distance between injection points. Temperature, exercise, and massage can alter absorption rates at injection sites, requiring adjustments in timing and location selection based on daily activities.

Why Injection Site Selection Matters for Blood Sugar Control

Selecting appropriate places to inject insulin directly impacts how quickly and effectively the medication enters your bloodstream. Different body areas have varying blood flow rates and fat distribution, creating significant differences in absorption timing. The abdomen typically absorbs insulin within 15-30 minutes, while thigh injections may take 45-60 minutes to reach peak absorption.

Consistent site selection helps maintain predictable blood sugar patterns. Using the same general area for specific insulin types – such as always injecting rapid-acting insulin in the abdomen before meals – creates reliable timing patterns. This consistency allows for better dose calculations and reduces unexpected blood sugar variations.

Poor injection site management leads to several complications:

  • Lipodystrophy development from repeated use of the same spot
  • Unpredictable absorption causing blood sugar swings
  • Increased pain and bruising from overused areas
  • Reduced insulin effectiveness requiring higher doses
  • Skin infections from inadequate site rotation
  • Scar tissue formation blocking proper absorption

Blood flow variations throughout the day affect absorption at different places to inject insulin. Morning injections may absorb differently than evening ones due to circadian rhythm changes. Physical activity increases blood flow to exercised muscles, accelerating insulin absorption from nearby injection sites. Hot showers or baths similarly speed absorption through increased circulation.

Individual anatomy influences optimal site selection. People with more subcutaneous fat have greater flexibility in choosing injection locations. Those with less body fat must carefully identify appropriate areas with sufficient tissue depth. Body composition changes from weight loss or gain require reassessment of suitable injection sites.

Understanding the Four Main Places to Inject Insulin

Best Places to Inject Insulin

The abdomen remains the most popular injection site due to its large surface area and consistent absorption rates. This area spans from below the ribs to above the hip bones, excluding a two-inch circle around the navel. Abdominal fat typically maintains steady thickness, providing reliable absorption regardless of weight fluctuations.

Abdomen – The Primary Injection Zone

Abdominal injections offer several advantages for daily insulin management. The area provides easy access for self-injection and visual confirmation of proper technique. Absorption remains relatively unaffected by physical activity compared to limb injection sites. The large surface area accommodates extensive rotation patterns, reducing tissue damage risk.

Divide your abdomen into quadrants for systematic rotation. Start injections in the upper right quadrant, moving systematically through each section before returning to the starting area. Maintain at least one finger-width spacing between injection points. This methodical approach ensures adequate healing time between site uses.

Thigh Injections – Alternative Sites

Thigh surfaces provide substantial injection area, particularly beneficial for people requiring multiple daily doses. The outer thigh area, from four inches below the hip to four inches above the knee, offers the best absorption consistency. Avoid inner thigh areas where skin folds and movement may affect needle placement.

Thigh absorption rates vary more than abdominal sites due to muscle proximity and activity levels. Walking, running, or cycling significantly increases absorption speed from recent thigh injections. Consider this acceleration when planning injection timing around exercise schedules.

Upper Arm Considerations

The upper arm’s outer surface provides convenient places to inject insulin, though self-injection proves challenging without assistance. The injectable area extends from three inches below the shoulder to three inches above the elbow on the arm’s outer aspect. Limited fat tissue in many individuals restricts this site’s usefulness.

Partner assistance often becomes necessary for proper upper arm injections. The awkward angle required for self-injection increases risk of intramuscular injection or improper needle insertion. Reserve this site for situations when other areas need rest or when someone can assist with injection.

Buttocks as Injection Sites

The upper outer buttocks offer excellent absorption for longer-acting insulins. This area typically contains substantial fat tissue, reducing injection discomfort. The site works particularly well for children who may resist visible injection locations. However, self-injection difficulty limits adult use of this area.

Proper Rotation Techniques for Healthy Injection Sites

Systematic rotation prevents the complications associated with repeatedly using the same places to inject insulin. Create a rotation schedule that allows each site at least one week of recovery before reuse. Document injection locations using a body map or smartphone app to track patterns and identify overused areas.

Establish zones within each injection area for organized rotation. The abdomen can accommodate 20-30 different injection points when properly mapped. Number or letter each zone mentally, progressing through them sequentially. This structured approach eliminates guesswork and ensures even site usage.

Creating Your Personal Rotation Map

Design a personalized rotation system based on your injection frequency and preferred sites. Weekly planners work well for visualizing rotation patterns. Assign specific areas to different days or insulin types. Morning long-acting doses might use right abdomen sections, while mealtime rapid-acting doses rotate through left abdomen areas.

Day Morning Site Lunch Site Dinner Site Bedtime Site
Monday Right upper abdomen Left upper abdomen Right thigh Right buttock
Tuesday Right lower abdomen Left lower abdomen Left thigh Left buttock
Wednesday Left upper abdomen Right upper abdomen Right arm Right thigh
Thursday Left lower abdomen Right lower abdomen Left arm Left thigh
Friday Right thigh Left thigh Right upper abdomen Right buttock
Saturday Left thigh Right thigh Left upper abdomen Left buttock
Sunday Right arm Left arm Lower abdomen Alternate site

Monitor each injection site for signs of overuse. Red marks persisting over 24 hours indicate inadequate healing time. Hard lumps or indentations suggest lipodystrophy development requiring immediate site abandonment. Persistent pain or tenderness warns of potential tissue damage.

Looking for reliable diabetes medications at competitive prices? Purchase authentic Trulicity from Canadian pharmacy partner through Better You Rx and save substantially on your prescription costs.

Factors Affecting Insulin Absorption at Different Sites

Temperature dramatically influences absorption rates at all places to inject insulin. Heat dilates blood vessels, accelerating insulin uptake by 50% or more. Cold constricts vessels, potentially doubling absorption time. Room temperature insulin absorbs most predictably, so remove refrigerated insulin 15-30 minutes before injection.

Exercise creates site-specific absorption changes lasting several hours post-activity. Leg exercises accelerate thigh injection absorption, while arm workouts affect upper arm sites similarly. Abdominal exercises have minimal impact on belly injection sites due to limited muscle involvement. Plan injection locations based on anticipated physical activities.

Body Composition and Site Selection

Individual fat distribution patterns determine optimal places to inject insulin for each person. Measure pinchable skin thickness at potential sites – adequate subcutaneous fat should create at least a half-inch fold. Insufficient fat tissue increases intramuscular injection risk, causing rapid, unpredictable absorption.

Weight changes require injection site reassessment. Weight loss may eliminate previously suitable areas, while weight gain opens new injection possibilities. Pregnancy particularly affects abdominal injection suitability as skin stretches and baby growth limits accessible areas.

Injection Depth and Angle Considerations

Needle length must match injection site characteristics to ensure subcutaneous delivery. Standard 4-6mm needles work for most adults at 90-degree angles. Thin individuals or children may require 45-degree angles or shorter needles to avoid muscle penetration. Longer 8-12mm needles necessitate pinching skin to create adequate fat layer depth.

The injection angle affects absorption consistency across different places to inject insulin. Perpendicular insertion typically provides most reliable delivery into subcutaneous tissue. Angled injections risk shallow placement in skin layers or deep penetration into muscle. Practice maintaining consistent angles regardless of injection location.

Common Injection Site Problems and Solutions

Lipodystrophy remains the most frequent complication from poor rotation of places to inject insulin. This condition manifests as either lipohypertrophy (fatty lumps) or lipoatrophy (indented areas). Both forms alter insulin absorption unpredictably, complicating blood sugar management. Complete avoidance of affected areas for 2-3 months often allows tissue recovery.

Bruising occurs from needle contact with capillaries during injection. While generally harmless, extensive bruising may indicate technique issues or overuse of specific sites. Apply gentle pressure without rubbing after injection to minimize bruising. Persistent bruising warrants technique review with healthcare providers.

Preventing and Managing Lipodystrophy

Early lipodystrophy detection enables successful treatment through site rest. Run your hands over injection areas weekly, feeling for unusual textures or contours. Visual inspection in good lighting reveals subtle skin changes before they become problematic. Photography helps track changes over time.

Recovery strategies for lipodystrophy include:

  • Complete site abandonment for minimum three months
  • Gentle massage of affected areas between injections
  • Warm compress application to improve circulation
  • Documentation of affected areas to prevent accidental use
  • Dose adjustments when switching from affected to healthy sites
  • Regular monitoring for improvement or worsening

Addressing Injection Pain and Discomfort

Injection discomfort often stems from poor technique rather than the places to inject insulin themselves. Room temperature insulin causes less pain than cold. Relaxed muscles accept injections more comfortably than tense ones. Quick, decisive insertion proves less painful than slow, hesitant movements.

Numbing techniques reduce injection discomfort for sensitive individuals. Ice application for 30-60 seconds before injection temporarily numbs the area. Commercial numbing creams provide longer-lasting relief but require advance application. Distraction techniques like deep breathing or counting help manage injection anxiety.

Need affordable alternatives for diabetes management? Buy cheap Victoza online from Canada and access quality medications at reduced prices.

Special Considerations for Different Insulin Types

Long-acting basal insulins like Lantus perform consistently across all standard places to inject insulin. These formulations’ extended release profiles minimize absorption rate variations between sites. However, maintaining site consistency improves predictability of overnight glucose control patterns.

Rapid-acting mealtime insulins benefit from faster-absorbing injection sites. The abdomen typically provides quickest absorption for pre-meal doses. Slower-absorbing sites like thighs work better for meals with extended digestion times, such as high-fat or high-protein foods.

Mixing Insulins and Site Selection

When combining insulin types in single injections, choose places to inject insulin based on the dominant insulin’s characteristics. NPH-regular combinations follow intermediate-acting absorption patterns. Site selection should prioritize consistency over absorption speed for mixed doses.

Pre-mixed insulin formulations require particularly careful site rotation. These products’ fixed ratios cannot accommodate site-specific absorption variations through dose adjustments. Establish dedicated rotation patterns for pre-mixed insulins to maintain stable blood sugar control.

Insulin Pump Sites

Insulin pump users face unique challenges selecting infusion sites. Continuous insulin delivery accelerates tissue changes at injection locations. Pump sites require rotation every 2-3 days, demanding larger rotation areas than injection users. The abdomen typically provides best pump site options due to its size and accessibility.

Pump site rotation follows similar principles to injection rotation but requires wider spacing. Previous sites need longer recovery periods due to extended cannula presence. Mark old sites with removable stickers to prevent premature reuse. Consider alternating between abdomen and alternative sites monthly.

Age-Specific Guidelines for Injection Sites

Best Places to Inject Insulin for Diabetics

Children require modified approaches to places to inject insulin due to limited body surface area and fat tissue. The buttocks often provide the best injection site for young children, offering adequate fat tissue and reduced visibility. Parents should assist with injections until children develop sufficient motor skills and understanding.

Adolescents face unique challenges with injection site management during growth spurts and puberty. Rapid body changes alter fat distribution and insulin sensitivity. Increased self-consciousness may lead to site overuse in less visible areas. Education about proper rotation becomes crucial during this developmental stage.

Elderly Considerations

Older adults may have reduced subcutaneous fat and skin elasticity affecting suitable places to inject insulin. Arthritis or vision problems complicate self-injection and site rotation. Simplified rotation schemes using fewer sites may improve adherence while maintaining tissue health.

Cognitive changes in elderly patients necessitate injection site monitoring by caregivers. Clear marking systems using colored stickers or charts help maintain rotation schedules. Regular skin assessments detect problems before they affect blood sugar control.

Pregnancy Injection Modifications

Pregnancy dramatically alters abdominal injection site availability as the baby grows. Early pregnancy allows normal abdominal use, but expanding uterus gradually reduces accessible area. Lateral abdomen areas remain usable longer than central regions. Third trimester often requires complete transition to alternative sites.

Thigh and arm sites become primary places to inject insulin during late pregnancy. Increased blood flow during pregnancy may accelerate absorption from all sites. Frequent blood sugar monitoring helps identify necessary dose adjustments as injection sites change.

Advanced Injection Techniques and Tips

Skin preparation affects injection comfort and infection risk at all places to inject insulin. Clean sites with soap and water or alcohol swabs if visibly dirty. Allow alcohol to dry completely before injection to prevent stinging. Routine alcohol use for clean skin is unnecessary and may cause dryness.

Proper needle insertion technique ensures consistent subcutaneous delivery. Insert needles quickly and smoothly at the appropriate angle for your body type. Inject insulin slowly and steadily, counting to ten before withdrawal. This deliberate pace prevents insulin leakage and ensures complete dose delivery.

Temperature and Timing Strategies

Strategic use of temperature can optimize absorption from different places to inject insulin based on needs. Gentle site warming before rapid-acting insulin injection accelerates meal coverage. Avoiding heat exposure after long-acting insulin injection maintains steady basal delivery.

Timing injection site selection around daily activities maximizes absorption predictability. Morning abdominal injections provide consistent absorption for breakfast coverage. Evening thigh injections offer slower absorption suitable for overnight basal insulin. Weekend injection patterns might differ from weekday routines based on activity changes.

Troubleshooting Absorption Issues

Inconsistent blood sugar control despite proper dosing often indicates injection site problems. Systematically evaluate all places to inject insulin for signs of lipodystrophy or overuse. Temporary use of fresh sites helps determine if locations cause absorption issues.

Document absorption patterns from different sites through careful blood sugar monitoring. Note injection location, dose, timing, and subsequent glucose readings. Patterns emerging over several weeks guide site selection optimization. Share these records with healthcare providers for professional analysis.

Looking for cost-effective GLP-1 medications? Buy cheap Ozempic from a Canadian pharmacy partner through Better You Rx and enjoy significant savings on your diabetes prescriptions.

Safety Measures and Best Practices

Best Places to Inject Insulin- Complete Guide for Diabetics

Preventing infection at places to inject insulin requires basic hygiene practices. Wash hands before handling insulin and injection supplies. Never share needles or insulin pens between individuals. Replace needle tips after each use to maintain sterility and sharpness.

Proper insulin storage preserves medication effectiveness and injection safety. Refrigerate unopened insulin but never freeze. Room temperature storage for opened insulin prevents injection discomfort. Discard insulin exposed to extreme temperatures or past expiration dates.

Emergency Preparedness

Maintain accessible injection sites even during illness or injury. Identify backup places to inject insulin in case primary sites become unavailable. Practice non-dominant hand injection techniques for situations limiting mobility. Keep injection supplies in multiple locations for emergency access.

Travel preparation includes planning injection site rotation across time zones and climates. Pack extra supplies accounting for potential site problems or absorption changes. Research medical facilities at destinations for emergency support. Carry documentation of insulin requirements and injection needs.

Technology Integration

Modern technology assists with managing places to inject insulin effectively. Smartphone apps track rotation schedules and send reminders. Continuous glucose monitors reveal absorption patterns from different sites. Smart insulin pens record injection locations and doses automatically.

Digital photography documents injection site conditions over time. Weekly photos under consistent lighting show subtle changes. Cloud storage creates accessible records for healthcare provider review. Time-lapse comparisons reveal gradual tissue changes requiring intervention.

Final Recommendations

Successfully managing places to inject insulin requires systematic planning and consistent execution. Proper site rotation prevents tissue damage while maintaining predictable absorption. Regular site assessment identifies problems before they affect blood sugar control. Individual factors like body composition and activity levels guide personalized injection strategies.

Education about injection techniques and site management empowers better diabetes control. Understanding how different factors affect absorption enables informed decision-making. Recognizing early signs of site problems prevents complications. Continuous learning about new techniques and technologies improves outcomes.

Healthcare provider partnership optimizes injection site management over time. Regular reviews ensure rotation strategies remain appropriate as needs change. Professional assessment identifies subtle problems requiring intervention. Collaborative approaches address challenges while maintaining blood sugar targets.

Long-term success depends on establishing sustainable injection routines. Simple rotation systems promote adherence better than complex schemes. Flexibility accommodates lifestyle changes without compromising site health. Patience during adjustment periods allows new patterns to become habitual.

Frequently Asked Questions

How do I know if I’m injecting insulin correctly?

Correct injection technique produces minimal discomfort and consistent blood sugar results. The needle should enter smoothly without resistance, and insulin should flow easily without leakage. After injection, little to no insulin should appear on the skin surface. Blood sugar readings should respond predictably to doses when using proper technique at appropriate places to inject insulin.

What happens if you inject insulin in the wrong place?

Injecting into muscle instead of fat tissue causes rapid, unpredictable absorption potentially leading to hypoglycemia. Overused sites with lipodystrophy absorb insulin erratically, causing blood sugar swings. Injection into scar tissue or bruised areas may prevent proper absorption entirely. Wrong site selection can result in poor diabetes control despite correct dosing.

Should I pinch my skin when injecting insulin?

Skin pinching depends on needle length and body composition at chosen places to inject insulin. Short 4-6mm needles rarely require pinching for adults with adequate subcutaneous fat. Longer needles or lean body areas benefit from gentle pinching to ensure subcutaneous delivery. Pinch skin gently between thumb and fingers without squeezing tightly.

What are the two common insulin errors?

The most common insulin errors involve incorrect site rotation leading to lipodystrophy and failing to rotate among different places to inject insulin. Second, improper injection timing relative to meals causes blood sugar mismatches. These errors compound each other, as lipodystrophy makes timing effects more unpredictable.

What is the best location to inject insulin?

The abdomen generally provides the best combination of accessibility, absorption consistency, and rotation capacity. However, the optimal location varies by individual factors and insulin type. Rapid-acting insulin works best in the abdomen, while long-acting performs well in any appropriate site with adequate fat tissue.

How to use insulin injection during pregnancy?

During pregnancy, gradually transition from abdominal to alternative places to inject insulin as the belly expands. Use lateral abdomen areas as long as comfortable, then move to thighs and arms. Increase rotation frequency to accommodate reduced available sites. Monitor absorption changes due to increased blood flow and adjust doses accordingly.

Is it ok to inject insulin in my thigh?

Thigh injections work well for insulin delivery, particularly for long-acting formulations. Use the outer thigh area maintaining distance from knee and groin. Avoid injection before leg exercise which accelerates absorption. Thighs offer excellent rotation capacity for people requiring multiple daily injections across various places to inject insulin.


Sign Up For Newsletter

Please enable JavaScript in your browser to complete this form.

Join 60.000+ Subscribers and get a new discount coupon on every Saturday.

Address

PO Box 29631, Mississauga RPO Central Parkway, ON L5A 4H2

Phone Number

1-647-576-2076

better you rx big letter logo

Discover convenience with Better You Rx, your trusted pharmacy-affiliated partner. We work with leading pharmacies to deliver prescriptions and over-the-counter medications right to your doorstep. Enjoy cost-effective solutions on a platform that’s easy to use. We focus on safety and efficacy in all products. Our dedicated team ensures a smooth experience. From ordering to delivery, we simplify your healthcare needs. Choose Better You Rx for reliable service and expert support. Trust us for all your medication requirements. Experience the ease of modern pharmacy care.

Categories

Operating Hours: 
10:00AM – 6:00PM CST
Monday – Friday

Our Payment Partners :

Copyright © 2024 BetteryouRX. All Rights Reserved.

Join The Waitlist Be among the first to know when becomes available.
Add to cart