Does Zepbound Need to Be Refrigerated? Complete Guide 2025

Does Zepbound need to be refrigerated becomes a crucial question once you receive your prescription for this weight management medication. Zepbound requires refrigeration between 36°F and 46°F (2°C to 8°C) when stored long-term to maintain its effectiveness. However, you can keep unopened Zepbound pens at room temperature up to 77°F (25°C) for a maximum of 21 days. Once you start using a pen, it remains stable at room temperature for up to 21 days before requiring disposal. Never freeze Zepbound, as freezing permanently damages the medication and makes it unsafe to use. Understanding proper storage prevents medication waste and ensures each dose works effectively for your weight management goals. Room temperature storage offers flexibility for daily use and travel, while refrigeration extends shelf life for unopened pens. 

Understanding Zepbound Storage Requirements

Zepbound contains tirzepatide, a medication that requires specific temperature conditions to remain effective. The active ingredient is a sensitive biological compound that breaks down when exposed to temperature extremes. Proper storage protects the medication’s potency and ensures safe, effective use.

Unopened Zepbound pens must stay refrigerated between 36°F and 46°F when stored for extended periods. This temperature range preserves the medication’s chemical structure and prevents degradation. Refrigeration extends the medication’s usable life until the expiration date printed on the pen.

The refrigerator’s main compartment provides ideal storage conditions. Avoid placing Zepbound in the freezer compartment or in areas that might freeze, such as near cooling vents. Keep the pens in their original carton to protect them from light exposure, which can also degrade the medication.

Store Zepbound away from the refrigerator door where temperature fluctuations occur more frequently. The constant opening and closing of the refrigerator door creates temperature variations that may affect medication stability. The middle or back shelves of the main compartment maintain more consistent temperatures.

Room temperature storage provides flexibility for active use. You can keep Zepbound at temperatures up to 77°F for 21 days maximum. This allowance makes daily dosing more convenient since you don’t need to handle cold medication during each injection.

Once you remove an unopened pen from the refrigerator for room temperature storage, you cannot return it to refrigerated conditions. The medication remains stable at room temperature for the 21-day window, but refrigerating it again after warming doesn’t reset this timeframe or extend usability.

Does Zepbound Need to Be Refrigerated During Use

Does Zepbound Need to Be Refrigerated?

Once you start using a Zepbound pen, refrigeration becomes optional rather than required. You can store in-use pens either in the refrigerator or at room temperature up to 77°F, depending on your preference and convenience.

Many people find room temperature injections more comfortable than cold ones. Cold medication can cause temporary discomfort at the injection site, while room temperature Zepbound typically feels less noticeable during administration. Storing your active pen at room temperature eliminates the need to warm it before each injection.

The 21-day room temperature limit applies from the moment you first use the pen, not from when you remove it from the refrigerator. Track the date of your first injection and dispose of the pen 21 days later, even if medication remains inside. This timeframe ensures the medication maintains full potency throughout its use period.

Whether stored in the refrigerator or at room temperature, protect in-use pens from direct sunlight and heat sources. Avoid leaving Zepbound in cars, near windows, or in other locations where temperatures might exceed 77°F. Excessive heat accelerates medication breakdown and reduces effectiveness.

Keep the pen cap on when not in use to protect the medication from light and contamination. The cap creates a seal that maintains sterility and prevents accidental needle sticks. Replace the cap immediately after each injection.

If you prefer refrigerated storage for in-use pens, allow the medication to reach room temperature before injecting. Remove the pen from the refrigerator 30 minutes before your scheduled dose. This warming period improves injection comfort and allows the medication to flow smoothly through the needle.

Ready to start your weight management journey? Order Zepbound KwikPen through Better You Rx, a prescription referral service offering convenient access to your medications.

ZepBound Room Temperature Storage Guidelines

Understanding room temperature storage limits helps you use Zepbound safely while maintaining flexibility in your daily routine. The 21-day room temperature window applies whether the pen is unopened or in use, giving you options for storage management.

Unopened Pen Storage

Unopened Zepbound pens can remain at room temperature up to 77°F for 21 consecutive days. This flexibility proves valuable when traveling or if refrigeration becomes temporarily unavailable. However, you must use or properly dispose of the pen within this timeframe.

Mark the date when you remove an unopened pen from the refrigerator. Write this date on the pen carton or keep a note in your phone to track the 21-day countdown. This practice prevents accidentally using expired medication that has exceeded room temperature storage limits.

Temperature consistency matters during room temperature storage. Avoid locations with significant temperature swings, such as bathrooms that get steamy or rooms that become very warm during the day. Stable temperatures between 68°F and 77°F provide optimal conditions.

In-Use Pen Storage

After your first injection from a pen, the 21-day room temperature clock starts regardless of where you store it. You can continue refrigerating the in-use pen or keep it at room temperature based on personal preference.

Calculate your disposal date from the first injection, not from when you started room temperature storage. For example, if you inject once weekly and take your first dose on January 1st, dispose of the pen on January 22nd, even if medication remains.

Some people find it helpful to label in-use pens with the first injection date and calculated disposal date. This clear marking prevents confusion about whether the pen remains usable, especially if you use multiple pens for different doses.

Temperature Monitoring

Consider using a room thermometer in the area where you store Zepbound at room temperature. This simple tool confirms that storage conditions stay within the acceptable range. Digital thermometers with min-max memory functions show whether temperatures exceeded safe limits while you were away.

During hot weather, indoor temperatures may exceed 77°F in homes without air conditioning. If your home gets too warm, store Zepbound in the coolest available location, use a cooler with ice packs for temporary storage, or return the medication to refrigeration if it hasn’t exceeded the 21-day room temperature limit.

Winter heating systems can also create temperature challenges. Avoid storing Zepbound near heating vents, radiators, or space heaters where localized temperatures might exceed safe limits even if the room feels comfortable overall.

Traveling With Zepbound

Travel requires extra planning to maintain proper storage conditions for Zepbound. Whether driving across town or flying internationally, you can transport your medication safely by following specific guidelines and using appropriate storage methods.

Short Trips and Daily Transport

For brief outings or daily activities, Zepbound remains stable without special storage equipment. If you’ll return home within a few hours, simply keep the medication in your bag away from direct heat sources. Avoid leaving Zepbound in hot cars, as vehicle interiors can quickly exceed safe storage temperatures.

When running errands on warm days, bring an insulated lunch bag if you’ll be away from home for several hours. Even without ice packs, the insulation provides some temperature protection. Place the medication in the center of the bag surrounded by other items for additional insulation.

Extended Travel and Vacation

Longer trips require more careful planning. Portable medication coolers designed for travel keep Zepbound within safe temperature ranges during extended journeys. These specialized coolers use ice packs, gel packs, or battery-powered cooling to maintain refrigeration temperatures.

Choose coolers specifically designed for medication storage rather than standard food coolers. Medication coolers provide more precise temperature control and often include temperature monitoring features. Look for models that maintain temperatures between 36°F and 46°F without freezing.

Pack ice packs around the Zepbound pen without allowing direct contact between the medication and frozen ice packs. Direct contact with ice can freeze the medication, permanently damaging it. Use a barrier like a small towel or the medication’s original packaging to prevent freezing.

Air Travel Considerations

Zepbound can travel in carry-on or checked luggage, though carry-on storage is generally preferable. Cabin temperatures remain more stable than cargo hold temperatures, and you maintain control over your medication throughout the journey.

Airport security allows medications in carry-on bags without size restrictions. Keep Zepbound in its original packaging with the prescription label visible. Inform security officers that you’re carrying refrigerated medication if they need to inspect your bag.

Consider the total travel time when planning air travel with Zepbound. If your journey including layovers exceeds a few hours, use a portable cooler to maintain appropriate temperatures. Many airport lounges provide refrigeration if you need to cool your medication during extended layovers.

Hotel and Accommodation Storage

Upon reaching your destination, immediately refrigerate Zepbound if you’ll be staying multiple days. Most hotel rooms include mini-fridges, but verify this amenity when booking. If no refrigerator is available, request one from the front desk or continue using your portable cooler with fresh ice packs.

Check the mini-fridge temperature if possible, as these units sometimes run warmer than standard refrigerators. If the refrigerator feels too warm or you’re uncertain about its temperature, continuing room temperature storage within the 21-day limit may be safer than using an inadequate refrigerator.

Planning a trip? Get your medications delivered before you travel from Better You Rx, a prescription referral service that makes medication access simple and convenient.

What Happens With Improper Storage

Understanding Zepbound Storage Requirements

Understanding the consequences of improper storage helps you recognize when Zepbound may no longer be safe or effective. Temperature violations, freezing, and extended room temperature exposure all compromise medication quality.

Temperature Exposure Above 77°F

When Zepbound experiences temperatures above 77°F, the medication begins degrading more rapidly. Brief exposure to slightly elevated temperatures may not completely ruin the medication, but extended heat exposure significantly reduces potency.

If Zepbound sits in temperatures above 77°F for more than a few hours, the medication’s effectiveness becomes questionable. The tirzepatide compound breaks down under heat stress, potentially resulting in reduced weight management effects even if the medication appears normal.

Heat-damaged Zepbound shows no visible signs of degradation. The liquid doesn’t change color, develop particles, or smell different when heat-damaged. This lack of obvious indicators makes temperature monitoring crucial for ensuring medication quality.

Freezing Damage

Freezing permanently damages Zepbound and makes it completely unusable. The freezing process disrupts the medication’s molecular structure in ways that cannot be reversed by thawing. Frozen Zepbound must be discarded immediately, even if it appears normal after thawing.

Check for freezing if you suspect your Zepbound experienced temperatures below 32°F. Look for ice crystals inside the pen or on the medication’s surface. If the medication was completely frozen and has thawed, discard it regardless of appearance.

Partial freezing can be difficult to detect. If you’re uncertain whether Zepbound froze, examine the liquid carefully for any cloudiness or particles that weren’t present before. When in doubt, contact your healthcare provider or pharmacist for guidance rather than using potentially damaged medication.

Extended Room Temperature Storage

Zepbound left at room temperature beyond 21 days loses potency even if temperatures stayed within the acceptable range. The 21-day limit exists because the medication gradually degrades at room temperature, eventually becoming less effective.

Using Zepbound after the 21-day room temperature limit may not cause harm, but it likely won’t provide full therapeutic benefits. The reduced potency means you might not achieve expected weight management results despite continuing injections.

Track room temperature storage time carefully and dispose of pens that exceed the 21-day limit. Don’t try to extend usability by returning the medication to the refrigerator. Once the room temperature countdown begins, refrigeration doesn’t pause or reset the timeline.

Signs of Compromised Medication

Inspect Zepbound before each use for signs of damage or contamination. Properly stored medication appears clear and colorless without particles, cloudiness, or discoloration. Any visible changes indicate the medication should not be used.

Discard Zepbound if you notice:

  • Cloudiness or haziness in the liquid
  • Particles, flakes, or floating debris
  • Color changes from clear to yellow, brown, or any other tint
  • Cracks or damage to the pen itself
  • The medication has been frozen
  • Room temperature storage exceeded 21 days
  • You’re uncertain about storage conditions

When uncertain about whether Zepbound remains safe to use, err on the side of caution and request a replacement. Using compromised medication provides no benefits and may delay your treatment progress.

Best Practices for Zepbound Storage

Implementing consistent storage habits ensures your Zepbound remains effective throughout its usable life. These practical strategies minimize storage errors and help you maintain optimal medication quality.

Organizing Your Storage Space

Dedicate a specific location in your refrigerator for Zepbound storage. This consistent placement prevents accidentally misplacing the medication and makes it easy to grab when needed. The middle shelf typically provides the most stable temperature.

Store Zepbound in its original carton even while refrigerated. The carton protects against light exposure and provides space to write important dates like when you started room temperature storage or when an in-use pen expires.

Keep a small calendar or note near your storage location to track important dates. Record the date you started using each pen and calculate the disposal date 21 days later. This visible reminder prevents accidentally using expired medication.

Creating Storage Routines

Establish consistent habits around medication storage. Check the temperature of your refrigerator monthly using a refrigerator thermometer. This proactive monitoring catches temperature problems before they compromise your medication.

After each injection, immediately return the pen to its designated storage location. This habit prevents accidentally leaving the medication out where it might experience temperature extremes or get lost.

When starting a new pen, transfer any tracking information from the old pen to the new one. Note the first injection date on the pen carton and set a reminder for 21 days later. These redundant tracking methods prevent confusion about medication status.

Preparing for Emergencies

Keep backup cooling options available for power outages or refrigerator failures. A small cooler and reusable ice packs provide temporary storage during emergencies. Store ice packs in your freezer so they’re ready when needed.

During power outages, a refrigerator maintains safe temperatures for several hours if you keep the door closed. Avoid opening the refrigerator unnecessarily during outages to preserve cold air. If power will be out for extended periods, transfer Zepbound to a cooler with ice packs.

Have your healthcare provider’s contact information readily available for storage questions or emergencies. Quick access to professional guidance helps you make informed decisions when storage problems arise.

Managing Multiple Pens

If you have several Zepbound pens, organize them by expiration date with the oldest in front. This rotation system ensures you use pens before they expire and reduces waste from expired medication.

Label each pen clearly if you’re managing multiple doses or sharing refrigerator space with family members using the same medication. Clear labeling prevents mix-ups and ensures each person uses their own prescribed supply.

Consider the storage timeline when ordering refills. Order new supplies with enough advance time to receive and refrigerate them before your current supply expires, but not so far ahead that pens approach their expiration dates before use.

Need help managing your prescriptions? Visit Better You Rx, a prescription referral service dedicated to making medication access easier and more affordable.

ZepBound Storage Myths and Facts

Several misconceptions about Zepbound storage persist despite clear guidance. Understanding the facts helps you store your medication properly and avoid common mistakes that compromise effectiveness.

Myth – You Can Refreeze Thawed Zepbound

Some people believe that if Zepbound accidentally freezes, allowing it to thaw completely makes it usable again. This is false. Freezing causes irreversible damage to the medication’s molecular structure. Once Zepbound freezes, it must be discarded regardless of whether it appears normal after thawing.

The freeze-thaw process disrupts the delicate protein structure of tirzepatide. Even if the medication looks clear and normal after thawing, its effectiveness is permanently compromised. Never attempt to use Zepbound that has been frozen.

Myth – Refrigeration Resets the Room Temperature Clock

Another common misconception suggests that returning room temperature Zepbound to the refrigerator pauses or resets the 21-day countdown. This is incorrect. Once Zepbound begins room temperature storage, the 21-day clock continues regardless of whether you refrigerate it again.

The medication degradation that occurs during room temperature storage is cumulative. Refrigeration after warming doesn’t reverse degradation that already happened. Track total room temperature exposure time, not just current storage conditions.

Myth – Cold Medication Works Better

Some users believe that injecting cold Zepbound directly from the refrigerator makes it more effective. Temperature at injection doesn’t affect medication potency. Cold injections simply feel less comfortable than room temperature ones.

The medication’s effectiveness depends on proper storage throughout its life, not its temperature at the moment of injection. Allowing refrigerated Zepbound to warm to room temperature before injecting improves comfort without affecting results.

Fact – Sunlight Damages Zepbound

Direct sunlight exposure can degrade Zepbound even if the temperature remains within acceptable ranges. Light-induced degradation occurs separately from temperature damage. Always store Zepbound in its original carton or another opaque container to protect it from light.

Window sills, countertops near windows, and other sun-exposed areas are unsuitable storage locations even if they feel cool. The combination of light and moderate warmth accelerates medication breakdown.

Fact – Storage Affects Your Results

Proper storage directly impacts your weight management outcomes. Degraded medication delivers reduced amounts of active tirzepatide, potentially resulting in diminished appetite suppression and weight management effects. Consistent proper storage ensures you receive full therapeutic benefits from each dose.

If you notice reduced effectiveness from your Zepbound injections, review your storage practices. Improper storage may explain unexpected changes in medication response.

Key Takeaways

Zepbound requires refrigeration between 36°F and 46°F for long-term storage, but offers flexibility with 21 days of room temperature storage up to 77°F. This combination of requirements and allowances makes Zepbound manageable for daily use while ensuring medication stability.

Never freeze Zepbound, as freezing causes permanent damage that makes the medication unusable. Store pens in the main refrigerator compartment away from freezing zones and temperature-variable areas like the door. Keep Zepbound in its original carton to protect against light exposure.

Track room temperature storage time carefully, starting the 21-day countdown from when you first remove the pen from refrigeration or take your first injection, whichever comes first. Dispose of pens after 21 days at room temperature, even if medication remains inside.

Travel with Zepbound using insulated bags or portable medication coolers for trips lasting several hours. Maintain temperature awareness during travel and immediately refrigerate the medication upon reaching your destination if staying multiple days.

Inspect Zepbound before each use for signs of damage like cloudiness, particles, or discoloration. Discard any medication that appears abnormal or if you’re uncertain about its storage history. Proper storage practices ensure each dose delivers full effectiveness for your weight management goals.

Frequently Asked Questions

What Happens if I Don’t Refrigerate Zepbound?

Unopened Zepbound can remain at room temperature up to 77°F for 21 days without refrigeration. After 21 days at room temperature, the medication begins losing potency and should be discarded. If you accidentally left unopened Zepbound unrefrigerated, check how long it was at room temperature. If less than 21 days and temperatures stayed below 77°F, the medication remains usable. Mark the date you discovered it was unrefrigerated and calculate 21 days from when it likely left refrigeration. If you’re uncertain how long it was unrefrigerated or if it exceeded 21 days, request a replacement rather than risk using compromised medication.

How to Keep Zepbound Cold While Traveling?

Keep Zepbound cold while traveling using insulated medication coolers with ice packs or gel packs. Choose coolers designed specifically for medication that maintain temperatures between 36°F and 46°F. Place ice packs around the Zepbound pen without direct contact to prevent freezing. For air travel, pack Zepbound in carry-on luggage where you control storage conditions. Most flights provide temperatures suitable for the 21-day room temperature allowance, but longer international trips benefit from portable cooling. When driving, never leave Zepbound in a parked car where temperatures can quickly exceed safe limits. Bring a small cooler even for day trips during hot weather.

What Happens to Zepbound After 21 Days?

After 21 days at room temperature, Zepbound begins degrading and losing effectiveness. The active ingredient tirzepatide breaks down gradually at room temperature, and the 21-day limit represents the point where potency loss becomes significant. Using Zepbound after 21 days at room temperature likely won’t cause harm, but it may not provide expected weight management benefits. The reduced potency means you might not experience full appetite suppression or weight loss effects despite continuing injections. Always dispose of Zepbound that exceeded the 21-day room temperature limit and start with a fresh pen to ensure optimal results.

What Happens if Tirzepatide Is Not Refrigerated?

Tirzepatide, the active ingredient in Zepbound, remains stable at room temperature up to 77°F for 21 days. Beyond this timeframe or at higher temperatures, tirzepatide begins breaking down and losing effectiveness. The medication doesn’t become harmful when left unrefrigerated within reasonable limits, but its potency decreases. Short-term lack of refrigeration within the 21-day window doesn’t damage tirzepatide if temperatures stayed below 77°F. However, extended unrefrigerated storage or exposure to high temperatures compromises the medication’s ability to provide weight management benefits. When uncertain about storage conditions, replace the medication rather than risk using ineffective tirzepatide.

Can I Carry Zepbound on a Plane?

You can carry Zepbound on a plane in either carry-on or checked luggage, though carry-on storage is preferable. Carry-on storage allows you to monitor medication conditions throughout your flight and prevents exposure to extreme cargo hold temperatures. Airport security permits medications in carry-on bags regardless of liquid volume restrictions. Keep Zepbound in its original packaging with the prescription label visible for security screening. Inform security officers you’re carrying refrigerated medication if needed. For flights lasting several hours, consider using a small insulated bag with ice packs to maintain appropriate temperatures, though the 21-day room temperature allowance covers most travel scenarios without special cooling equipment.

Is Tirzepatide Still Good if Left Out Overnight?

Tirzepatide remains good if left out overnight as long as room temperature stayed below 77°F and the total room temperature storage time doesn’t exceed 21 days. One night at room temperature doesn’t damage the medication. However, start tracking the 21-day countdown from when you left it out if this was an unopened pen’s first room temperature exposure. If the pen was already in use or previously at room temperature, add the overnight hours to your cumulative room temperature time. Check that the medication appears clear and colorless before your next injection. If anything looks abnormal or you’re concerned about storage conditions, contact your healthcare provider for guidance.

Does Zepbound Need to Be Refrigerated After Opening?

Zepbound does not require refrigeration after opening, though you can continue refrigerating in-use pens if preferred. Once you take your first injection from a pen, you can store it at room temperature up to 77°F for 21 days total. Many people find room temperature storage more convenient for active pens since it eliminates the need to warm the medication before each injection. Whether you refrigerate or use room temperature storage, the 21-day disposal timeline starts from your first injection. After 21 days, discard the pen even if medication remains inside. Choose whichever storage method feels most convenient while staying within the 21-day limit and temperature requirements.

Does Wegovy Make You Tired? Causes & How to Manage Fatigue

Practical Strategies to Combat Fatigue Does Wegovy Make You Tired_ Causes & How to Manage Fatigue Common Causes of Fatigue on Wegovy
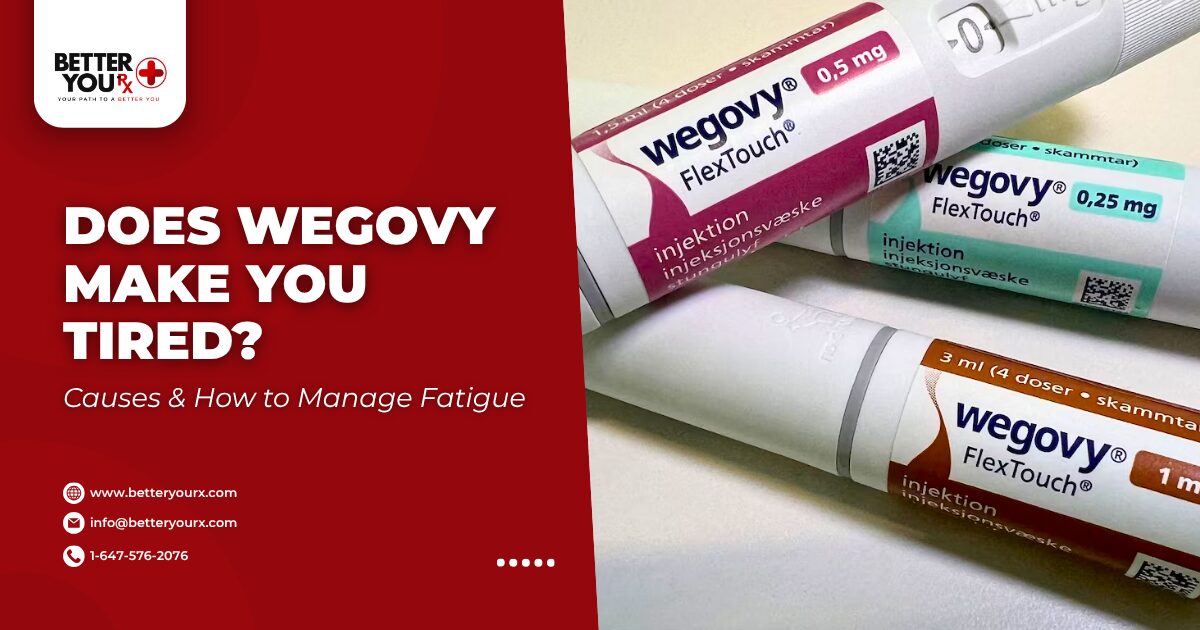
Does Wegovy make you tired is a common concern among people starting this weight loss medication. Fatigue represents one of the frequently reported experiences during Wegovy treatment, though it varies significantly among users. The tiredness typically stems from reduced calorie intake, changes in metabolism, dehydration, nutritional adjustments, and your body adapting to the medication. Most people experience fatigue during the first few weeks of treatment as their system adjusts to appetite changes and lower food consumption. The good news is that this tiredness usually improves over time as your body adapts. Managing fatigue involves staying hydrated, eating nutrient-dense foods, maintaining gentle exercise, getting adequate sleep, and adjusting meal timing. 

Understanding Wegovy and Energy Levels

Living Well on Wegovy

Wegovy contains Semaglutide as its active ingredient, which works by mimicking a hormone called GLP-1 that regulates appetite and food intake. This medication slows stomach emptying and signals fullness to your brain, helping you eat less and lose weight effectively.

When you start Wegovy, your eating patterns change dramatically. The medication significantly reduces hunger signals, leading to decreased food consumption. This sudden shift in calorie intake directly impacts your energy levels, especially during the initial weeks of treatment.

Your body has been accustomed to a certain calorie level for maintaining your current weight. When Wegovy reduces your appetite and food intake, your system must adapt to functioning on fewer calories. This adaptation period often brings tiredness as your metabolism adjusts to the new energy balance.

The medication also affects how quickly food moves through your digestive system. Slower gastric emptying means nutrients absorb more gradually, which can temporarily alter your energy patterns throughout the day. Your body needs time to adjust to these digestive changes.

Does Wegovy make you tired for everyone? Not necessarily. Individual responses vary based on factors like starting dose, overall health, baseline energy levels, diet quality, hydration status, and lifestyle habits. Some people experience minimal fatigue, while others feel more pronounced tiredness during the adjustment period.

The tiredness associated with Wegovy differs from regular fatigue. It often feels like a general lack of energy rather than sleepiness. You might notice reduced motivation for physical activities or feeling less energetic during your usual daily tasks.

Ready to start your weight loss journey? Learn more about Wegovy through Better You Rx, a prescription referral service connecting you with this effective medication.

Common Causes of Fatigue on Wegovy

Multiple factors contribute to tiredness during Wegovy treatment. Understanding these causes helps you address each one effectively and minimize their impact on your daily life.

Reduced Calorie Intake

The primary reason people feel tired on Wegovy relates to decreased food consumption. When the medication suppresses your appetite, you naturally eat less throughout the day. Your body interprets this calorie deficit as a signal to conserve energy.

During weight loss, your body burns stored fat for fuel. While this process is exactly what you want for losing weight, the metabolic shift can temporarily reduce your energy levels. Your system needs time to become efficient at utilizing fat stores instead of readily available dietary calories.

Many people on Wegovy unintentionally create too large of a calorie deficit. While eating less drives weight loss, consuming too few calories can cause excessive fatigue. Your body still needs adequate fuel to maintain basic functions, support physical activity, and keep your energy stable.

Dehydration Effects

The medication can reduce your thirst signals along with your appetite. When you eat less, you also tend to drink less, especially if much of your previous fluid intake came from foods with high water content.

Dehydration directly impacts energy levels. Even mild dehydration causes fatigue, difficulty concentrating, headaches, and reduced physical performance. Your blood volume decreases when dehydrated, making your heart work harder to circulate oxygen and nutrients throughout your body.

Some people experience nausea as a side effect of Wegovy, which may further reduce fluid intake. If nausea causes vomiting or diarrhea, fluid loss increases dramatically, compounding the dehydration problem and resulting tiredness.

Nutritional Deficiencies

Eating significantly less food means consuming fewer vitamins and minerals. When your diet shrinks, getting adequate nutrition becomes challenging. Certain nutrient deficiencies directly cause fatigue and low energy.

Iron deficiency leads to anemia, which reduces your blood’s oxygen-carrying capacity and causes persistent tiredness. B vitamins play crucial roles in energy metabolism, and deficiencies in B12, folate, or other B vitamins contribute to fatigue. Vitamin D deficiency also correlates with low energy and tiredness.

Protein intake often decreases when appetite drops. Adequate protein is essential for maintaining muscle mass, supporting metabolism, and sustaining energy levels. Insufficient protein consumption can leave you feeling weak and tired.

Blood Sugar Fluctuations

Wegovy affects how your body processes carbohydrates and regulates blood sugar. These changes can cause energy fluctuations throughout the day, particularly if your eating schedule becomes irregular.

When you skip meals or go long periods without eating due to reduced appetite, blood sugar levels may drop below optimal ranges. Low blood sugar causes fatigue, weakness, difficulty concentrating, and irritability. Even people without diabetes can experience these effects.

Conversely, if you consume primarily simple carbohydrates during your reduced meals, you might experience blood sugar spikes followed by crashes. These fluctuations create an energy roller coaster that leaves you feeling tired and drained.

Sleep Disruptions

Some people experience changes in sleep quality when starting Wegovy. Digestive discomfort, nausea, or other side effects might interfere with falling asleep or staying asleep throughout the night. Poor sleep quality directly translates to daytime fatigue.

The medication can also cause vivid dreams or restless sleep in some individuals. Even if you spend adequate time in bed, disrupted sleep architecture prevents truly restorative rest, leaving you tired the next day.

Does Wegovy Make You Tired Long-Term

The fatigue experienced on Wegovy typically improves as treatment continues. Most people notice their energy levels stabilizing within 4-8 weeks after starting the medication or increasing to a new dose.

During the initial weeks, your body undergoes significant metabolic adjustments. This tiredness represents your system learning to function efficiently on fewer calories while burning fat stores for energy.

As you continue treatment, several positive changes occur that improve energy:

  • Your metabolism adapts to lower calorie intake
  • Your body becomes more efficient at utilizing fat for fuel
  • You develop new eating patterns that better support energy needs
  • Hydration habits typically improve as you become more aware
  • Your system adjusts to the medication’s effects on digestion

Many people report feeling more energetic after the initial adjustment period compared to before starting Wegovy. Weight loss itself often improves energy levels. Carrying less weight reduces the physical strain on your body, improves sleep quality, enhances cardiovascular function, and boosts overall vitality.

However, persistent fatigue beyond the initial weeks deserves attention. If tiredness continues or worsens after 2-3 months on a stable dose, consult your healthcare provider. Ongoing fatigue might indicate issues unrelated to Wegovy that need evaluation.

Some individuals experience renewed tiredness when their dose increases. Each dose escalation can trigger a brief adjustment period similar to when you first started the medication. This temporary fatigue usually resolves within a few weeks as your body adapts to the higher dose.

The key is distinguishing between normal adaptation fatigue and problematic tiredness. Normal adjustment fatigue gradually improves over weeks, doesn’t severely impact daily function, and responds well to supportive strategies like adequate hydration and nutrition. Concerning fatigue persists despite good self-care, significantly interferes with work or daily activities, or accompanies other worrying symptoms.

Practical Strategies to Combat Fatigue

Managing tiredness while taking Wegovy involves multiple approaches that address the various causes of low energy. Implementing these strategies helps you feel better while continuing your weight loss journey.

Optimize Your Nutrition

Even though your appetite is reduced, focus on nutrient density in every meal. Choose foods that pack maximum nutrition into smaller portions. Prioritize protein at every meal to maintain muscle mass and support energy production. Good protein sources include eggs, Greek yogurt, chicken, fish, tofu, and legumes. Aim for at least 60-80 grams of protein daily, distributed across your meals.

Include healthy fats that provide sustained energy and support hormone production. Avocados, nuts, seeds, olive oil, and fatty fish offer beneficial fats that help you feel satisfied and energized. Fat digests slowly, providing steady energy between meals.

Don’t neglect carbohydrates, but choose complex varieties that stabilize blood sugar. Whole grains, sweet potatoes, quinoa, and oats provide sustained energy without the crashes associated with refined carbohydrates. Pair carbs with protein and fat to further stabilize blood sugar.

Eat regular small meals rather than trying to consume large amounts in one sitting. Your reduced appetite makes big meals uncomfortable, but spacing smaller meals throughout the day maintains more stable energy levels and prevents blood sugar drops.

Managing fatigue on your weight loss journey? Get your medications at an affordable price through Better You Rx, a trusted prescription referral service.

Stay Properly Hydrated

Hydration deserves special attention when taking Wegovy. Set specific hydration goals rather than relying on thirst, since the medication may reduce your natural thirst signals.

Aim for at least 8-10 glasses of water daily, more if you exercise or live in hot climates. Keep a water bottle with you throughout the day as a visual reminder to drink regularly. Set phone reminders if needed to establish consistent hydration habits.

If plain water feels unappealing, try adding fresh fruit slices, cucumber, or herbs like mint for flavor without added sugars. Herbal teas, both hot and iced, count toward your fluid intake. Avoid relying on caffeinated beverages for hydration since caffeine has mild diuretic effects.

Monitor your hydration status by checking urine color. Pale yellow indicates good hydration, while dark yellow suggests you need more fluids. Other signs of adequate hydration include moist lips, elastic skin, and consistent energy levels.

Maintain Physical Activity

Exercise might seem counterintuitive when feeling tired, but appropriate physical activity actually boosts energy levels. Movement increases blood flow, delivers oxygen throughout your body, and stimulates energy production in your cells.

Start with gentle activities if you’re experiencing significant fatigue. Walking for 10-20 minutes daily provides benefits without overwhelming your system. Gradually increase duration and intensity as your energy improves.

Morning exercise can energize you for the entire day. Even brief morning movement like stretching, yoga, or a short walk helps wake up your body and combat the sluggishness you might feel upon waking.

Listen to your body and adjust activity levels based on your energy. Some days you might feel capable of more vigorous exercise, while other days call for gentler movement. Both have value in supporting your energy and overall health.

Avoid exercising too close to bedtime, as this can interfere with sleep quality. Aim to complete workouts at least 3-4 hours before sleep to allow your body to wind down properly.

Improve Sleep Quality

Prioritizing good sleep becomes especially important when taking Wegovy. Quality sleep helps your body recover, supports metabolism, and combats daytime fatigue.

Establish a consistent sleep schedule by going to bed and waking at the same times daily, even on weekends. This regularity helps regulate your body’s internal clock and improves sleep quality over time.

Create a relaxing bedtime routine that signals your body it’s time to wind down. This might include reading, gentle stretching, meditation, or a warm bath. Avoid screens for at least an hour before bed, as blue light interferes with melatonin production.

Ensure your bedroom supports good sleep with a comfortable temperature (typically 65-68°F), complete darkness, and minimal noise. Consider blackout curtains, a white noise machine, or earplugs if environmental factors disrupt your sleep.

If digestive discomfort from Wegovy interferes with sleep, try taking your dose in the morning rather than evening. Eating your last meal several hours before bedtime also helps minimize nighttime digestive issues.

Manage Stress Levels

Does Wegovy make you tired, or is stress contributing to your fatigue? Often both factors play a role. Chronic stress depletes energy and can worsen fatigue experienced during medication adjustment.

Practice stress-reduction techniques like deep breathing, meditation, or progressive muscle relaxation. Even 5-10 minutes daily of these practices can significantly impact your energy levels and overall wellbeing.

Set realistic expectations for your weight loss journey. While Wegovy is highly effective, the process takes time. Putting pressure on yourself for rapid results creates stress that compounds fatigue and makes the journey less sustainable.

Connect with supportive people who understand your experience. Whether friends, family, or online communities, having support reduces stress and provides encouragement during challenging periods.

When to Consult Your Healthcare Provider

While fatigue is common during Wegovy treatment, certain situations warrant medical evaluation. Knowing when to seek guidance ensures you receive appropriate care and support.

Contact your healthcare provider if fatigue persists beyond 8-12 weeks without improvement. Ongoing tiredness might indicate issues requiring adjustment to your treatment plan or evaluation for other causes.

Severe fatigue that prevents you from performing daily activities or work responsibilities needs prompt attention. While some tiredness during adjustment is normal, debilitating exhaustion is not and may require intervention.

If fatigue accompanies other concerning symptoms, seek medical evaluation. Warning signs include persistent dizziness, extreme weakness, rapid heartbeat, chest pain, shortness of breath, or unusual bruising. These symptoms might indicate complications requiring immediate attention.

Worsening fatigue after initially improving suggests something beyond normal medication adjustment. This pattern might indicate developing nutritional deficiencies, thyroid issues, or other medical conditions unrelated to Wegovy.

Does Wegovy make you tired in ways that affect your mental health? Persistent fatigue can contribute to low mood or depression. If you notice changes in your mental wellbeing alongside physical tiredness, discuss these concerns with your healthcare provider.

Your provider might recommend blood tests to check for anemia, thyroid function, vitamin deficiencies, or other conditions causing fatigue. Identifying and addressing any underlying issues helps resolve persistent tiredness while safely continuing your weight loss treatment.

Experience persistent side effects? Get your medications safely and affordably through Better You Rx, a trusted prescription referral service.

Adjusting Your Wegovy Dose

Practical Strategies to Combat Fatigue

Sometimes fatigue relates to your current Wegovy dose. The medication follows a gradual dose escalation schedule, starting low and increasing slowly to minimize side effects while maximizing effectiveness.

If fatigue feels overwhelming at your current dose, discuss slowing the escalation schedule with your healthcare provider. Staying at a lower dose longer allows your body more time to adjust before increasing further.

Some people find their ideal maintenance dose is lower than the maximum. You don’t necessarily need to reach the highest dose to achieve significant weight loss. If a lower dose provides good results without excessive fatigue, maintaining that level might be your best option.

Never adjust your dose without medical guidance. Dose changes should only occur under healthcare provider supervision to ensure safety and effectiveness. Self-adjusting dosage can cause problems and reduce treatment success.

The standard Wegovy escalation schedule increases every four weeks, but individual needs vary. Some people benefit from slower progression, while others tolerate the standard schedule well. Your provider can personalize the approach based on your response and side effects.

Remember that each dose increase may trigger temporary fatigue similar to when you first started. This recurrence is normal and typically resolves within a few weeks as you adapt to the higher dose.

Living Well on Wegovy

Successfully managing fatigue while taking Wegovy allows you to enjoy the benefits of weight loss without excessive tiredness compromising your quality of life. Focus on the positive changes happening in your body. Weight loss improves numerous health markers, reduces disease risks, enhances mobility, and boosts confidence. These benefits often outweigh temporary adjustment challenges like fatigue.

Celebrate non-scale victories that indicate improving health. Better sleep quality, increased stamina, improved mood, better-fitting clothes, and enhanced physical capabilities all represent success beyond the number on the scale.

Build sustainable habits that support long-term success. The nutrition, hydration, activity, and sleep strategies that combat fatigue also promote lasting health improvements that extend beyond your time on Wegovy.

Be patient with your body during the adjustment process. Significant metabolic changes take time. Expecting immediate adaptation creates frustration, while accepting that adjustment happens gradually reduces stress and supports better outcomes.

Connect with others on similar journeys. Sharing experiences, strategies, and encouragement helps you navigate challenges like fatigue while staying motivated toward your goals.

Final Thoughts

Does Wegovy make you tired? For many people, yes, particularly during the initial weeks of treatment or after dose increases. This fatigue stems from multiple factors including reduced calorie intake, dehydration, nutritional changes, blood sugar fluctuations, and metabolic adjustments.

The encouraging news is that fatigue typically improves as your body adapts to the medication. Most people experience energy levels stabilizing within 4-8 weeks, with many reporting increased energy compared to before treatment once significant weight loss occurs.

Managing fatigue effectively involves addressing its multiple causes through proper nutrition, adequate hydration, appropriate physical activity, quality sleep, and stress management. These strategies work together to support your energy while allowing your body to adjust to Wegovy.

Persistent or severe fatigue warrants medical evaluation to rule out other causes and ensure your treatment plan remains appropriate. Your healthcare provider can offer personalized guidance based on your specific situation and response to the medication.

The temporary challenge of fatigue during adjustment represents a small hurdle on the path to significant, lasting weight loss and improved health. With proper strategies and realistic expectations, you can successfully navigate this side effect while achieving your weight loss goals on Wegovy.

Frequently Asked Questions

How Long Does Fatigue Last on Wegovy?

Fatigue on Wegovy typically lasts 4-8 weeks as your body adjusts to the medication and reduced calorie intake. Most people notice energy levels stabilizing within this timeframe. When you increase to a new dose, you might experience renewed tiredness for 2-4 weeks before adapting. Individual experiences vary based on overall health, nutrition quality, hydration status, and lifestyle factors. If fatigue persists beyond 12 weeks without improvement, consult your healthcare provider to evaluate potential underlying causes.

How to Beat Fatigue on Wegovy?

Beat fatigue on Wegovy by focusing on nutrition quality rather than quantity, eating protein at every meal, staying well hydrated throughout the day, and maintaining gentle physical activity. Get adequate sleep by establishing consistent sleep schedules and creating relaxing bedtime routines. Eat small frequent meals to stabilize blood sugar, choose complex carbohydrates over simple sugars, and include healthy fats for sustained energy. Monitor for signs of dehydration or nutritional deficiencies, and address them promptly with dietary adjustments or supplements as recommended by your healthcare provider.

What Is the Number One Side Effect of Wegovy?

The number one side effect of Wegovy is nausea, which affects many people starting the medication. Nausea typically occurs during the first few weeks of treatment or after dose increases. Other common side effects include diarrhea, constipation, vomiting, abdominal pain, and headache. Does Wegovy make you tired ranks among frequently reported experiences as well. Most side effects diminish as your body adjusts to the medication. Taking Wegovy with food, staying hydrated, and avoiding large fatty meals helps minimize digestive side effects.

Is Wegovy Hard on Your Body?

Wegovy is generally well tolerated when used as directed under medical supervision. The medication works naturally by mimicking a hormone your body already produces, making it relatively gentle compared to some weight loss approaches. However, your body does undergo adjustments as appetite decreases and metabolism changes. These adaptations can feel challenging initially but represent normal responses to weight loss rather than harm. Serious side effects are uncommon but can occur, which is why medical supervision throughout treatment is important. Most people complete Wegovy treatment successfully without significant problems.

Which Is Safer, Ozempic or Wegovy?

Ozempic and Wegovy contain the same active ingredient, Semaglutide, making their safety profiles essentially identical. Wegovy is approved specifically for weight management at higher doses, while Ozempic is approved for blood sugar control at lower doses. Both medications undergo rigorous testing and monitoring. Safety depends more on appropriate use, medical supervision, and individual health factors than on which brand name you use. Your healthcare provider determines which medication and dose is appropriate based on your specific health needs, goals, and medical history.

What Happens If You Eat Too Much While on Wegovy?

Eating too much while on Wegovy typically causes uncomfortable digestive symptoms including nausea, vomiting, abdominal pain, bloating, and feeling overly full. The medication slows stomach emptying, so large meals sit in your stomach longer causing discomfort. Does Wegovy make you tired after overeating? Yes, your body diverts energy to digestion, and the discomfort from overfilling your stomach can leave you feeling sluggish. Eating smaller, more frequent meals prevents these issues. The medication’s appetite-suppressing effects usually make overeating naturally less appealing, but occasionally eating more than planned typically doesn’t cause lasting problems beyond temporary discomfort.

Can I Drink Coffee on Wegovy?

You can drink coffee while taking Wegovy. The medication does not interact negatively with caffeine, and coffee consumption does not reduce Wegovy’s effectiveness. However, be mindful that coffee has mild diuretic effects that could contribute to dehydration if you’re not drinking enough water. Avoid adding excessive sugar or cream to your coffee, as these add calories without much nutritional value. Some people find that coffee on an empty stomach causes more nausea while taking Wegovy, so consider having coffee with or after a small meal. Moderate coffee consumption (2-3 cups daily) is generally fine for most people on Wegovy.

Why Do I Feel So Good on Wegovy?

Many people feel good on Wegovy for several reasons beyond just weight loss. The medication improves blood sugar stability, which creates more consistent energy and mood throughout the day. Weight loss itself boosts confidence, improves mobility, reduces joint pain, and enhances overall physical comfort. Better blood sugar control positively affects mood and mental clarity. Some people experience improved sleep quality as weight decreases. The sense of accomplishment from successfully managing weight creates psychological benefits. Does Wegovy make you tired initially? Yes, but once you adapt, many people report feeling significantly better physically and mentally compared to before treatment.

Meta description: 

Where to Inject Zepbound? A Step-by-Step Guide

Where to inject Zepbound determines how well this weight loss medication works for you. Tirzepatide, the active ingredient in Zepbound, must be injected into the fatty layer beneath your skin for proper absorption. You have three approved areas to choose from – the belly, thighs, and upper arms. Each spot has different benefits based on your body type and comfort level. The belly usually absorbs medication fastest, thighs allow easy self-administration, and upper arms work well with assistance. Getting the technique right means knowing how deep to inject, which spots to avoid, staying two inches away from your belly button, and picking the right time of day. Rotating between different sites prevents skin problems and keeps the medication working consistently. This guide walks you through site selection, proper injection angles, preparation steps, timing considerations, and answers common questions about making your treatment successful.

Where to Inject Zepbound?

Choosing Your Injection Location

Zepbound requires injection into subcutaneous fat, the layer between your skin and muscle. Three body areas provide the right amount of fatty tissue for effective medication delivery. Your belly offers the largest injection area and typically fastest absorption. The front and outer thighs give you easy access for self-injection without help. The back of your upper arms works when someone else can assist you.

Pick locations where you can pinch at least an inch of skin and fat. Thinner individuals might find certain areas work better than others based on their body composition. Women often have more subcutaneous fat in thighs and hips, while men typically carry more around the midsection.

Approved Injection Sites Comparison

Injection Site Advantages Considerations Best For
Abdomen Fastest absorption, largest area, easiest rotation Must stay 2 inches from belly button Most people, maximum effectiveness
Thighs Easy self-injection, good visibility, comfortable access Less fatty tissue in some individuals Self-administration, privacy needs
Upper Arms Keeps marks less visible, comfortable for some Requires assistance from another person Those with help available

Switch between different sites with each weekly injection. This rotation prevents the same spot from getting overused, which can cause lumps, skin changes, or reduced absorption over time. Keep a simple log of where you inject each week to maintain a consistent pattern.

Belly Injection Technique

Your abdomen provides the most versatile area for Zepbound injections. The region around your midsection contains abundant fatty tissue in most people, making it ideal for medication absorption. Target areas at least two inches from your belly button on all sides – this distance helps avoid the denser tissue directly around the navel.

Divide your belly into four sections mentally. The upper right quadrant sits between your belly button and right ribcage. The upper left mirrors this on the opposite side. Lower sections extend from your navel down toward your hip bones on each side. Avoid injecting along the centerline of your body where fat tissue is less consistent.

Key Belly Injection Points

  • Upper right abdomen – Between belly button and right ribcage, ideal for first weekly rotation
  • Upper left abdomen – Mirror area on left side, maintains absorption consistency
  • Lower right abdomen – Between belly button and right hip bone, comfortable seated position
  • Lower left abdomen – Completes rotation cycle, prevents tissue overuse
  • Side areas – Flanks on either side provide additional rotation spots when needed

Stay away from areas with scars, moles, stretch marks, or any skin abnormalities. These spots can affect how the medication absorbs into your system. Also avoid any areas that feel hard, tender, bruised, or swollen from previous injections.

Thigh Injection Method

The front and outer portions of your thighs work excellently for self-administered Zepbound injections. Sit down comfortably and identify the middle third of your thigh – the area halfway between your hip and knee provides the best fatty tissue for injection.

Focus on the top and outer surface of your thigh, avoiding the inner portion where major blood vessels run closer to the skin. The outer thigh typically has more subcutaneous fat and fewer nerve endings, reducing discomfort during injection.

When sitting, your thigh naturally flattens, making it easier to pinch the skin and create a proper injection site. You can see exactly what you’re doing throughout the entire process, which many people find reassuring, especially when starting treatment.

Thigh Injection Best Practices

  • Middle third positioning – Measure halfway between hip and knee for optimal fat layer
  • Outer surface focus – Avoid inner thigh to prevent hitting blood vessels
  • Sitting position – Allows better access and visibility during injection
  • Right-left alternation – Switch legs weekly to distribute injection impact
  • Vertical variation – Move injection spot up or down a few inches each time

Alternate between right and left thighs weekly, and vary the exact spot on each leg. Move up or down a few inches, or shift between the front and outer portions to distribute injections across different tissue areas.

Upper Arm Administration

The back of your upper arm contains adequate fatty tissue for Zepbound injection, though this site typically requires another person’s help. The target area runs from your shoulder down about halfway to your elbow, focusing on the fleshiest part of your triceps.

This location works best when you have a family member, friend, or caregiver who can administer your weekly injection. The person helping you should pinch the skin at the back of your arm to create a fold of tissue for proper subcutaneous delivery.

If using this site, make sure the person assisting you understands proper injection technique. They should insert the needle at a 90-degree angle into pinched skin, hold it steady during medication delivery, and withdraw it smoothly after the full dose administers.

Some people prefer this site because it keeps injection marks away from areas they see frequently. The upper arm also tends to have less sensitivity than the belly for some individuals, though this varies by person.

Looking for affordable access to your weight loss treatment? Visit Better You Rx and get your medication through our prescription referral service.

What is the Best Injection Site for Zepbound?

The belly ranks as the most effective injection site for most Zepbound users. This area typically provides the fastest and most consistent medication absorption due to rich blood supply and abundant fatty tissue. The large surface area gives you plenty of room to rotate injection spots while maintaining effectiveness.

Studies on similar medications show abdominal injections often produce more predictable blood level patterns compared to other sites. The consistent absorption helps maintain steady medication levels throughout the week between doses.

Why the Belly Works Best

  • Fastest absorption rate – Rich blood supply delivers medication efficiently into your system
  • Most fatty tissue – Provides ideal subcutaneous layer for proper injection depth
  • Largest rotation area – Multiple spots prevent tissue damage from repeated use
  • Consistent results – Predictable absorption maintains steady medication levels
  • Easy self-access – Visible and reachable without assistance from others
  • Proven effectiveness – Most studied site for similar weight loss medications

However, “best” depends on your individual circumstances. People with limited abdominal fat might achieve better results using their thighs. Those who experience discomfort with belly injections may prefer their thighs or arms. Some individuals rotate through all three sites to prevent any single area from developing tissue changes.

Listen to your body’s response. If you notice better appetite control or fewer side effects with a particular site, that location might work best for your physiology. Track which sites you use and any patterns you notice in how you feel.

Consider practical factors too. If you travel frequently, thigh injections offer more privacy. If you have assistance at home, upper arm injections might appeal to you. The most important factor is choosing a site you’ll use consistently every week.

Step-by-Step Injection Process

Remove your Zepbound KwikPen from the refrigerator 30 minutes before injection time. Cold medication can cause more discomfort, so allowing it to reach room temperature improves the experience. Never warm the pen artificially using hot water, microwaves, or direct sunlight.

Wash your hands thoroughly with soap and water, scrubbing for at least 20 seconds. Clean the chosen injection site with an alcohol wipe, moving in a circular motion from the center outward. Let your skin air dry completely – wet skin can cause stinging when the needle enters.

Complete Injection Steps

  1. Prepare the pen – Remove from refrigerator 30 minutes early, check medication clarity
  2. Wash hands – Scrub with soap and warm water for 20 seconds minimum
  3. Clean injection site – Use alcohol wipe in circular motion, allow to air dry
  4. Attach new needle – Remove cap, twist on fresh needle, never reuse old needles
  5. Dial dose – Set prescribed amount, double-check dose window for accuracy
  6. Pinch skin – Create 1-2 inch fold of skin and fat at injection site
  7. Insert needle – Hold pen at 90-degree angle, push needle all the way in
  8. Inject medication – Press button, hold firmly while counting to 10 slowly
  9. Withdraw needle – Keep button pressed, pull straight out from skin
  10. Dispose safely – Place used needle immediately into sharps container

Pinch a fold of skin at your chosen injection site. Hold the pen at a 90-degree angle against your skin. Press the injection button firmly and hold it down while counting to 10 slowly. This ensures the full dose delivers properly. You might feel slight pressure but shouldn’t experience sharp pain.

Keep the button pressed while withdrawing the needle straight out from your skin. Release the pinched skin and apply gentle pressure with a clean cotton ball if needed. Don’t rub the injection site, as this can affect medication absorption. Dispose of the used needle immediately in a sharps container.

Ready to save on your Zepbound prescription? Buy cheap Zepbound online from Canada through Better You Rx, a prescription referral service that connects you with licensed contracted pharmacy departments.

What is the Best Time to Inject Zepbound?

Managing Injection Site Reactions

Zepbound can be taken any time of day that fits your schedule, but consistency matters more than the specific hour. Pick a time you can stick with every week – the same day and roughly the same time helps maintain steady medication levels in your system.

Many people prefer evening injections. Taking Zepbound before bed means any temporary side effects like nausea might occur while sleeping, reducing their impact on daily activities. Evening administration also works well for people with busy morning routines.

Timing Options Throughout the Day

Time of Day Benefits Ideal For
Early Morning (6-8 AM) Easy to remember, monitor side effects during day People with structured routines, early risers
Midday (12-2 PM) Flexible for work breaks, neutral meal timing Those with lunch flexibility, shift workers
Evening (6-8 PM) Side effects occur during sleep, convenient after work Busy professionals, those experiencing nausea
Before Bed (9-11 PM) Maximum sleep during adjustment period People with evening routines, night schedules

Morning injections work better for others, especially those who want to monitor how they feel after dosing. Some individuals find taking Zepbound early helps them remember their weekly schedule more easily. Morning dosing also aligns well with people who eat their largest meals later in the day.

Consider your eating patterns when scheduling injections. While Zepbound doesn’t require food to work properly, some people experience less nausea when they haven’t eaten recently. Others prefer having something light in their stomach. Experiment to find what minimizes side effects for you.

Weekend dosing gives you flexibility if side effects occur. Taking your injection on Saturday or Sunday means you have time to rest if needed without missing work or other weekday obligations. However, weekday dosing works fine if it better matches your routine.

Mark your calendar or set phone reminders for your injection day. Missing doses or taking them irregularly can reduce effectiveness and may increase side effects when you resume treatment. If you miss a dose by more than four days, contact your prescribing medical professional for guidance.

Injection Depth and Angle

Zepbound must reach the subcutaneous layer – the fatty tissue between skin and muscle. Proper needle depth ensures medication absorbs correctly without going too shallow or too deep. The KwikPen needles are designed to reach this layer when inserted at a 90-degree angle.

Pinching your skin before injection helps ensure the needle reaches fat rather than muscle. Create a fold of skin and fat about one to two inches wide. This technique works especially well for people with less body fat or when using the thigh area.

Proper Injection Technique Elements

  • 90-degree angle – Needle perpendicular to skin surface ensures correct depth
  • Skin pinching – Creates 1-2 inch fold to lift fat layer away from muscle
  • Full needle insertion – Push needle completely in for proper subcutaneous delivery
  • Steady hand position – Hold pen firmly against skin throughout injection
  • 10-second hold – Count slowly to ensure complete dose administration
  • Straight withdrawal – Pull needle out same angle it went in to prevent tissue damage

Insert the needle straight down at a right angle to your skin surface. Angled injections might not deliver medication to the correct tissue depth. The entire needle should enter your skin – don’t be afraid to push it all the way in. The needles are designed specifically for subcutaneous injection depth.

People with more body fat might not need to pinch skin before injection. The fatty layer is thick enough that a straight injection at 90 degrees will reach the right depth. Those with less subcutaneous fat benefit more from the pinching technique.

Injecting too shallow puts medication just under the skin surface rather than in fatty tissue. This can cause lumps, reduced absorption, and increased local reactions. Injecting too deep reaches muscle, which absorbs medication faster than intended and may cause different side effects.

Areas to Avoid

Stay at least two inches away from your belly button in all directions. The navel area has different tissue density and may not absorb medication as consistently as surrounding areas. Injecting too close can also cause more discomfort due to nerve sensitivity.

Locations to Skip During Injection

  • Belly button zone – Two-inch radius around navel has inconsistent tissue density
  • Visible veins – Risk of hitting blood vessels increases pain and bruising
  • Scars and moles – Altered tissue composition affects medication absorption
  • Tattoos – Ink changes skin structure, may reduce absorption effectiveness
  • Previous injection lumps – Hard or tender areas need recovery time
  • Active skin conditions – Rashes, sunburn, or inflammation increase infection risk
  • Waistband areas – Clothing friction causes additional irritation
  • Inner thighs – Major blood vessels run close to surface
  • Directly over bones – Hip bones, kneecaps lack adequate fatty tissue
  • Recent injection sites – Wait 4 weeks before using same exact spot

Never inject into areas with visible veins, bruises, scars, moles, or tattoos. These features indicate tissue changes that could affect medication absorption. Scars contain different tissue composition that might not absorb Zepbound properly.

Avoid any spots that feel hard, lumpy, or tender from previous injections. These signs indicate tissue changes that need time to heal. Continuing to inject in affected areas can worsen the problem and reduce medication effectiveness.

Skip areas with active skin conditions like rashes, sunburn, inflammation, or infections. Wait until skin returns to normal before using affected areas for injection. Injecting into irritated skin increases infection risk and can be quite painful.

Don’t inject into the same exact spot more frequently than every four weeks. Your body needs time for tissue to fully recover between injections at the same location. Most people find rotating through enough different spots means they never use the exact same point twice.

The waistline where clothing bands sit often experiences irritation from rubbing. Choose injection sites slightly above or below where waistbands, belts, or tight clothing typically rest to avoid additional irritation.

Managing Injection Site Reactions

Minor redness, slight swelling, or mild tenderness at injection sites is common and usually resolves within a few days. These reactions indicate your body responding to the injection but don’t necessarily signal a problem. Apply a cool compress for 10-15 minutes if the area feels uncomfortable.

Bruising happens occasionally, especially if the needle hits a small blood vessel. This is harmless and will fade like any bruise. People taking blood thinners might bruise more easily. Applying gentle pressure immediately after injection can minimize bruising.

Common Reactions and Solutions

Reaction Type Appearance Duration Home Treatment
Redness Pink to red circle around injection 1-3 days Cool compress, avoid touching area
Mild swelling Slight raised bump at site 2-4 days Ice pack 10-15 minutes, elevation if possible
Bruising Purple, blue, or yellow discoloration 5-10 days Gentle pressure after injection, avoid blood thinners if possible
Small lumps Firm bump under skin 1-3 weeks Rotate sites, warm compress after 48 hours
Tenderness Soreness when touched 2-5 days Avoid pressure on area, over-the-counter pain relief if needed
Mild itching Slight tickling sensation 1-2 days Cool cloth, avoid scratching, antihistamine if severe

Small lumps under the skin sometimes develop at injection sites. These typically result from medication pooling in one spot or injecting too shallow. They usually disappear within a few weeks as your body absorbs the medication. Avoid injecting in the same area until the lump resolves completely.

Itching at injection sites can occur but shouldn’t be severe. Mild itching usually passes quickly. Avoid scratching, which can irritate skin further or introduce bacteria. If itching persists or spreads beyond the injection site, contact your medical professional.

Significant swelling, severe pain, warmth, or redness spreading beyond the immediate injection area might indicate infection. These symptoms are uncommon but require medical attention. Proper technique and clean injection practices prevent most infections.

Rotating injection sites remains the best prevention for skin reactions. Using the same area repeatedly causes cumulative irritation that worsens over time. Give each site adequate rest between injections by following a rotation schedule.

Order Zepbound through Better You Rx and receive your medication delivered directly to your home.

Storing Your Zepbound Pen

Step-by-Step Injection Process

Keep unopened Zepbound KwikPens refrigerated at 36-46°F until you’re ready to use them. Don’t freeze the pens – frozen medication becomes ineffective and must be discarded. Store pens in their original carton to protect from light.

Once you start using a pen, you can keep it refrigerated or at room temperature up to 86°F for up to 21 days. Many people prefer room temperature storage for the pen they’re currently using since this eliminates the need to warm it before each injection.

Storage Guidelines Summary

  • Unopened pens – Refrigerate at 36-46°F in original carton until first use
  • Opened pens – Refrigerate or keep at room temperature up to 86°F for 21 days maximum
  • Never freeze – Frozen medication loses effectiveness and must be thrown away
  • Protect from light – Keep in carton to prevent light damage to medication
  • Avoid extreme heat – Never leave in cars, direct sunlight, or near heat sources
  • Travel considerations – Use cooling case for trips without refrigeration access
  • Check appearance – Medication should stay clear and colorless throughout storage
  • Secure location – Store where children and pets cannot access pens

Never leave Zepbound in direct sunlight, near heat sources, or in very cold environments like car trunks during winter. Extreme temperatures damage the medication and reduce effectiveness. If a pen freezes or overheats, throw it away even if the medication looks normal.

Always check the medication appearance before each injection. Zepbound should look clear and colorless. Any cloudiness, color change, or floating particles means the pen should not be used. Contact your prescribing medical professional for a replacement.

Keep pens out of reach of children and pets. Store them in a secure location where others won’t accidentally use them. The medication is prescribed specifically for you and should never be shared with others.

Travel with Zepbound requires planning. Use a cooling case if you’ll be away from refrigeration for extended periods. Airport security allows medication and cooling packs through checkpoints – keep your prescription information handy when traveling.

Troubleshooting Common Issues

If medication doesn’t seem to flow during injection, the pen might be clogged or damaged. Check that you’ve dialed the correct dose and attached the needle properly. Sometimes air bubbles block flow – performing a test shot before injecting can clear these.

Experiencing pain during injection often means you’ve hit a nerve or muscle. If sharp pain occurs, withdraw the needle and choose a different spot at least an inch away. Pinching more skin before injection helps avoid going too deep.

Quick Solutions for Injection Problems

  • Pen won’t inject – Verify dose dial setting, check needle attachment, try test shot to clear air
  • Sharp pain during injection – Stop immediately, withdraw needle, choose new spot 1+ inches away
  • Medication leaking – Hold button full 10 seconds, ensure needle fully inserted before pressing
  • Bruising frequently – Apply pressure after injection, avoid areas with visible veins
  • Consistent lumps forming – Check injection depth, rotate sites more thoroughly, pinch skin properly
  • Needle won’t attach – Ensure pen cap fully removed, align needle straight, twist firmly
  • Dose window unclear – Clean pen exterior, check in good lighting, replace pen if damaged
  • Forgetting injection day – Set phone reminders, mark calendar, pair with weekly routine

Missing your weekly injection by a day or two won’t significantly impact results. Take your dose as soon as you remember if it’s within four days of your scheduled time. If more than four days have passed, skip the missed dose and resume your regular schedule the following week.

Increased side effects after changing injection sites can happen as your body adjusts to absorbing medication from a different area. These changes usually settle within a week or two. If side effects become severe or don’t improve, consult your medical professional.

Running out of injection sites while still seeing reactions at previous spots might mean you’re not rotating broadly enough. Each approved body area contains multiple injection zones – expand your rotation to include more variation within each site.

Difficulty self-injecting in certain areas suggests you might benefit from trying a different site or asking for assistance. Not everyone can comfortably reach all approved injection areas. Focus on locations you can access independently if help isn’t available.

Final Thoughts on Injection Success

Mastering proper Zepbound injection technique takes practice but becomes routine within a few weeks. The key elements include choosing appropriate sites with adequate fatty tissue, rotating locations to prevent tissue damage, and maintaining consistent timing with your weekly doses. Clean technique prevents infections while correct depth and angle ensure optimal medication absorption.

Your success with Zepbound depends on more than just where you inject. Combining proper administration with healthy lifestyle choices amplifies results. Stay hydrated, eat balanced meals, and incorporate physical activity that matches your fitness level. These habits work synergistically with the medication’s appetite-suppressing effects.

Track your injection sites using a simple calendar or notes app on your phone. This prevents accidentally using the same location too frequently. Note any patterns in side effects related to different injection sites so you can optimize your routine based on your body’s responses.

Frequently Asked Questions

How to Make Zepbound Most Effective?

Taking Zepbound at the same time each week maximizes effectiveness by maintaining consistent medication levels. Combine your injections with healthy eating habits and regular physical activity for best results. Proper injection technique matters too – rotate sites, inject at correct depth, and hold the pen in place for a full 10-second count. Staying well-hydrated helps your body process the medication efficiently. Track your progress with measurements and photos rather than focusing solely on scale weight. Give the medication adequate time to work – most people see significant results within 12-20 weeks. Never increase your dose without medical guidance, as your body needs time to adjust at each level.

Where Do Zepbound Injections Go?

Zepbound injections go into the subcutaneous fat layer beneath your skin but above muscle tissue. The medication specifically targets this fatty layer where it absorbs slowly into your bloodstream over several days. Three approved locations contain adequate subcutaneous fat – your belly, thighs, and upper arms. The belly provides the largest area and most consistent absorption. Thighs offer easy self-injection access. Upper arms work well with assistance. The medication does not go into veins, muscles, or directly under skin surface. Proper depth ensures the medication releases at the intended rate for week-long appetite control.

What Happens if You Inject Zepbound in the Wrong Place?

Injecting Zepbound into muscle rather than fat causes faster absorption than intended, potentially leading to increased side effects and reduced week-long effectiveness. The medication works best when it releases slowly from fatty tissue. Muscle injections bypass this controlled release. Injecting too shallow just under skin surface can cause lumps, pain, and poor absorption as the medication pools instead of dispersing properly. Using non-approved areas like buttocks hasn’t been studied and might not provide consistent results. Wrong placement won’t cause serious harm but reduces how well the medication works. If you accidentally inject in the wrong spot, continue your regular schedule the following week and use proper technique going forward.

Where is the Best Place to Inject for Weight Loss?

The belly typically provides the best results for weight loss with Zepbound because it offers consistent medication absorption and plenty of rotation options. The large abdominal area lets you vary injection spots extensively while maintaining effectiveness. However, individual body composition matters – people with less abdominal fat might achieve better results using their thighs where they have more subcutaneous tissue. Consistency matters more than the specific site you choose. Pick a location you can access easily and use reliably every week. Rotating through all three approved sites prevents tissue damage that could reduce absorption over time. The best injection site is ultimately the one you’ll use correctly and consistently.

Where is the Best Place to Take the Zepbound Shot for Weight Loss?

The front and outer thighs work excellently for weight loss injections because this area combines easy access with adequate fatty tissue in most people. Thigh injections let you see exactly what you’re doing throughout the process, which helps maintain proper technique. The belly offers even more surface area for rotation and typically fastest absorption, making it another top choice. Either location works effectively when you use correct injection technique. Choose based on your comfort level and body composition. Some people prefer alternating between belly and thighs to maximize rotation options. Avoid inner thighs, backs of legs, or any areas without sufficient pinchable fat. The key is using sites with enough subcutaneous tissue for proper medication delivery.

Should I Take Zepbound on an Empty Stomach?

Zepbound works regardless of whether you’ve eaten recently – food doesn’t affect how the medication absorbs from subcutaneous tissue. You can inject before meals, after eating, or any time that fits your schedule. However, some people experience less nausea when they haven’t eaten immediately before injection. Others find having light food in their stomach reduces discomfort. Pay attention to how you feel and adjust timing based on your response. The medication suppresses appetite for days after injection, so immediate food intake doesn’t impact its effectiveness. Choose injection timing based on your schedule and comfort rather than meal timing. Consistency with your weekly schedule matters far more than whether your stomach is empty or full.

What Happens if You Inject Tirzepatide Too Close to the Belly Button?

Injecting tirzepatide within two inches of your belly button can cause inconsistent absorption because tissue density differs in this area. The navel region contains denser connective tissue with less subcutaneous fat compared to surrounding areas. This can slow medication absorption or create uneven delivery. The area immediately around the belly button also has more nerve endings, making injections potentially more uncomfortable. You might experience more local reactions like redness or tenderness when injecting too close to the navel. While not dangerous, it reduces medication effectiveness and increases discomfort. Always measure at least two inches away from your belly button in all directions before injecting. This spacing ensures you’re using optimal fatty tissue for proper medication absorption and minimizes unwanted reactions.


Basal vs Bolus Insulin: Key Differences & Diabetes Management Guide

Basal vs bolus insulin represents two fundamental approaches to insulin therapy, each serving distinct purposes in diabetes management. Basal insulin provides steady, long-acting glucose control throughout the day and night, lasting 12-42 hours with minimal peak activity. Bolus insulin delivers rapid-acting coverage for meals and glucose spikes, beginning work within 15 minutes and lasting 3-4 hours.

Basal-bolus therapy combines both approaches, offering superior glucose control with lifestyle flexibility and reduced hypoglycemia risk compared to single insulin regimens. Common basal insulins include Glargine, Detemir, and Degludec, administered once or twice daily. Rapid-acting bolus options like Lispro, Aspart, and Glulisine require precise timing 15-30 minutes before meals. Both Type 1 and Type 2 diabetes patients can benefit from this approach, though implementation requires proper education in carbohydrate counting, insulin calculations, and blood glucose monitoring for optimal results.

What Is Basal Insulin?

Basal insulin represents the foundation of insulin therapy, providing steady, long-acting glucose control over extended periods. This type of insulin mimics the pancreas’s continuous, low-level insulin production that occurs between meals and during sleep. Basal insulin helps maintain stable blood glucose levels by suppressing glucose production from the liver and facilitating glucose uptake by muscles and other tissues.

Long-acting basal insulins are designed to provide consistent insulin levels for 12 to 24 hours or longer, depending on the specific formulation. These insulins have minimal peak activity, creating a relatively flat action profile that provides steady glucose control without significant fluctuations.

Common basal insulin types include Glargine (Lantus, Basaglar), Detemir (Levemir), and Degludec (Tresiba). Each has unique characteristics regarding duration of action, injection frequency, and individual response patterns. Glargine and Degludec typically require once-daily dosing, while Detemir may require twice-daily administration in some patients.

The primary advantage of basal insulin lies in its convenience and consistent action. Patients can administer basal insulin at the same time each day, providing reliable background glucose control that doesn’t require precise timing with meals. This consistency helps reduce glucose variability and provides a stable foundation for overall diabetes management.

Proper basal insulin dosing should maintain blood glucose levels within target ranges during fasting periods, between meals, and overnight. Healthcare providers typically adjust basal insulin doses based on fasting glucose levels and patterns observed through continuous glucose monitoring or frequent blood glucose testing.

Need basal vs bolus insulin? Order Humulin N KwikPen today for reliable intermediate-acting insulin therapy.

What Is Bolus Insulin?

Bolus insulin provides rapid-acting glucose control specifically designed to manage blood glucose spikes associated with meals and snacks. This insulin type mimics the pancreas’s natural response to food intake, delivering quick-acting insulin coverage that matches carbohydrate absorption and prevents post-meal hyperglycemia.

Rapid-acting bolus insulins begin working within 15 minutes of injection, reach peak activity within 1-2 hours, and continue working for 3-4 hours. This action profile closely matches the body’s natural insulin response to food consumption, making bolus insulin ideal for meal coverage.

Popular bolus insulin options include Lispro (Humalog, Admelog), Aspart (Novolog), and Glulisine (Apidra). These insulins offer similar onset and duration characteristics but may have subtle differences in peak timing and individual response patterns. Some patients may respond better to one formulation over others, requiring individualized selection based on glucose response patterns.

Running out of basal vs bolus insulin? Get Admelog Vials delivered for effective bolus coverage.

Bolus insulin dosing requires careful calculation based on carbohydrate intake, current blood glucose levels, and individual insulin sensitivity factors. The insulin-to-carbohydrate ratio determines how much bolus insulin is needed for each gram of carbohydrate consumed, while correction factors help address elevated glucose levels.

Timing bolus insulin administration is crucial for optimal effectiveness. Most rapid-acting insulins should be administered 15-30 minutes before eating to ensure insulin action aligns with glucose absorption from food. However, this timing may vary based on individual response patterns and current glucose levels.

Key Differences Between Basal and Bolus Insulin

Basal vs Bolus Insulin

The fundamental differences between basal and bolus insulin extend beyond their duration of action to encompass their intended purposes, dosing strategies, and roles in comprehensive diabetes management.

Duration and Onset Characteristics

Basal insulin provides extended coverage lasting 12-42 hours depending on the specific formulation, with minimal peak activity and steady action profiles. Bolus insulin offers rapid onset within 15 minutes, peaks within 1-2 hours, and completes its action within 3-4 hours.

Purpose and Function

Basal insulin addresses background glucose control, suppressing hepatic glucose production and maintaining stable glucose levels between meals and during sleep. Bolus insulin specifically targets meal-related glucose spikes and provides correction coverage for elevated glucose levels.

Dosing Flexibility

Basal insulin typically requires consistent daily timing but offers flexibility in exact administration time within a few hours. Bolus insulin demands precise timing relative to meals and requires dose adjustments based on carbohydrate intake and glucose levels.

Coverage Patterns

Basal insulin provides continuous, steady glucose management throughout the day and night. Bolus insulin delivers targeted coverage for specific events like meals, snacks, or glucose corrections, with distinct periods of activity and inactivity.

Basal-Bolus Insulin Therapy: A Comprehensive Approach

Basal-bolus insulin therapy combines long-acting basal insulin with rapid-acting bolus insulin to provide comprehensive glucose management that closely mimics natural pancreatic function. This approach offers superior glucose control compared to single insulin regimens and provides flexibility for varying meal patterns and lifestyle factors.

The basal-bolus regimen typically involves one or two daily basal insulin injections combined with bolus insulin doses before meals and for glucose corrections. This combination addresses both background glucose control and meal-related insulin needs, providing more physiologic insulin replacement.

Advantages of Basal-Bolus Therapy

Basal-bolus insulin therapy offers numerous advantages for diabetes management:

  • Improved Glucose Control: Better hemoglobin A1c levels and reduced glucose variability compared to conventional insulin regimens
  • Lifestyle Flexibility: Ability to adjust meal timing, carbohydrate intake, and daily schedules without compromising glucose control
  • Reduced Hypoglycemia Risk: More precise insulin dosing reduces the risk of low blood glucose episodes
  • Better Quality of Life: Increased freedom in food choices and daily activities while maintaining good glucose control
  • Customizable Approach: Ability to adjust both basal and bolus components independently based on individual needs
  • Physiologic Insulin Replacement: Closer mimicry of natural pancreatic insulin production patterns

Implementation Considerations

Successful basal-bolus therapy requires comprehensive diabetes education, including carbohydrate counting, insulin dosing calculations, and blood glucose monitoring techniques. Patients must understand insulin-to-carbohydrate ratios, correction factors, and timing principles for optimal results.

Healthcare providers typically start with conservative insulin doses and make gradual adjustments based on glucose patterns and patient response. Regular monitoring through blood glucose testing or continuous glucose monitoring helps optimize both basal and bolus insulin doses.

Timing and Administration Guidelines

Proper timing and administration techniques are crucial for maximizing insulin effectiveness and minimizing glucose variability in basal-bolus therapy.

Basal Insulin Timing

Basal insulin should be administered at consistent times daily to maintain steady insulin levels. Most long-acting insulins can be given at any convenient time, but consistency is important for predictable glucose control.

Morning administration of basal insulin may help address dawn phenomenon, the natural rise in glucose that occurs in early morning hours. Evening administration might be preferred for patients who experience overnight glucose elevations or prefer bedtime dosing routines.

Bolus Insulin Timing

Optimal bolus insulin timing depends on several factors including current glucose levels, meal composition, and individual insulin response patterns. Generally, rapid-acting bolus insulin should be administered 15-30 minutes before eating to ensure insulin action aligns with glucose absorption.

When blood glucose levels are elevated, bolus insulin may need to be given earlier to allow correction time before adding meal coverage. Conversely, if glucose levels are low or trending downward, bolus insulin timing may be delayed or administered closer to meal consumption.

For mixed meals containing protein, fat, and carbohydrates, some patients may benefit from split dosing or extended bolus delivery using insulin pumps. High-fat meals may require additional insulin coverage 2-4 hours after eating due to delayed glucose absorption.

Insulin Types and Formulations

Comparison Table: Basal vs Bolus Insulin Characteristics

Characteristic

Basal Insulin

Bolus Insulin

Onset Time

1-4 hours

15 minutes

Peak Activity

Minimal to no peak

1-2 hours

Duration

12-42 hours

3-4 hours

Purpose

Background glucose control

Meal coverage & corrections

Dosing Frequency

Once or twice daily

Before each meal

Timing Flexibility

Consistent daily timing

Must align with meals

Common Types

Glargine, Detemir, Degludec

Lispro, Aspart, Glulisine

Action Profile

Steady, flat curve

Rapid rise and fall

Long-Acting Basal Insulin Options

Glargine (Lantus, Basaglar) Glargine provides 24-hour basal coverage with minimal peak activity and consistent glucose control. This insulin can be administered once daily at any convenient time, offering flexibility for different schedules and preferences.

Detemir (Levemir) Detemir offers 12-20 hour duration and may require twice-daily dosing in some patients. This insulin has a slightly different action profile that may provide more predictable glucose control for certain individuals.

Degludec (Tresiba) Degludec provides ultra-long-acting coverage lasting up to 42 hours, offering exceptional dosing flexibility and consistent glucose control. This insulin’s extended duration allows for variable dosing times while maintaining effective basal coverage.

Rapid-Acting Bolus Insulin Options

Lispro (Humalog, Admelog) Lispro offers rapid onset and peak activity within 1-2 hours, making it ideal for pre-meal administration and glucose correction. This insulin provides reliable meal coverage with predictable action patterns.

Aspart (Novolog) Aspart provides similar characteristics to Lispro with rapid onset and short duration. Some patients may find subtle differences in peak timing or overall response patterns that influence individual preferences.

Glulisine (Apidra) Glulisine offers rapid-acting coverage with unique formulation characteristics that may provide faster onset in certain situations. This insulin may be preferred for patients requiring very rapid meal coverage.

Explore Admelog vial options for convenient bolus insulin administration.

Effective basal-bolus insulin therapy requires comprehensive glucose monitoring to optimize dosing and timing decisions. Modern glucose monitoring options include traditional blood glucose meters, continuous glucose monitors (CGMs), and flash glucose monitoring systems.

Monitoring Strategies

Fasting Glucose Patterns

  • Regular fasting glucose monitoring helps evaluate basal insulin effectiveness and provides insights into overnight glucose control
  • Consistent fasting glucose levels within target ranges indicate appropriate basal insulin dosing for stable background control
  • Patterns of high fasting glucose may suggest insufficient basal insulin coverage or dawn phenomenon requiring dosing adjustments
  • Low fasting glucose levels could indicate excessive basal insulin that needs reduction to prevent nocturnal hypoglycemia

Post-Meal Glucose Responses

  • Monitoring glucose levels 1-2 hours after meals helps assess bolus insulin effectiveness and meal coverage adequacy
  • Post-meal glucose spikes above target ranges may indicate inadequate bolus dosing or timing issues with insulin administration
  • Consistent post-meal glucose elevation suggests need for insulin-to-carbohydrate ratio adjustments or earlier bolus timing
  • Post-meal hypoglycemia indicates excessive bolus insulin requiring dose reduction or carbohydrate intake modifications

Overnight Glucose Patterns

  • Continuous glucose monitoring or periodic overnight glucose checks help identify nocturnal glucose patterns and trends
  • Dawn phenomenon patterns show early morning glucose elevation requiring basal insulin timing or dosing adjustments
  • Overnight hyperglycemia may indicate insufficient basal coverage or need for split basal insulin dosing
  • Nocturnal hypoglycemia requires careful basal insulin reduction and may necessitate bedtime snack considerations

Dose Adjustment Principles

Insulin dose adjustments should be made systematically, changing one component at a time to identify specific effects. Basal insulin adjustments typically involve 10-20% dose changes based on fasting glucose patterns over several days.

Bolus insulin adjustments may involve insulin-to-carbohydrate ratio changes or correction factor modifications based on post-meal glucose responses and overall glucose control patterns. Healthcare providers should guide major insulin adjustments while patients can make minor corrections based on established guidelines.

Special Populations and Considerations

Blood Glucose Monitoring and Adjustment

Type 1 Diabetes Management

Individuals with Type 1 diabetes require complete insulin replacement therapy, making basal-bolus regimens essential for survival and optimal glucose control. These patients typically need more intensive monitoring and frequent dose adjustments due to complete insulin deficiency.

Basal insulin usually represents 40-50% of total daily insulin needs in Type 1 diabetes, with bolus insulin providing the remaining coverage for meals and corrections. Individual ratios may vary based on age, activity level, and metabolic factors.

Type 2 Diabetes Progression

Type 2 diabetes patients may progress from oral medications to basal insulin alone, eventually requiring basal-bolus therapy as beta cell function declines. This progression allows for gradual introduction of insulin therapy components while maintaining glucose control.

Starting with basal insulin alone allows patients to adapt to insulin injections before adding mealtime bolus coverage. This stepwise approach often improves treatment acceptance and long-term adherence to insulin therapy.

Pregnancy and Insulin Therapy

Pregnancy significantly affects insulin requirements due to hormonal changes and increased metabolic demands. Basal-bolus therapy often provides the flexibility needed to manage changing glucose patterns throughout pregnancy while maintaining tight glucose control for maternal and fetal health.

Insulin requirements typically increase during pregnancy, particularly in the second and third trimesters. More frequent glucose monitoring and insulin adjustments are necessary to maintain optimal glucose control during this critical period.

Low on basal vs bolus insulin? Get Novolog FlexPens fast delivery for convenient rapid-acting insulin delivery.

Lifestyle Integration and Patient Education

Successfully implementing basal-bolus insulin therapy requires comprehensive patient education and lifestyle integration strategies. Patients must understand carbohydrate counting, insulin dosing calculations, injection techniques, and glucose monitoring procedures.

Carbohydrate Counting Skills

Accurate carbohydrate counting forms the foundation of effective bolus insulin dosing. Patients need education about carbohydrate content in various foods, portion size estimation, and label reading skills for processed foods.

Practice with carbohydrate counting using real meals and snacks helps develop accuracy and confidence in insulin dosing decisions. Mobile apps and online resources can provide additional support for carbohydrate counting skills development.

Injection Technique and Site Rotation

Proper injection technique ensures consistent insulin absorption and reduces complications like lipodystrophy. Patients should learn about injection site rotation, needle selection, and injection depth for optimal insulin delivery.

Regular assessment of injection sites helps identify developing lipodystrophy or other complications that could affect insulin absorption. Healthcare providers should review injection techniques periodically and provide corrective guidance as needed.

Exercise and Activity Considerations

Physical activity significantly affects glucose levels and insulin requirements. Patients need strategies for adjusting insulin doses around exercise, understanding activity timing effects, and managing exercise-related glucose changes.

Different types of exercise may have varying effects on glucose levels, requiring individualized approaches to insulin and carbohydrate adjustments. Continuous glucose monitoring can help identify patterns and optimize activity-related management strategies.

Technology Integration and Advanced Management

Key Differences Between Basal and Bolus Insulin

Modern diabetes technology offers numerous tools to enhance basal-bolus insulin therapy effectiveness and convenience. Insulin pumps, continuous glucose monitors, and smartphone applications provide advanced management capabilities.

Insulin Pump Therapy

Insulin pumps deliver both basal and bolus insulin through continuous subcutaneous insulin infusion, offering precise dosing and programmable delivery patterns. Pumps can provide variable basal rates throughout the day and sophisticated bolus delivery options for complex meal management.

Pump therapy may be particularly beneficial for patients with irregular schedules, frequent hypoglycemia, or difficult-to-manage glucose patterns. However, pumps require intensive education and ongoing support for safe and effective use.

Continuous Glucose Monitoring

CGMs provide real-time glucose readings and trends, enabling more proactive insulin dosing decisions and improved glucose control. Integration with insulin delivery systems creates automated insulin delivery systems that adjust insulin based on glucose patterns.

CGM data helps identify glucose patterns that may not be apparent through traditional blood glucose monitoring, enabling more precise insulin adjustments and improved overall management.

Troubleshooting Common Challenges

Basal-bolus insulin therapy may present various challenges requiring problem-solving approaches and management adjustments.

Managing Glucose Variability

High glucose variability may indicate timing issues, incorrect insulin-to-carbohydrate ratios, or inadequate basal insulin coverage. Systematic evaluation of glucose patterns helps identify specific causes and appropriate interventions.

Hypoglycemia Prevention

Recurrent hypoglycemia may result from excessive insulin dosing, timing mismatches, or inadequate carbohydrate coverage. Hypoglycemia unawareness requires particular attention and may necessitate relaxed glucose targets temporarily.

Dawn Phenomenon Management

Dawn phenomenon causes early morning glucose elevation due to natural hormone fluctuations. Management strategies include adjusting basal insulin timing, using different basal insulin formulations, or adding morning correction doses.

Alternative Insulin Options and Adjunct Therapies

GLP-1 Receptor Agonists

GLP-1 receptor agonists like Lixisenatide can complement basal-bolus insulin therapy by improving post-meal glucose control and potentially reducing insulin requirements. These medications may help optimize glucose control while minimizing weight gain often associated with insulin therapy.

Inhaled Insulin Options

Inhaled insulin provides rapid-acting mealtime coverage without injections, offering an alternative bolus insulin delivery method for patients with injection concerns or difficulties.

Key Takeaways for Basal vs Bolus Insulin Management

Effective diabetes management through basal-bolus insulin therapy requires understanding the distinct roles of each insulin type and their proper implementation. Basal insulin provides the foundation for glucose control with steady, long-acting coverage, while bolus insulin addresses specific meal-related needs and glucose corrections. The combination offers superior glucose management compared to single insulin regimens, providing lifestyle flexibility and improved quality of life for both Type 1 and Type 2 diabetes patients.

Success with basal-bolus therapy depends on proper education, including carbohydrate counting skills, insulin dosing calculations, and consistent blood glucose monitoring. Working closely with healthcare providers ensures optimal insulin adjustments and helps address challenges that may arise during treatment. Modern technology integration and continuous learning about diabetes management techniques contribute to better outcomes and enhanced daily diabetes care.

Frequently Asked Questions

What’s the Difference Between Basal and Bolus Insulin?

Basal insulin provides long-acting, steady glucose control throughout the day and night, lasting 12-24 hours or longer with minimal peak activity. It mimics the pancreas’s continuous background insulin production and helps maintain stable glucose levels between meals and during sleep. Bolus insulin offers rapid-acting coverage for meals and glucose corrections, beginning work within 15 minutes, peaking in 1-2 hours, and lasting 3-4 hours. The key difference lies in their purpose: basal insulin provides foundation glucose control while bolus insulin addresses specific glucose spikes from food or elevated glucose levels.

When to Give Basal Bolus Insulin?

Basal insulin should be administered at consistent times daily, typically once or twice per day depending on the specific formulation. Most long-acting basal insulins can be given at any convenient time but require consistency for predictable glucose control. Bolus insulin should be given before meals, typically 15-30 minutes prior to eating to allow insulin action to align with glucose absorption from food. Additional bolus doses may be needed for snacks or to correct elevated glucose levels. The timing may need adjustment based on current glucose levels and meal composition.

What Does Bolus Insulin Mean?

Bolus insulin refers to rapid-acting insulin administered to cover meals and correct elevated blood glucose levels. The term “bolus” means a single, discrete dose given at specific times rather than continuous administration. Bolus insulin mimics the pancreas’s natural response to food intake, providing quick-acting insulin coverage that prevents post-meal hyperglycemia. Common bolus insulins include Lispro, Aspart, and Glulisine, all designed to work quickly and complete their action within a few hours to match the body’s natural meal-related insulin needs.

What Are the Advantages of Basal Bolus Insulin?

Basal-bolus insulin therapy offers superior glucose control compared to conventional insulin regimens, with better hemoglobin A1c levels and reduced glucose variability. This approach provides lifestyle flexibility, allowing patients to adjust meal timing and carbohydrate intake while maintaining good glucose control. The risk of hypoglycemia is reduced through more precise insulin dosing, and patients experience improved quality of life with increased freedom in food choices and daily activities. The therapy provides physiologic insulin replacement that closely mimics natural pancreatic function, and both basal and bolus components can be adjusted independently based on individual needs.

What is the Best Time to Inject Bolus?

The optimal time to inject bolus insulin is typically 15-30 minutes before eating to ensure insulin action aligns with glucose absorption from food. However, timing may vary based on current glucose levels, with earlier administration needed when glucose is elevated and later timing appropriate when glucose is low or trending downward. Individual response patterns may require timing adjustments, and different meal compositions may affect optimal timing. For high-fat meals, additional coverage may be needed 2-4 hours after eating due to delayed glucose absorption.

Is Bolus Insulin Only for Type 1 Diabetes?

Bolus insulin is not exclusively for Type 1 diabetes. While all individuals with Type 1 diabetes require bolus insulin as part of complete insulin replacement therapy, many people with Type 2 diabetes also benefit from bolus insulin coverage. Type 2 diabetes patients may progress from oral medications to basal insulin alone, eventually requiring basal-bolus therapy as beta cell function declines over time. Bolus insulin helps Type 2 diabetes patients achieve better glucose control, particularly around meals, and may be recommended when basal insulin alone is insufficient to maintain target glucose levels.

What is the Purpose of Basal Insulin?

The primary purpose of basal insulin is to provide steady, long-acting glucose control that mimics the pancreas’s continuous background insulin production. Basal insulin suppresses hepatic glucose production, which naturally occurs between meals and during sleep, and facilitates glucose uptake by muscles and other tissues throughout the day and night. This foundation glucose control helps maintain stable blood glucose levels during fasting periods, reduces dawn phenomenon effects, and provides consistent insulin coverage that doesn’t require precise meal timing. Basal insulin forms the cornerstone of comprehensive diabetes management by addressing background glucose control needs.

Lispro vs Regular Insulin – Understanding the Key Differences for Better Diabetes Management

Lispro vs regular insulin represents two distinct categories of insulin therapy, each designed to address specific blood sugar control needs. Lispro insulin, a rapid-acting synthetic insulin analog, begins working within 15 minutes and peaks in 1-2 hours, making it ideal for mealtime glucose control. Regular insulin, also known as short-acting insulin, takes 30 minutes to start working and peaks in 2-3 hours, providing longer-lasting coverage. The choice between these insulin types depends on your lifestyle, eating patterns, blood sugar targets, and overall diabetes management plan. Understanding their onset times, peak effects, duration, and practical applications helps you work with your healthcare provider to optimize your treatment approach and achieve better glycemic control.

How Lispro vs Regular Insulin Works in Your Body

Lispro insulin mimics the natural insulin response your pancreas would produce after eating. This rapid-acting insulin analog has been modified at the molecular level to absorb more quickly from injection sites into your bloodstream. When understanding Lispro vs Regular Insulin differences, it’s important to note that when you inject Lispro, it begins lowering blood glucose within 10-15 minutes, reaches peak effectiveness in 1-2 hours, and continues working for 3-5 hours total.

The molecular structure of Lispro has been engineered by reversing the amino acids proline and lysine at positions 28 and 29 of the B-chain. This modification prevents the insulin molecules from forming hexamers, allowing them to disperse more rapidly from the injection site. The monomeric and dimeric forms of Lispro are absorbed much faster through capillary walls, resulting in its characteristic rapid onset of action.

The fast onset makes Lispro particularly effective for controlling post-meal blood sugar spikes. Its quick action allows for flexible meal timing, as you can inject just before eating or even immediately after meals if needed. This flexibility proves especially valuable for people with unpredictable schedules or varying appetite patterns. The pharmacokinetic profile closely matches the physiological insulin response to meals, making it an excellent choice for mimicking natural pancreatic function.

Lispro’s bioavailability remains consistent across different injection sites, though absorption may vary slightly between subcutaneous tissue locations. The abdomen typically provides the fastest absorption, followed by the arms, thighs, and buttocks. Factors such as injection depth, tissue temperature, and local blood flow can influence absorption rates, but these variations are generally minimal with rapid-acting formulations.

Key Characteristics of Lispro Insulin:

  • Onset time – 10-15 minutes
  • Peak action – 1-2 hours
  • Duration – 3-5 hours
  • Best used for mealtime coverage
  • Allows flexible dosing timing
  • Bioavailability – 55-77% compared to regular insulin
  • Temperature stability – Maintains potency at room temperature for 28 days

Ready to experience better mealtime glucose control? Buy Humalog cartridge insulin Lispro from Canada and enjoy significant savings on your diabetes medications.

Understanding Regular Insulin and Its Mechanism

Making the Right Choice for Your Lifestyle

Regular insulin, also called short-acting or soluble insulin, represents the traditional form of mealtime insulin that has been used for decades. This clear, colorless solution contains human insulin that works more slowly than rapid-acting analogs like Lispro. When comparing Lispro vs Regular Insulin characteristics, Regular insulin requires 30 minutes to begin lowering blood glucose, reaches peak effectiveness in 2-3 hours, and continues working for 5-8 hours.

Regular insulin contains recombinant human insulin produced through genetic engineering in bacterial or yeast cells. The amino acid sequence is identical to naturally occurring human insulin, making it biocompatible and reducing the risk of immune reactions. Unlike rapid-acting analogs, regular insulin maintains its hexameric structure in solution, which requires time to dissociate into monomers and dimers before absorption can occur effectively.

The longer onset time means you need to inject regular insulin 30 minutes before eating to properly cover your meal. This timing requirement can make meal planning more rigid compared to rapid-acting options. However, the extended duration of action can provide better coverage for meals with slower-digesting carbohydrates or larger portions. The sustained release pattern makes regular insulin particularly effective for covering complex meals that include proteins, fats, and fiber that slow gastric emptying.

Regular insulin’s absorption characteristics remain relatively consistent across injection sites, though individual factors such as tissue thickness, blood flow, and temperature can influence uptake rates. The subcutaneous depot formed after injection gradually releases insulin into systemic circulation, creating the characteristic delayed but sustained action profile.

Regular Insulin Characteristics:

  • Onset time – 30 minutes
  • Peak action – 2-3 hours
  • Duration – 5-8 hours
  • Requires pre-meal injection timing
  • Longer-lasting glucose coverage
  • Bioavailability – 63-89% depending on injection site
  • Storage requirements – Stable at refrigeration temperatures
  • Zinc content – Contains zinc for crystallization and stability
Feature Regular Insulin Lispro Insulin
Onset Time 30 minutes 10-15 minutes
Peak Effect 2-3 hours 1-2 hours
Duration 5-8 hours 3-5 hours
Meal Timing 30 min before Just before/after
Flexibility Less flexible More flexible
Structure Hexameric Monomeric/Dimeric
Manufacturing Standard recombinant Analog technology

Speed and Timing Differences Between Lispro vs Regular Insulin

The most significant difference between Lispro vs regular insulin lies in their speed of action and timing requirements. These differences directly impact how you manage your daily diabetes care routine and meal planning strategies. Understanding these distinctions helps optimize your treatment approach and achieve better glycemic outcomes.

Lispro’s rapid onset means you can inject and eat within minutes, making it ideal for spontaneous meals or when you’re unsure about portion sizes. You can even wait to see how much you actually eat before determining your final dose. This flexibility reduces the risk of hypoglycemia from taking insulin for food you don’t end up consuming. The ability to dose post-meal is particularly valuable for children, elderly patients, or anyone with variable appetite patterns.

Regular insulin’s 30-minute delay requires more planning but offers advantages for certain situations. The key distinction in Lispro vs Regular Insulin usage is that regular insulin’s longer duration provides better coverage for high-fat meals that slow gastric emptying, extended social meals, or grazing-style eating patterns. The sustained action can also help bridge between meals when used in combination with longer-acting insulins.

The extended action profile of regular insulin can be beneficial for managing dawn phenomenon, where blood glucose naturally rises in the early morning hours. When used as part of conventional insulin therapy, regular insulin’s longer duration helps maintain glucose control between meals without requiring additional intermediate-acting insulin doses.

Timing Considerations:

  • Lispro – Inject 0-15 minutes before eating
  • Regular – Inject 30 minutes before eating
  • Flexibility – Lispro allows post-meal dosing adjustments
  • Duration – Regular insulin covers longer eating windows
  • Exercise considerations – Lispro provides better control during physical activity
  • Stress response – Regular insulin may offer more stable coverage during illness
  • Travel adjustments – Lispro adapts better to changing meal schedules

Discover the convenience of rapid-acting insulin. Browse our complete insulin Lispro collection to find the right option for your lifestyle.

Effectiveness Comparison for Blood Sugar Control

Both Lispro and regular insulin effectively lower blood glucose, but their different action profiles make them suitable for different glycemic control strategies. When evaluating Lispro vs Regular Insulin effectiveness, clinical studies show that rapid-acting insulins like Lispro typically provide better post-meal glucose control with lower risk of late hypoglycemia compared to regular insulin.

Lispro’s quick onset and peak action align more closely with natural insulin response patterns, leading to improved HbA1c levels in many patients. The reduced risk of hypoglycemia occurs because Lispro clears from your system faster, decreasing the chance of overlapping insulin action between meals. Research demonstrates that patients using rapid-acting insulins experience fewer severe hypoglycemic episodes while achieving similar or better overall glucose control.

The improved post-prandial glucose control with Lispro translates to better management of glucose excursions that contribute to diabetic complications. Studies show reductions in post-meal glucose spikes of 20-30% compared to regular insulin when proper timing is maintained. This improvement in glucose variability correlates with reduced oxidative stress and lower cardiovascular risk markers.

Regular insulin may provide superior control for individuals who experience delayed gastric emptying, eat high-fiber meals, or have gastroparesis. Its longer action profile can better match slower carbohydrate absorption patterns in these situations. The extended coverage is particularly valuable for patients with autonomic neuropathy affecting digestion or those taking medications that slow gastric motility.

Patient satisfaction scores consistently favor rapid-acting insulins due to improved lifestyle flexibility and reduced meal planning constraints. Quality of life measures show significant improvements in treatment satisfaction, dietary freedom, and overall diabetes management burden when patients switch from regular to rapid-acting insulin formulations.

Long-term cardiovascular outcomes data suggests similar benefits between insulin types when used appropriately, though the improved glucose control achieved with rapid-acting insulins may translate to reduced microvascular complication risk over time. The key factor remains consistent use and appropriate dosing rather than insulin type selection alone.

Effectiveness Factors:

  • Post-meal control – Lispro generally superior
  • HbA1c improvement – Lispro shows slight advantage
  • Hypoglycemia risk – Lower with Lispro
  • Special circumstances – Regular insulin may be preferred
  • Glucose variability – Better control with rapid-acting formulations
  • Patient satisfaction – Higher ratings for flexibility with Lispro
  • Quality of life – Improved dietary freedom with rapid-acting insulins

Side Effects and Safety Profiles

Lispro vs Regular Insulin

Both insulin types share fundamental safety profiles since they perform the same basic function of lowering blood glucose. However, their different timing characteristics create distinct patterns of potential side effects and adverse reactions.

Lispro Insulin Side Effects:

  • Common: Hypoglycemia, injection site reactions (pain, redness, swelling), weight gain, lipodystrophy
  • Less Common: Allergic reactions (rash, itching, difficulty breathing), hypokalemia (low potassium), peripheral edema
  • Rare: Severe hypoglycemia, anaphylaxis, insulin antibody formation
  • Injection Site: Localized fat loss or thickening, bruising, bleeding
  • Metabolic: Fluid retention, electrolyte imbalances

Regular Insulin Side Effects:

  • Common: Hypoglycemia, injection site reactions, weight gain, lipodystrophy
  • Less Common: Allergic skin reactions, hypokalemia, sodium retention, blurred vision
  • Rare: Severe allergic reactions, insulin resistance, lipoatrophy
  • Gastrointestinal: Nausea (especially during hypoglycemia), abdominal discomfort
  • Neurological: Headache, dizziness, confusion during low blood sugar episodes

Timing-Related Safety Differences:

Lispro’s rapid action increases the risk of immediate post-injection hypoglycemia if you delay eating or consume less food than expected. The quick onset means symptoms can develop suddenly within 15-30 minutes of injection. However, the shorter duration reduces late-onset hypoglycemia risk, particularly overnight or between meals.

Regular insulin’s delayed onset can lead to hypoglycemia 2-4 hours after injection, especially if meals are delayed or smaller than anticipated. The longer duration increases the risk of insulin stacking when doses are given too close together, potentially causing prolonged hypoglycemic episodes.

Critical Safety Considerations:

  • Monitor blood glucose more frequently when starting either insulin
  • Recognize early hypoglycemia symptoms (sweating, shakiness, rapid heartbeat)
  • Adjust doses gradually based on response patterns and blood sugar logs
  • Maintain consistent carbohydrate intake during initial therapy
  • Rotate injection sites systematically to prevent lipodystrophy
  • Keep fast-acting carbohydrates readily available for hypoglycemia treatment
  • Report persistent injection site reactions or unusual symptoms to healthcare providers

Accessibility Factors to Consider:

  • Global availability – Regular insulin more universally accessible
  • Generic availability – Regular insulin has more generic alternatives
  • Delivery options – Both available in multiple formats
  • Provider familiarity – Regular insulin has longer prescribing history
  • Supply chain stability – Both have established distribution networks

Formulation Options:

  • Vials – Traditional option for both insulin types
  • Pre-filled pens – Convenient for both Lispro and regular insulin
  • Cartridges – Refillable pen systems available
  • Concentrated formulations – Higher strength options when needed

Humalog Junior KwikPen is $112.8 in BetterYouRx, providing an accessible option for those seeking reliable Lispro insulin therapy. Access affordable diabetes medication through reliable Canadian sources. Order Humalog Junior KwikPen from Canada and enjoy convenient delivery options.

Making the Right Choice for Your LifestyleEffectiveness Comparison for Blood Sugar Control


Selecting between Lispro vs regular insulin depends on multiple personal factors including your daily routine, eating habits, glucose targets, and lifestyle preferences. Neither insulin type is universally superior – the best choice is the one that fits your specific needs and helps you achieve optimal glucose control while maintaining quality of life and treatment adherence.

The decision process should involve careful consideration of your individual circumstances, medical history, and treatment goals. Healthcare providers typically evaluate factors such as current glucose control patterns, hypoglycemia frequency, meal timing consistency, physical activity levels, and personal preferences when recommending insulin therapy options.

Choose Lispro If You:

  • Have unpredictable meal timing due to work or lifestyle demands
  • Prefer flexibility in dosing and meal planning
  • Experience frequent hypoglycemia with regular insulin regimens
  • Want to dose after seeing portion sizes or appetite levels
  • Have gastroparesis or delayed gastric emptying conditions
  • Lead an active lifestyle with varying schedules and activities
  • Struggle with pre-meal timing requirements of regular insulin
  • Experience significant post-meal glucose spikes despite proper timing
  • Travel frequently or have irregular work schedules

Choose Regular Insulin If You:

  • Maintain consistent meal timing and structured daily routines
  • Have budget constraints that favor more affordable insulin options
  • Experience good glucose control with your current regular insulin regimen
  • Eat larger or high-fat meals frequently that require extended coverage
  • Have slower gastric emptying that benefits from longer insulin action
  • Prefer established, well-studied treatments with decades of safety data
  • Live in areas where rapid-acting analogs have limited availability
  • Experience adequate glucose control without flexibility requirements

Your healthcare provider can help evaluate these factors and may recommend starting with one type while keeping the option to switch based on your response and lifestyle changes. Many people find success with either option when properly dosed and timed according to their specific needs. The transition between insulin types should always be done under medical supervision with appropriate glucose monitoring adjustments.

Optimizing Your Insulin Therapy Choice

The decision between Lispro vs regular insulin centers on matching insulin action to your individual needs. Lispro offers rapid onset and flexible timing, ideal for variable lifestyles and improved post-meal control. Regular insulin provides longer duration and established protocols, suitable for structured routines and extended coverage needs. Both effectively lower blood glucose when used appropriately. Success depends on consistent use, proper timing, and regular monitoring. Healthcare provider guidance ensures optimal selection based on your lifestyle, medical circumstances, and glucose targets. Individual responses vary, making personalized approaches essential. Treatment satisfaction improves when insulin choice aligns with daily routines and preferences. Regular reassessment ensures continued effectiveness as circumstances change over time.

Frequently Asked Questions

Is Lispro Safe in Pregnancy?

Lispro insulin is generally considered safe during pregnancy and is often preferred over regular insulin for pregnant women with diabetes. The rapid-acting nature helps control post-meal glucose spikes that can be particularly harmful during pregnancy. Always consult your healthcare provider before making any insulin changes during pregnancy, as individual circumstances vary significantly.

Can Humalog Cause Diarrhea?

Diarrhea is not a common direct side effect of Humalog (insulin Lispro), but it can occur in some individuals. More often, digestive issues result from blood sugar fluctuations rather than the insulin itself. If you experience persistent diarrhea after starting Humalog, discuss this with your healthcare provider to rule out other causes.

What Kind of Insulin Is Lispro?

Lispro is a rapid-acting insulin analog, meaning it’s a modified form of human insulin designed to work faster than natural insulin. It’s created by reversing two amino acids in the insulin molecule, which prevents it from clumping together and allows for quicker absorption. Lispro is classified as mealtime or bolus insulin, used primarily to control blood sugar spikes after eating.

What Are the Advantages of Lispro Insulin?

Lispro insulin offers several key advantages including rapid onset within 10-15 minutes, allowing flexible meal timing and the ability to dose just before or even after eating. It provides better post-meal glucose control with reduced risk of late hypoglycemia compared to regular insulin. The shorter duration of action (3-5 hours) means less risk of insulin stacking and allows for more precise dose timing.

What Is the Difference Between Lispro and Regular Insulin?

The primary differences lie in onset time, peak action, and duration. Lispro begins working in 10-15 minutes, peaks in 1-2 hours, and lasts 3-5 hours, while regular insulin starts in 30 minutes, peaks in 2-3 hours, and continues for 5-8 hours. This means Lispro requires injection closer to meal time but offers more flexibility, while regular insulin needs 30-minute pre-meal timing but provides longer coverage.

Who Should Not Take Insulin Lispro?

People with known hypersensitivity or allergy to Lispro or any of its components should not use this insulin. Those experiencing hypoglycemia should not inject additional Lispro until blood sugar levels normalize. Individuals with severe kidney or liver disease may need dose adjustments or alternative treatments.

Which Insulin Is Better, Humalog or Lispro?

Humalog is actually a brand name for insulin Lispro, so they are the same medication. Generic insulin Lispro and brand-name Humalog contain the same active ingredient and work identically in your body. The choice between them typically comes down to availability and personal preference for delivery devices.


Insulin Dosing Weight-Based – Guide for Safe Diabetes Management

Weight-based insulin dosing represents a fundamental approach to diabetes management that helps healthcare providers determine appropriate insulin doses based on a patient’s body weight. This comprehensive guide explores the essential principles of calculating weight-based insulin doses, understanding different insulin types, and implementing safe dosing strategies for effective blood sugar control.

The weight-based dosing method provides a starting point for insulin therapy by establishing baseline requirements typically ranging from 0.4 to 1.0 units per kilogram of body weight daily. This approach considers individual factors such as insulin sensitivity, activity levels, and disease progression while offering healthcare providers a systematic framework for initiating and adjusting insulin therapy.

Understanding Weight-Based Insulin Calculations

Weight-based insulin dosing serves as the foundation for establishing appropriate insulin therapy in diabetes management. The calculation process begins with determining total daily insulin requirements based on body weight, typically measured in kilograms. Healthcare providers use established formulas that account for different patient populations and insulin sensitivity levels.

The basic calculation starts with multiplying body weight in kilograms by a predetermined factor ranging from 0.4 to 1.0 units per kilogram. Newly diagnosed patients with type 1 diabetes often begin with lower doses around 0.4-0.6 units per kilogram, while patients with insulin resistance or type 2 diabetes may require higher doses approaching 0.8-1.0 units per kilogram or more.

Patient factors significantly influence these calculations including age, physical activity level, eating patterns, and concurrent medications. Younger patients typically demonstrate higher insulin sensitivity requiring lower doses per kilogram, while older adults or those with additional health conditions may need adjusted calculations. The presence of other medications, particularly corticosteroids or certain psychiatric medications, can increase insulin requirements substantially.

Looking to optimize your diabetes management with reliable insulin options? Consider Humalog Junior KwikPen for precise pediatric dosing needs.

How to Calculate Weight-Based Insulin Dosing

Safety Considerations and Monitoring

Calculating weight-based insulin dosing involves several systematic steps that healthcare providers follow to establish safe and effective insulin regimens. The process requires accurate body weight measurements, understanding of insulin types, and consideration of individual patient factors.

Step 1 – Determine Total Daily Insulin Dose (TDID) Begin by calculating the total daily insulin dose using the formula: TDID = Body weight (kg) × Units per kg factor. For most patients, start with 0.5 units per kilogram as a baseline, adjusting based on individual circumstances.

Step 2 – Distribute Between Basal and Bolus Insulin Divide the total daily dose between basal (background) insulin and bolus (mealtime) insulin. Typically, 40-50% of the total dose serves as basal insulin, while the remaining 50-60% covers bolus needs distributed across meals.

Step 3 – Calculate Individual Meal Bolus Doses Distribute bolus insulin across meals based on carbohydrate content and individual insulin-to-carbohydrate ratios. Start with dividing bolus insulin equally across three meals, then adjust based on actual carbohydrate intake and blood glucose responses.

Step 4 – Apply Correction Factors Establish correction factors for high blood glucose levels, typically starting with 1 unit of rapid-acting insulin for every 50 mg/dL above target glucose levels. Adjust this sensitivity factor based on individual response patterns and total daily insulin requirements.

The calculation process requires ongoing monitoring and adjustment based on blood glucose patterns, lifestyle changes, and patient response to initial dosing recommendations.

Types of Weight-Based Insulin Dosing Regimens

Different insulin regimens utilize weight-based calculations while addressing varying patient needs and diabetes management goals. Understanding these regimens helps healthcare providers select appropriate approaches for individual patients.

Basal-Bolus Regimens Basal-bolus regimens provide the most physiologic approach to insulin replacement therapy. Long-acting insulin such as Glargine or Detemir covers basal needs, while rapid-acting insulin like Lispro or Aspart addresses mealtime requirements. Weight-based calculations determine both components with typical distributions of 40-50% basal and 50-60% bolus insulin.

Mixed Insulin Regimens Pre-mixed insulin combinations like 70/30 or 75/25 formulations offer convenience for patients requiring simplified regimens. Weight-based dosing for mixed insulins typically starts with 0.6-0.8 units per kilogram daily, divided between morning and evening doses based on individual meal patterns and glucose responses.

Sliding Scale Approaches While less preferred for routine management, sliding scale insulin protocols use weight-based corrections for hospitalized patients or temporary situations. These protocols establish correction doses based on current blood glucose levels and total daily insulin requirements calculated from patient weight.

Continuous Insulin Infusion Insulin pump therapy utilizes sophisticated weight-based calculations for programming basal rates and bolus doses. Initial pump settings derive from total daily injection requirements, with basal rates typically programmed as 40-50% of total daily needs distributed across 24-hour periods.

Factors Affecting Weight-Based Insulin Requirements

Insulin Dosing Weight-Based

Multiple factors influence individual insulin requirements beyond simple weight-based calculations. Understanding these variables helps healthcare providers make appropriate adjustments and set realistic expectations for diabetes management outcomes.

Insulin Sensitivity Variations Individual insulin sensitivity varies significantly based on factors including genetics, physical fitness, body composition, and hormonal status. Athletes or physically active individuals often demonstrate higher insulin sensitivity requiring lower doses per kilogram, while sedentary patients may need higher doses to achieve similar glucose control.

Age-Related Considerations Age significantly impacts insulin requirements with children and adolescents often requiring higher doses per kilogram due to growth hormone effects and pubertal changes. Elderly patients may need lower starting doses due to decreased kidney function, reduced caloric intake, or increased risk of hypoglycemia.

Honeymoon Period Effects Newly diagnosed type 1 diabetes patients may experience a honeymoon period where remaining beta cell function reduces insulin requirements. During this phase, weight-based calculations may overestimate needs, requiring careful monitoring and dose reductions to prevent hypoglycemia.

Concurrent Medical Conditions Various medical conditions affect insulin requirements including kidney disease, liver dysfunction, thyroid disorders, and infections. Kidney disease may reduce insulin clearance requiring dose adjustments, while hyperthyroidism can increase insulin needs substantially.

Medication Interactions Certain medications significantly impact insulin requirements including corticosteroids (increase needs), beta-blockers (may mask hypoglycemia symptoms), and some psychiatric medications (increase insulin resistance). Weight-based calculations must account for these interactions.

Safety Considerations and Monitoring

Safe implementation of weight-based insulin dosing requires comprehensive monitoring protocols and awareness of potential complications. Healthcare providers must establish clear guidelines for dose adjustments and patient education regarding hypoglycemia recognition and treatment.

Blood Glucose Monitoring Requirements Patients beginning weight-based insulin regimens require frequent blood glucose monitoring to assess dose appropriateness and identify patterns requiring adjustment. Initial monitoring typically includes pre-meal and bedtime glucose checks, with additional testing during illness or routine changes.

Hypoglycemia Prevention Weight-based dosing calculations provide starting points that require individualization to prevent hypoglycemia. Healthcare providers must educate patients about hypoglycemia symptoms, treatment protocols, and situations requiring immediate medical attention. Glucagon prescriptions become essential safety measures for patients using insulin.

Dose Adjustment Protocols Systematic dose adjustment protocols help healthcare providers make safe modifications to weight-based insulin regimens. Typical adjustment increments range from 10-20% of current doses, with changes made every 3-5 days based on glucose pattern analysis rather than isolated high or low readings.

Special Population Considerations Pregnant women, elderly patients, and those with kidney or liver disease require modified approaches to weight-based insulin dosing. These populations often need more conservative starting doses and more frequent monitoring to ensure safety while achieving glucose targets.

Insulin Types and Weight-Based Applications

Insulin Type Onset Peak Duration Weight-Based Dosing Application
Rapid-Acting (Lispro, Aspart) 15-30 min 1-2 hours 3-5 hours Bolus dosing: 50-60% of TDID
Short-Acting (Regular) 30-60 min 2-4 hours 6-8 hours Mealtime coverage: 0.1-0.3 u/kg per meal
Intermediate-Acting (NPH) 1-3 hours 6-8 hours 12-16 hours Basal coverage: 40-50% of TDID
Long-Acting (Glargine, Detemir) 1-4 hours Minimal peak 20-24 hours Basal dosing: 0.2-0.5 u/kg daily
Pre-Mixed (70/30, 75/25) 15-30 min 2-8 hours 16-20 hours Twice daily: 0.3-0.4 u/kg per dose

Different insulin types require specific considerations when applying weight-based dosing calculations. Rapid-acting insulins like Lispro and Aspart work quickly to cover mealtime glucose rises, while long-acting formulations provide steady background insulin coverage throughout the day.

Understanding pharmacokinetic profiles helps healthcare providers optimize timing and dosing for individual patient needs. The table above illustrates how different insulin types fit into weight-based regimens and typical dosing ranges for each category.

Special Dosing Situations and Adjustments

Certain situations require modifications to standard weight-based insulin dosing approaches. These circumstances demand careful consideration and often more intensive monitoring to ensure patient safety and optimal glucose control.

Sick Day Management Illness typically increases insulin requirements due to stress hormones and reduced food intake patterns. Patients may need 10-20% increases in total daily insulin doses during illness, with emphasis on maintaining basal insulin even when unable to eat normally. Blood glucose monitoring becomes more frequent during sick days.

Exercise and Physical Activity Regular exercise affects insulin sensitivity and may require dose adjustments to prevent hypoglycemia. Patients engaging in prolonged or intense physical activity often need 25-50% reductions in rapid-acting insulin doses for meals preceding exercise. Long-term exercise programs may reduce overall insulin requirements.

Travel and Schedule Changes Time zone changes and altered meal schedules require insulin timing adjustments while maintaining appropriate total daily doses. Patients crossing multiple time zones may need temporary intermediate adjustments before resuming normal schedules in new locations.

Pregnancy Considerations Pregnancy significantly alters insulin requirements with needs typically increasing throughout gestation. First trimester may see decreased requirements, while second and third trimesters often require substantial dose increases. Weight-based calculations must account for both pre-pregnancy weight and gestational changes.

Ready to start your Insulin Dosing Weight-Based journey? Explore Humulin N KwikPen for reliable intermediate-acting insulin coverage that fits seamlessly into your diabetes management plan.

Advanced Dosing Strategies

Advanced Dosing Strategies

Advanced weight-based insulin dosing strategies incorporate sophisticated approaches that address complex diabetes management situations. These strategies often combine multiple calculation methods and require experienced healthcare provider guidance.

Carbohydrate-to-Insulin Ratios Individual carbohydrate-to-insulin ratios determine how much rapid-acting insulin patients need for specific amounts of dietary carbohydrates. Starting ratios often derive from weight-based calculations using the 450 rule (450 divided by total daily insulin dose) or 500 rule for more insulin-sensitive patients.

Correction Factor Calculations Correction factors help patients adjust insulin doses for elevated blood glucose levels. The 1800 rule (1800 divided by total daily insulin dose) provides starting correction factors, indicating how much blood glucose decreases per unit of rapid-acting insulin.

Pattern Management Advanced dosing involves analyzing blood glucose patterns over multiple days to identify consistent trends requiring systematic dose adjustments. Dawn phenomenon, post-meal spikes, and overnight lows each require specific modification strategies based on pattern timing and magnitude.

Technology Integration Modern diabetes technology including continuous glucose monitors and insulin pumps utilize weight-based calculations as starting points for automated dosing adjustments. These systems learn individual response patterns and modify doses based on real-time glucose data and historical patterns.

Need rapid-acting insulin for precise mealtime control? Discover Admelog Vial – the trusted choice for effective insulin dosing weight-based management that adapts to your lifestyle.

Key Takeaways for Successful Weight-Based Insulin Management

Successful weight-based insulin dosing requires systematic approaches combining accurate calculations with individualized adjustments based on patient response patterns. Healthcare providers must balance standard dosing formulas with patient-specific factors including lifestyle, concurrent medications, and individual insulin sensitivity variations.

Regular monitoring and systematic dose adjustments ensure optimal glucose control while minimizing hypoglycemia risks. Patients require comprehensive education about their insulin regimens including proper timing, dose calculations, and emergency management procedures for both high and low blood glucose situations.

The integration of modern diabetes technology with traditional weight-based calculations offers enhanced precision and safety for insulin dose management. Continuous glucose monitoring and insulin delivery systems provide real-time feedback for optimizing doses while maintaining the fundamental principles of weight-based dosing as starting points.

Long-term success with weight-based insulin dosing depends on consistent healthcare provider collaboration, patient education, and willingness to make appropriate adjustments based on changing circumstances and individual response patterns.

Frequently Asked Questions

What Is the 70 30 Rule Insulin?

The 70/30 rule refers to pre-mixed insulin containing 70% intermediate-acting insulin (NPH) and 30% short-acting regular insulin. Weight-based dosing typically starts with 0.6-0.8 units per kilogram daily, divided between morning (60-70%) and evening (30-40%) doses.

How Much Insulin per Kg Body Weight?

Type 1 diabetes patients typically need 0.4-1.0 units per kilogram daily. Newly diagnosed patients start at 0.4-0.6 u/kg, while established patients require 0.6-1.0 u/kg. Type 2 diabetes patients may need 0.8-2.0 units per kilogram daily due to insulin resistance.

What Is the 2/3 1/3 Rule for Insulin?

The 2/3 1/3 rule distributes total daily insulin dose with two-thirds given in the morning and one-third in the evening. This accounts for higher daytime insulin needs when cortisol levels and food intake are greater.

What Is the 30 60 90 Rule for Insulin?

The 30 60 90 rule refers to blood glucose monitoring times after insulin injection. Check at 30 minutes for immediate effects, 60 minutes for peak action, and 90 minutes for overall effectiveness. This helps determine if ratios need adjustment.

How Does Weight Affect Insulin Needs?

Higher body weight often increases insulin resistance, requiring more units per kilogram. Muscle mass increases insulin sensitivity while fat tissue decreases it. Weight changes typically require 10% dose adjustments for every 10% weight change.

How Much Insulin Should I Take if My Sugar Is 300?

Correction doses depend on individual factors. A typical correction might be 1 unit per 50 mg/dL above target. For 300 mg/dL with a 120 mg/dL target: (300-120)/50 = 4 units. Healthcare providers must determine individual correction factors.

What Is the 3 Hour Rule for Diabetes?

Rapid-acting insulin remains active for approximately 3 hours. Avoid giving additional doses within 3 hours of the previous injection unless directed by healthcare providers to prevent dangerous insulin stacking and hypoglycemia.


Short vs Long Acting Insulin: Which Type is Right for You?

Managing diabetes effectively means understanding the different types of insulin and how they work in your body. The choice between short vs long acting insulin can significantly impact your blood sugar control, daily routine, and overall quality of life.

Short-acting insulin works quickly to manage blood sugar spikes after meals, while long-acting insulin provides steady glucose control throughout the day. Each type serves a specific purpose in diabetes management, and many people use both as part of their treatment plan.

In this guide, we’ll break down the key differences between short and long acting insulin, help you understand which type might work best for your lifestyle, and explain how to use them effectively for optimal blood sugar control.

Need reliable insulin options? Browse our insulin collection for fast-acting and long-lasting solutions.

What Is Short Acting Insulin

Short acting insulin is designed to work quickly in your body, typically starting to lower blood sugar within 30 minutes to 2 hours after injection. This type of insulin is essential for managing blood glucose spikes that occur after eating meals.

Unlike long acting insulin, short acting insulin has a relatively brief duration of action, making it perfect for covering the immediate rise in blood sugar from food consumption.

Basic Definition and Purpose

Short acting insulin, also called regular insulin, is a fast-working medication that helps your body process glucose from meals. It mimics the natural insulin response your pancreas would normally produce when you eat.

You’ll typically inject short acting insulin 30 minutes before meals to ensure it’s working when your blood sugar begins to rise. The timing is crucial because this insulin needs to align with your body’s natural digestion process.

Common brand names include Humulin R, Novolin R, and rapid-acting options like Apidra. Each has slightly different onset times and durations, but all serve the same basic function of managing post-meal glucose levels.

How It Works in Your Body

Short vs Long-Acting Insulin

When you inject short acting insulin, it enters your bloodstream and helps cells absorb glucose from your blood. This process typically begins within 30 minutes to 1 hour, peaks at 2-4 hours, and lasts for 6-8 hours total.

The insulin works by binding to insulin receptors on your cells, essentially “unlocking” them to accept glucose. Without this process, glucose would remain in your bloodstream, leading to dangerous high blood sugar levels.

Your body absorbs short acting insulin at different rates depending on injection site, activity level, and individual metabolism. Injecting into the abdomen usually provides the fastest absorption, while thigh injections tend to work more slowly.

Types and Brand Options

Several types of short acting insulin are available, each with specific characteristics:

  • Regular insulin (Humulin R, Novolin R): Traditional short acting insulin that starts working in 30-60 minutes
  • Rapid-acting insulin (Humalog, Novolog, Apidra): Newer formulations that begin working within 15 minutes
  • Ultra-rapid insulin: The newest category that starts working in as little as 5-10 minutes

The choice between these options depends on your eating schedule, lifestyle, and how your body responds to different formulations. Many people find rapid-acting insulin more convenient because it can be taken just before or even during meals.

What Is Long Acting Insulin

Long acting insulin provides steady, consistent blood sugar control for 18-24 hours or longer. This type of insulin works as your body’s “background” insulin, mimicking the slow, continuous insulin release a healthy pancreas produces throughout the day and night.

Unlike short acting insulin that handles meal-related glucose spikes, long acting insulin maintains stable blood sugar levels between meals and while you sleep.

Basic Definition and Purpose

Long acting insulin, often called basal insulin, is designed to provide a steady release of insulin over an extended period. It helps control your baseline blood sugar levels when you’re not eating, preventing dangerous glucose fluctuations throughout the day.

You typically inject long acting insulin once or twice daily, usually at the same time each day to maintain consistent levels in your bloodstream. This predictable dosing schedule makes it easier to manage your diabetes routine.

Popular options include Basaglar, Lantus, Levemir, and Tresiba. Each has a different duration and release pattern, but all provide the extended coverage your body needs for optimal glucose control.

How It Works in Your Body

Long acting insulin is formulated to release slowly and steadily into your bloodstream over many hours. The insulin molecules are modified to delay absorption, creating a smooth, consistent effect rather than sharp peaks and valleys.

Most long acting insulins begin working within 1-2 hours after injection and maintain steady levels for 18-24 hours. Some newer formulations like Tresiba can last up to 42 hours, providing even more flexibility in dosing times.

The steady release helps your liver regulate glucose production and assists your cells in maintaining proper glucose uptake throughout periods when you’re not eating. This background insulin activity is essential for preventing both high and low blood sugar episodes.

Types and Brand Options

Several long acting insulin options are available, each with unique characteristics:

  • Insulin glargine (Lantus, Basaglar): 24-hour duration with steady release
  • Insulin detemir (Levemir): 18-24 hour duration, may need twice-daily dosing
  • Insulin degludec (Tresiba): Ultra-long acting, lasts up to 42 hours
  • NPH insulin: Intermediate-acting option that bridges short and long acting categories

Your healthcare provider will help determine which long acting insulin works best based on your blood sugar patterns, lifestyle, and individual response to different formulations.

Short vs Long Acting Insulin: Key Differences

How to Use Short and Long Acting Insulin

Understanding the distinctions between short and long acting insulin is crucial for effective diabetes management. These two types serve completely different purposes and work on different timelines in your body.

Here’s a comprehensive comparison of how they stack up:

Feature Short Acting Insulin Long Acting Insulin
Onset Time 15 minutes to 2 hours 1-2 hours
Peak Effect 2-4 hours after injection No significant peak (steady release)
Duration 6-8 hours 18-42 hours depending on type
Primary Purpose Control post-meal blood sugar spikes Provide baseline glucose control
Injection Timing Before or with meals Once or twice daily, same time
Flexibility Must coordinate with meals More flexible timing
Blood Sugar Pattern Rapid drop, then returns to baseline Steady, consistent control
Common Uses Meal coverage, correction doses Overnight control, between-meal stability

When to Use Each Type

The timing and purpose of each insulin type determines when you’ll use them:

Short Acting Insulin:

  • Before meals to cover expected blood sugar rise
  • As correction doses when blood sugar is already high
  • During illness when blood sugar is unpredictable
  • For fine-tuning glucose control throughout the day

Long Acting Insulin:

  • Daily baseline coverage, usually at bedtime or morning
  • Maintaining stable glucose during sleep
  • Preventing blood sugar spikes between meals
  • Providing consistent control for people with irregular eating patterns

Combining Both Types

Many people with diabetes use both short and long acting insulin as part of a comprehensive treatment plan. This combination therapy allows for:

  • Precise control over both baseline and meal-related blood sugar
  • Flexibility in eating schedules while maintaining steady background control
  • Better overall glucose management compared to using either type alone
  • Reduced risk of both high and low blood sugar episodes

Your healthcare provider will determine the right combination and dosing schedule based on your individual needs, blood sugar patterns, and lifestyle factors.

Benefits and Considerations

Both short and long acting insulin offer specific advantages depending on your diabetes management needs. Understanding these benefits helps you work with your healthcare provider to choose the most effective treatment approach.

Short Acting Insulin Benefits

Short acting insulin provides several key advantages for managing blood glucose:

Precise Meal Control: You can adjust doses based on what and how much you plan to eat, giving you more flexibility in your diet and meal timing.

Quick Correction: When blood sugar runs high, short acting insulin can bring levels down relatively quickly, usually within a few hours.

Predictable Timing: The effects are relatively short-lived, so you know when the insulin will be most active and when it will wear off.

Reduced Post-Meal Spikes: By taking insulin before eating, you can prevent the dangerous blood sugar spikes that occur after meals.

Long Acting Insulin Benefits

Long acting insulin offers different but equally important advantages:

Steady Background Control: Provides consistent glucose management throughout the day and night without frequent injections.

Simplified Dosing: Usually requires only one or two injections per day at consistent times, making it easier to maintain your routine.

Sleep Security: Helps prevent dangerous blood sugar drops or spikes while you sleep, when you can’t monitor or treat glucose changes.

Lifestyle Flexibility: Since it works independently of meals, you have more freedom in when and what you eat without compromising glucose control.

Important Considerations

Each type of insulin also comes with specific considerations:

Short Acting Insulin Considerations:

  • Requires careful timing with meals
  • Risk of low blood sugar if you don’t eat as planned
  • Multiple daily injections needed
  • Must carry supplies when eating away from home

Long Acting Insulin Considerations:

  • Takes longer to adjust if dose needs changing
  • May not fully cover meal-related glucose spikes alone
  • Timing consistency is important for optimal effect
  • Individual response varies significantly between people

Safety reminders: Always follow your healthcare provider’s instructions for dosing and timing. Both types of insulin can cause low blood sugar if not used properly.

Looking for additional diabetes management options? Explore Byetta for complementary blood sugar control.

How to Use Short and Long Acting Insulin

Short vs Long Acting Insulin- Key Differences

Proper insulin injection technique and timing are essential for safe and effective diabetes management. Whether you’re using short acting, long acting, or both types of insulin, following correct procedures ensures optimal blood sugar control.

Injection Technique and Sites

Start by washing your hands thoroughly and gathering all necessary supplies: insulin, syringe or pen, alcohol swabs, and a sharps container for disposal.

Choose your injection site carefully. The best areas include the abdomen (fastest absorption), outer thighs, upper arms, and buttocks. Rotate injection sites regularly to prevent lipodystrophy, which can affect insulin absorption.

Clean the injection site with an alcohol swab and let it dry. Insert the needle at a 90-degree angle for most people, or 45 degrees if you’re thin. Inject the insulin slowly and steadily, then wait 5-10 seconds before removing the needle to prevent insulin from leaking back out.

Never reuse needles or share insulin pens with others, as this can lead to infections or blood-borne disease transmission. Dispose of needles properly in a puncture-resistant sharps container.

Timing Guidelines

Short Acting Insulin Timing:

  • Regular insulin: Inject 30 minutes before meals
  • Rapid-acting insulin: Inject 5-15 minutes before eating
  • Can be taken during or immediately after meals if needed
  • Use for correction doses any time blood sugar is elevated

Long Acting Insulin Timing:

  • Take at the same time every day for consistent coverage
  • Many people prefer bedtime dosing for overnight control
  • Morning dosing works well for some people
  • Don’t worry about meal timing – this insulin works independently

Storage and Handling

Store unopened insulin in the refrigerator between 36-46°F, but never freeze it. Frozen insulin becomes ineffective and should be discarded immediately.

Once opened, most insulin can be stored at room temperature for 28 days, making it more comfortable to inject. Keep insulin away from extreme heat, direct sunlight, and freezing temperatures.

Always check insulin before using. Clear insulins should be colorless and free of particles. If you notice clumping, frosting, or discoloration, don’t use that insulin and contact your pharmacy for a replacement.

Monitoring and Adjusting

Regular blood glucose monitoring helps you understand how well your insulin regimen is working. Check blood sugar:

  • Before meals and at bedtime for baseline readings
  • 2 hours after meals to see how well short acting insulin is working
  • Occasionally during the night to ensure long acting insulin is providing steady coverage
  • Any time you feel symptoms of high or low blood sugar

Keep detailed records of blood glucose readings, insulin doses, meals, and physical activity. This information helps your healthcare provider make necessary adjustments to your insulin regimen.

Work closely with your diabetes care team to fine-tune your insulin doses. Never make significant changes to your insulin regimen without medical supervision, as this can lead to dangerous blood sugar fluctuations.

Wrapping Up

Choosing between short vs long acting insulin isn’t usually an either-or decision. Most people with diabetes benefit from understanding both types and how they work together to provide comprehensive blood glucose control throughout the day and night.

Short acting insulin handles the immediate challenge of post-meal blood sugar spikes, while long acting insulin provides the steady background control your body needs between meals and during sleep. Together, they can help you achieve the stable blood sugar levels that are essential for long-term health.

The key is working with your healthcare provider to find the right combination, timing, and doses that fit your individual needs, lifestyle, and blood sugar patterns. With proper education and consistent monitoring, both types of insulin can be powerful tools in managing your diabetes effectively.

Ready to take the next step in your diabetes management? Consult with your healthcare provider about which insulin types and insulin products might work best for your specific situation.

Frequently Asked Questions

Can Lantus cause dizziness?

Yes, Lantus can cause dizziness, particularly if it leads to low blood sugar (hypoglycemia). Dizziness is often one of the first symptoms people notice when their blood glucose drops too low. If you experience dizziness while taking Lantus, check your blood sugar immediately and follow your healthcare provider’s guidelines for treating low blood sugar.

Is Ozempic a short-acting insulin?

No, Ozempic is not insulin at all. Ozempic (semaglutide) is a GLP-1 receptor agonist that helps control blood sugar by increasing insulin production when blood sugar is high and slowing digestion. Unlike short-acting insulin that works within minutes to hours, Ozempic is taken once weekly and works differently to help manage diabetes.

Do type 2 diabetics take short-acting insulin?

Many people with type 2 diabetes do use short-acting insulin, especially those who have had diabetes for several years or need precise blood sugar control. Short-acting insulin is often prescribed when other medications aren’t providing adequate control, particularly for covering meals or correcting high blood sugar episodes. The decision depends on individual blood sugar patterns and overall diabetes management needs.

Can Lantus cause skin rash?

Yes, Lantus can cause skin reactions including rash, redness, or itching at the injection site. These reactions are usually mild and temporary, but persistent or severe skin reactions could indicate an allergy to the insulin. If you develop a widespread rash or other allergic symptoms, contact your healthcare provider immediately as this could be a serious allergic reaction.

What does an insulin allergy look like?

An insulin allergy can range from mild local reactions to severe systemic responses. Mild symptoms include redness, swelling, or itching at the injection site. More serious allergic reactions may cause widespread rash, hives, difficulty breathing, rapid heartbeat, or swelling of the face and throat. Severe insulin allergies are rare but require immediate medical attention.

Does insulin affect eyesight?

Insulin can temporarily affect eyesight, particularly when blood sugar levels change rapidly. When starting insulin or adjusting doses, some people experience blurry vision as their eyes adjust to changing glucose levels. This usually resolves within a few weeks. However, consistently high blood sugar over time can cause permanent eye damage, so proper insulin use actually helps protect your vision long-term.


Insulin Resistance vs Prediabetes: Understanding the Key Differences

Confused about insulin resistance vs prediabetes? You’re not alone. These two conditions are closely related but distinct, and understanding the difference can be crucial for your health management. While both involve problems with how your body handles blood sugar, they represent different stages and mechanisms in the journey toward type 2 diabetes.

Insulin resistance is the underlying process where your cells don’t respond properly to insulin, while prediabetes is a diagnosed condition with specific blood sugar ranges. Knowing which one you’re dealing with or if you have both can help guide your treatment decisions and lifestyle changes.

Take control of your blood sugar management. Explore our insulin products for comprehensive diabetes care.

What Is Insulin Resistance?

Insulin resistance occurs when your body’s cells don’t respond effectively to insulin, the hormone responsible for helping glucose enter cells for energy. When this happens, your pancreas produces more insulin to try to overcome this resistance, but over time, this system can become overwhelmed.

Think of insulin resistance as a key that’s getting harder to turn in a lock. Your body keeps making more keys (insulin), but the locks (your cells) are becoming increasingly difficult to open.

Basic Definition and Mechanism

Insulin resistance is a metabolic condition where cells in your muscles, fat, and liver don’t respond properly to insulin. Normally, insulin acts like a key, unlocking cells so glucose can enter and provide energy.

When insulin resistance develops, these cells become less sensitive to insulin’s signals. Your pancreas compensates by producing more insulin, leading to higher insulin levels in your blood. This extra insulin can eventually maintain normal blood glucose levels, but only temporarily.

The condition often develops gradually over years. Initially, your pancreas can keep up with the increased demand, but eventually, it may struggle to produce enough insulin to overcome the resistance.

Common Causes and Risk Factors

Several factors contribute to insulin resistance development:

  • Excess weight: Particularly abdominal fat, which releases inflammatory substances that interfere with insulin function
  • Physical inactivity: Regular exercise helps cells use glucose more efficiently
  • Poor diet: High intake of processed foods, refined sugars, and saturated fats
  • Genetics: Family history of type 2 diabetes increases your risk
  • Age: Insulin sensitivity typically decreases with age
  • Sleep disorders: Poor sleep quality affects hormone regulation
  • Chronic stress: Elevates cortisol levels, which can interfere with insulin function
  • Certain medications: Some drugs can affect insulin sensitivity

Understanding these risk factors helps identify who might be more susceptible to developing insulin resistance and what lifestyle modifications might help.

Signs and Symptoms to Watch For

Insulin resistance often develops silently, but some signs may indicate its presence:

Early symptoms include frequent hunger, especially after meals, fatigue or drowsiness after eating, and difficulty concentrating. You might also notice increased cravings for sugary or starchy foods.

Physical signs can include darkened patches of skin (acanthosis nigricans) around the neck, armpits, or groin areas. Some people experience skin tags in these same areas.

Many people with insulin resistance also struggle with weight gain, particularly around the midsection, and find it difficult to lose weight despite diet and exercise efforts.

It’s important to note that many people with insulin resistance have no obvious symptoms, which is why regular health screenings are crucial for early detection.

What Is Prediabetes?

Treatment and Management Strategies

Prediabetes is a diagnosed condition where blood sugar levels are higher than normal but not yet high enough to be classified as type 2 diabetes. It represents a critical warning stage that gives you an opportunity to prevent or delay the onset of type 2 diabetes through lifestyle changes.

Unlike insulin resistance, which describes a biological process, prediabetes is defined by specific blood test results and represents a measurable progression toward diabetes.

Medical Definition and Diagnostic Criteria

Prediabetes is diagnosed using three main blood tests, each with specific ranges:

Fasting Plasma Glucose (FPG): Measures blood sugar after fasting for at least 8 hours. Prediabetes range is 100-125 mg/dL (normal is less than 100 mg/dL).

Oral Glucose Tolerance Test (OGTT): Measures blood sugar 2 hours after drinking a glucose solution. Prediabetes range is 140-199 mg/dL (normal is less than 140 mg/dL).

Hemoglobin A1C: Reflects average blood sugar over 2-3 months. Prediabetes range is 5.7-6.4% (normal is less than 5.7%).

Healthcare providers typically use at least one of these tests, and often multiple tests, to confirm a prediabetes diagnosis. The A1C test is particularly useful because it doesn’t require fasting.

Risk Factors and Demographics

Certain groups face higher risks for developing prediabetes:

Adults over 45 years old should be tested regularly, especially if they’re overweight. However, younger adults with risk factors should also be screened.

Ethnic minorities, including African Americans, Hispanic Americans, Native Americans, and Asian Americans, face increased risks. Family history of type 2 diabetes significantly raises your chances.

Other risk factors include having gestational diabetes during pregnancy, polycystic ovary syndrome (PCOS), high blood pressure, abnormal cholesterol levels, and a history of cardiovascular disease.

Lifestyle factors like physical inactivity, poor diet, and carrying excess weight, particularly around the midsection, also increase prediabetes risk.

Progression Without Intervention

Without lifestyle changes or medical intervention, prediabetes often progresses to type 2 diabetes. Studies show that 15-30% of people with prediabetes will develop type 2 diabetes within 5 years.

The progression isn’t inevitable, though. Research demonstrates that losing 5-7% of body weight and exercising regularly can reduce diabetes risk by 58%. Even modest lifestyle changes can make a significant difference.

During the prediabetes stage, your body is still producing insulin, but either not enough or your cells aren’t using it effectively. This is your window of opportunity to reverse course before permanent damage occurs.

Need reliable insulin therapy options? Check out our Admelog vial for fast-acting insulin support.

Insulin Resistance vs Prediabetes: Key Differences

While insulin resistance and prediabetes are closely connected, understanding their differences helps clarify where you stand and what actions to take. These conditions can coexist, but they represent different aspects of metabolic health.

Here’s how insulin resistance and prediabetes compare across key areas:

Aspect Insulin Resistance Prediabetes
Nature A biological process where cells don’t respond well to insulin A diagnosed condition based on elevated blood sugar levels
Diagnosis No specific test; inferred from symptoms and risk factors Specific blood tests with defined ranges (A1C, fasting glucose, OGTT)
Blood Sugar May be normal initially due to compensatory insulin production Elevated but below diabetes threshold
Symptoms Often silent; may include fatigue, cravings, difficulty losing weight Usually no symptoms; detected through screening
Timing Can develop years before blood sugar elevation Represents measurable progression toward diabetes
Reversibility Often reversible with lifestyle changes Can be reversed or progression delayed with intervention
Treatment Focus Improving insulin sensitivity through diet, exercise, and weight management Preventing progression to type 2 diabetes
Monitoring Regular health assessments and symptom awareness Routine blood sugar testing and medical follow-up

How They’re Connected

Insulin resistance typically comes first in the progression toward type 2 diabetes. When your cells become resistant to insulin, your pancreas works harder to produce more insulin to maintain normal blood sugar levels.

For a while, this compensation works, and your blood sugar remains normal despite having insulin resistance. However, over time, your pancreas may struggle to keep up with the increased demand.

When your pancreas can no longer produce enough insulin to overcome the resistance, blood sugar levels begin to rise. This elevation in blood sugar is when prediabetes is diagnosed.

Not everyone with insulin resistance develops prediabetes, and the timeline varies significantly between individuals. Some people may have insulin resistance for years without progressing, while others move more quickly through the stages.

Can You Have Both Conditions

Prevention Strategies

Yes, many people have both insulin resistance and prediabetes simultaneously. In fact, insulin resistance is often the underlying cause of prediabetes.

When you have both conditions, it means your cells aren’t responding well to insulin (insulin resistance) and your blood sugar levels have risen above normal ranges (prediabetes).

Having both conditions doesn’t mean you’ll automatically develop type 2 diabetes, but it does indicate a higher risk and the need for more aggressive intervention strategies.

The good news is that treatments addressing one condition often help the other, since they share similar underlying mechanisms and respond to similar lifestyle interventions.

Diagnosis and Testing

Getting properly diagnosed is crucial for understanding your metabolic health and taking appropriate action. The testing approaches for insulin resistance and prediabetes differ, but both provide valuable information for managing your health.

Testing for Insulin Resistance

Unlike prediabetes, there’s no single standard test specifically for insulin resistance. Healthcare providers typically assess insulin resistance through a combination of approaches:

Clinical Assessment: Your doctor evaluates risk factors, symptoms, and physical signs like acanthosis nigricans (dark skin patches) or difficulty losing weight.

HOMA-IR Test: This calculation uses fasting glucose and insulin levels to estimate insulin resistance. While not routinely used in clinical practice, it’s valuable for research and some specialized assessments.

Metabolic Panel: Includes tests for triglycerides, HDL cholesterol, and blood pressure. High triglycerides and low HDL often accompany insulin resistance.

Glucose Tolerance Test with Insulin Measurement: Some specialists measure both glucose and insulin levels during an oral glucose tolerance test to assess how much insulin your body needs to handle glucose.

Many healthcare providers diagnose insulin resistance based on a constellation of factors rather than a single test, including your medical history, physical examination, and related metabolic markers.

Testing for Prediabetes

Prediabetes diagnosis relies on specific, standardized blood tests with established ranges:

Hemoglobin A1C: The most convenient test since it doesn’t require fasting. It measures your average blood sugar over 2-3 months. Prediabetes range: 5.7-6.4%.

Fasting Plasma Glucose: Requires fasting for at least 8 hours. Prediabetes range: 100-125 mg/dL. This test is widely available and relatively inexpensive.

Oral Glucose Tolerance Test (OGTT): You drink a glucose solution, then blood sugar is measured after 2 hours. Prediabetes range: 140-199 mg/dL. This test is more time-consuming but can detect prediabetes that other tests might miss.

Healthcare providers often use multiple tests to confirm diagnosis, especially if results are borderline or if you have risk factors that suggest testing a particular method.

When to Get Tested

For Prediabetes: The American Diabetes Association recommends screening for all adults 35 and older, regardless of weight. Adults younger than 35 should be tested if they’re overweight and have additional risk factors.

Testing frequency depends on results and risk factors. If tests are normal, repeat screening every 3 years. If you have prediabetes, test annually to monitor progression.

For Insulin Resistance: Consider evaluation if you have multiple risk factors, unexplained difficulty losing weight, family history of diabetes, or signs like dark skin patches.

Women with a history of gestational diabetes or polycystic ovary syndrome should discuss insulin resistance screening with their healthcare provider.

Take charge of your glucose management. Our Apidra cartridge offers convenient rapid-acting insulin delivery.

Treatment and Management Strategies

Insulin Resistance vs Prediabetes- Key Differences

Both insulin resistance and prediabetes respond well to similar treatment approaches, with lifestyle modifications forming the foundation of management. The goal is to improve your body’s ability to use insulin effectively and prevent progression to type 2 diabetes.

Lifestyle Modifications That Work

Dietary Changes: Focus on a balanced diet rich in whole foods, lean proteins, healthy fats, and complex carbohydrates. Limit processed foods, refined sugars, and excessive portions.

The Mediterranean diet and low-glycemic eating patterns show particular promise for improving insulin sensitivity. Consider working with a registered dietitian to develop a sustainable eating plan.

Regular Physical Activity: Exercise is one of the most effective interventions for both conditions. Aim for at least 150 minutes of moderate-intensity aerobic activity per week, plus muscle-strengthening activities twice weekly.

Both aerobic exercise and resistance training improve insulin sensitivity. Even modest increases in activity, like a 30-minute daily walk, can make a significant difference.

Weight Management: Losing even 5-7% of your body weight can dramatically improve insulin sensitivity and reduce prediabetes risk. Focus on gradual, sustainable weight loss rather than extreme measures.

Sleep Improvement: Poor sleep affects hormone regulation and insulin sensitivity. Aim for 7-9 hours of quality sleep nightly and address sleep disorders if present.

Stress Management: Chronic stress elevates cortisol levels, which can worsen insulin resistance. Incorporate stress-reduction techniques like meditation, yoga, or regular relaxation practices.

Medical Treatment Options

While lifestyle changes are primary, some people benefit from medical interventions:

Metformin: Often prescribed for prediabetes, especially in younger adults, those with BMI over 35, or women with a history of gestational diabetes. It improves insulin sensitivity and can help prevent progression to diabetes.

Other Medications: Depending on individual circumstances, healthcare providers might consider other medications that improve insulin sensitivity or help with related conditions like high blood pressure or abnormal cholesterol levels.

For those who already require insulin therapy for diabetes management, newer options like Adlyxin (lixisenatide) can help optimize blood sugar control.

Regular Monitoring: Whether or not you take medication, regular follow-up with your healthcare provider is crucial for tracking progress and adjusting treatment plans.

Creating Your Action Plan

Start by working with your healthcare team to establish clear goals and monitoring schedules. This might include target weight ranges, blood sugar goals, and specific lifestyle objectives.

Implement changes gradually rather than attempting everything at once. Start with one or two modifications, master them, then add others. This approach increases your likelihood of long-term success.

Consider joining support groups, working with healthcare professionals like dietitians or exercise physiologists, or using apps and tools that help track your progress.

Remember that managing insulin resistance and prediabetes is a marathon, not a sprint. Focus on building sustainable habits rather than seeking quick fixes.

Prevention Strategies

Prevention remains the most effective approach for both insulin resistance and prediabetes. Even if you have risk factors you can’t change, like family history or age, many prevention strategies can significantly reduce your risk or slow progression.

Diet and Nutrition Guidelines

Choose Complex Carbohydrates: Opt for whole grains, legumes, and vegetables over refined grains and processed foods. These foods provide steady energy without causing blood sugar spikes.

Prioritize Fiber: High-fiber foods slow glucose absorption and improve insulin sensitivity. Aim for 25-35 grams of fiber daily from sources like vegetables, fruits, beans, and whole grains.

Include Healthy Fats: Omega-3 fatty acids from fish, nuts, and seeds can improve insulin sensitivity. Limit saturated and trans fats, which can worsen insulin resistance.

Practice Portion Control: Use smaller plates, measure portions initially to learn appropriate sizes, and pay attention to hunger and fullness cues.

Stay Hydrated: Choose water over sugary drinks. If you want variety, try unsweetened tea, coffee, or sparkling water with lemon.

Exercise and Physical Activity

Start Where You Are: If you’re sedentary, begin with 10-15 minutes of walking daily and gradually increase duration and intensity.

Mix It Up: Combine aerobic exercise (walking, swimming, cycling) with strength training (weights, resistance bands, bodyweight exercises) for maximum benefit.

Find Activities You Enjoy: You’re more likely to stick with exercise you enjoy. Try dancing, hiking, gardening, or sports to make movement fun.

Build Activity Into Daily Life: Take stairs instead of elevators, park farther away, walk during phone calls, or do household chores more vigorously.

Set Realistic Goals: Aim for progress, not perfection. Consistency matters more than intensity when you’re building new habits.

Long-term Health Management

Regular Health Screenings: Stay up-to-date with recommended screenings for blood pressure, cholesterol, and blood sugar levels.

Maintain a Healthy Weight: If you need to lose weight, aim for 1-2 pounds per week through a combination of diet and exercise modifications.

Manage Other Health Conditions: Work with your healthcare provider to control conditions like high blood pressure or abnormal cholesterol that can worsen insulin resistance.

Stay Informed: Keep up with current research and recommendations, but be wary of fad diets or quick fixes that promise unrealistic results.

Build Your Support Network: Surround yourself with family, friends, or support groups who encourage your healthy lifestyle choices.

Conclusion

Understanding insulin resistance vs prediabetes empowers you to take control of your metabolic health. While these conditions are related, recognizing their differences helps you work more effectively with your healthcare team and make informed decisions about your care.

Insulin resistance often comes first, representing the underlying process where your cells don’t respond well to insulin. Prediabetes is the measurable result when blood sugar levels rise above normal ranges. Both conditions serve as important warnings, giving you the opportunity to make changes before type 2 diabetes develops.

The encouraging news is that both insulin resistance and prediabetes respond well to lifestyle modifications. Through strategic dietary changes, regular physical activity, weight management, and stress reduction, many people can improve their insulin sensitivity and even reverse prediabetes.

Whether you’re dealing with insulin resistance, prediabetes, or both, remember that small, consistent changes often lead to significant improvements over time. Work with your healthcare provider to develop a comprehensive plan that fits your lifestyle and health goals.

Ready to take the next step in managing your blood sugar health? Explore our comprehensive insulin products to support your diabetes management journey.

Frequently Asked Questions

Can you have insulin resistance without prediabetes?

Yes, you can have insulin resistance without prediabetes. Insulin resistance often develops first, and your pancreas may initially produce enough extra insulin to keep blood sugar levels normal. This compensation can last for years before blood sugar levels rise enough to be diagnosed as prediabetes.

Is insulin resistance the same as prediabetes?

No, insulin resistance and prediabetes are not the same. Insulin resistance is a biological process where cells don’t respond effectively to insulin. Prediabetes is a diagnosed condition based on elevated blood sugar levels. However, insulin resistance often causes prediabetes.

Can prediabetes be reversed?

Yes, prediabetes can often be reversed through lifestyle changes. Studies show that losing 5-7% of body weight and exercising regularly can reduce diabetes risk by 58%. With sustained lifestyle modifications, many people can return their blood sugar levels to normal ranges.

What comes first, insulin resistance or prediabetes?

Insulin resistance typically comes first. When cells become resistant to insulin, the pancreas produces more insulin to compensate. Over time, when the pancreas can’t keep up with the increased demand, blood sugar levels rise, leading to prediabetes diagnosis.

How long does it take for prediabetes to become diabetes?

The progression varies significantly between individuals. Studies show that 15-30% of people with prediabetes develop type 2 diabetes within 5 years. However, with lifestyle interventions, many people never progress to diabetes or significantly delay its onset.

What foods should I avoid if I have insulin resistance?

Limit refined carbohydrates, sugary drinks, processed foods, and foods high in saturated fats. Focus instead on whole grains, lean proteins, healthy fats, and plenty of vegetables. Working with a registered dietitian can help you develop a personalized eating plan.

Does Insulin Need to Be Refrigerated: Your Complete Storage Guide

Managing diabetes means keeping your insulin in perfect condition, and proper storage is absolutely critical for maintaining its effectiveness. If you’ve ever wondered “does insulin need to be refrigerated,” you’re asking the right question. The answer affects not just your medication’s potency, but your overall health and blood sugar control.

Insulin is a delicate protein that can lose its effectiveness when exposed to extreme temperatures, light, or improper storage conditions. Getting the storage basics right means your medication works as intended, your blood sugar stays stable, and you avoid potentially dangerous complications from degraded insulin.

In this guide, we’ll walk you through everything you need to know about insulin storage, from refrigeration requirements to travel tips, so you can keep your medication safe and effective.

Need reliable insulin supplies? Browse our insulin collection for trusted diabetes management options.

Understanding Insulin and Storage Requirements

Signs Your Insulin May Be Compromised

Insulin is a hormone that helps your body regulate blood sugar levels. When you have diabetes, your body either doesn’t produce enough insulin or can’t use it effectively. That’s where insulin medications come in, providing the hormone your body needs to function properly.

The challenge with insulin is that it’s a protein-based medication, which makes it sensitive to temperature changes, light exposure, and physical stress. Unlike some medications that remain stable at room temperature, insulin requires specific storage conditions to maintain its potency.

Why Temperature Matters for Insulin

Temperature control is the most important factor in insulin storage. Here’s what happens when insulin is exposed to different temperature ranges:

  • Too Cold (Freezing): Insulin that freezes becomes completely unusable and must be discarded. The protein structure breaks down permanently, making the medication ineffective.
  • Too Hot: High temperatures cause insulin to degrade rapidly, reducing its effectiveness and potentially making it dangerous to use.
  • Proper Range: Most insulin types remain stable when stored between 36°F to 46°F (2°C to 8°C) in unopened vials or pens.

Understanding these temperature requirements helps you make informed decisions about where and how to store your insulin supplies.

Different Types of Insulin Storage Needs

Not all insulin types have identical storage requirements, though most follow similar guidelines. Here’s how different insulin categories should be handled:

Insulin Type Unopened Storage After Opening Room Temperature Duration
Rapid-acting Refrigerate 36-46°F Can stay at room temp 28 days
Short-acting Refrigerate 36-46°F Can stay at room temp 28-42 days
Intermediate-acting Refrigerate 36-46°F Can stay at room temp 42 days
Long-acting Refrigerate 36-46°F Can stay at room temp 28-42 days
Pre-mixed Refrigerate 36-46°F Can stay at room temp 10-28 days

These timeframes can vary between manufacturers, so always check your specific insulin’s packaging or insert for precise storage instructions.

Looking for specific insulin options? Check out our Basaglar Cartridge for long-acting insulin needs.

Does Insulin Need to Be Refrigerated: The Complete Answer

Signs Your Insulin May Be Compromised

The short answer is: yes, unopened insulin should be refrigerated, but opened insulin can be stored at room temperature for limited periods. However, the complete picture is more nuanced and depends on several factors.

Unopened Insulin Storage

Unopened insulin vials, pens, and cartridges must be stored in the refrigerator between 36°F to 46°F (2°C to 8°C). This keeps the medication stable until its expiration date. Key points for unopened insulin storage:

  • Store in the main body of the refrigerator, not the door where temperatures fluctuate
  • Keep insulin in its original packaging to protect from light
  • Never store insulin in the freezer compartment
  • Don’t store near the back wall where temperatures might be coldest
  • Maintain consistent temperature by avoiding frequent door opening

Opened Insulin Storage Options

Once you start using an insulin vial or pen, you have two storage options:

Option 1: Continue Refrigerating

  • Keeps insulin stable for longer periods
  • Must warm to room temperature before injecting
  • Good for people who use insulin infrequently

Option 2: Room Temperature Storage

  • More convenient for daily use
  • No need to warm before injection
  • Must be used within specific timeframes (usually 28-42 days)
  • Store between 59°F to 86°F (15°C to 30°C)

Most diabetes educators recommend room temperature storage for daily-use insulin because it’s more comfortable for injections and reduces the risk of lipodystrophy (changes in fat tissue under the skin).

Special Considerations for Different Situations

Your insulin storage approach might need adjustments based on your lifestyle and circumstances:

  • Frequent Travelers: Consider keeping unopened backup supplies refrigerated while using opened insulin at room temperature
  • Hot Climates: Room temperature storage becomes riskier in extremely hot weather
  • Irregular Use: If you don’t use insulin daily, refrigerated storage might be better for opened supplies

Need diabetes management support? Explore our Byetta for additional blood sugar control options.

Best Practices for Insulin Storage

Proper insulin storage goes beyond just temperature control. Following these best practices ensures your medication stays effective and safe to use.

Refrigeration Guidelines

When storing insulin in the refrigerator, location and method matter:

Optimal Refrigerator Placement:

  • Store in the main compartment, never the door
  • Use the crisper drawer or a dedicated medication area
  • Keep insulin toward the front where temperatures are most stable
  • Avoid areas near the cooling vents or back wall

Organization Tips:

  • Use a small container or organizer to keep insulin supplies together
  • Label opened insulin with the date you first used it
  • Rotate stock by placing newer supplies behind older ones
  • Keep a thermometer in your medication storage area

Room Temperature Storage Best Practices

For insulin stored at room temperature, consistency and protection are key:

  • Choose a cool, dark place away from direct sunlight
  • Avoid areas with temperature fluctuations like bathrooms or kitchens
  • Never leave insulin in cars, especially during hot weather
  • Use a medication organizer or small cooler for travel
  • Keep insulin in its original packaging when possible

Protecting Insulin from Light and Physical Damage

Beyond temperature, insulin needs protection from other environmental factors:

Light Protection:

  • Store in original cartons or opaque containers
  • Avoid transparent pill organizers for insulin
  • Keep away from direct sunlight and bright artificial lights

Physical Protection:

  • Handle vials and pens gently to avoid damage
  • Don’t shake insulin vigorously (gently roll if mixing is needed)
  • Inspect for cracks or damage before each use
  • Replace damaged supplies immediately

For fast-acting options, consider our Fiasp Vial for reliable rapid insulin delivery.

Signs Your Insulin May Be Compromised

Does Insulin Need to Be Refrigerated: The Complete Answer

Recognizing when insulin has been compromised is crucial for maintaining effective diabetes management. Here are the key warning signs to watch for:

Visual Inspection Signs

Regular visual checks help you identify insulin that may no longer be effective:

Clear Insulin (Rapid and Long-Acting Types):

  • Should remain completely clear and colorless
  • Any cloudiness, particles, or discoloration means discard immediately
  • Clumping or crystallization indicates the insulin is no longer safe to use

Cloudy Insulin (Intermediate-Acting and Some Mixed Types):

  • Should have a uniform, milky appearance when properly mixed
  • Clumping that doesn’t dissolve with gentle rolling indicates spoilage
  • Unusual color changes or crystal formation means replacement is needed

Physical and Performance Indicators

Beyond visual cues, pay attention to how your insulin behaves and performs:

Physical Changes:

  • Unusual thickness or consistency changes
  • Separation that doesn’t remix with gentle agitation
  • Frosted appearance (indicates previous freezing)
  • Cracks or damage to vials or pen cartridges

Performance Issues:

  • Blood sugar levels remaining consistently higher than expected
  • Insulin not working as effectively as usual
  • Unusual injection site reactions or irritation
  • Burning or stinging sensation during injection

Temperature Exposure Warning Signs

Insulin exposed to extreme temperatures shows specific signs of damage:

  • Insulin that has been frozen will often appear cloudy or have visible particles
  • Heat-exposed insulin might change color or develop an unusual odor
  • Insulin left in hot cars may appear normal but lose effectiveness
  • Any insulin with an unusual smell should be discarded immediately

If you notice any of these signs, don’t risk using potentially compromised insulin. Replace it immediately and contact your healthcare provider if you have concerns about blood sugar control.

Travel and Emergency Storage Tips

Traveling with insulin or managing emergency situations requires special planning to ensure your medication stays safe and effective.

Air Travel Guidelines

Flying with insulin involves specific considerations for both carry-on and checked luggage:

Carry-On Recommendations:

  • Always pack insulin in carry-on luggage, never checked bags
  • Bring prescription labels and a letter from your doctor
  • Pack extra supplies in case of delays or lost luggage
  • Use insulated travel cases designed for medications
  • Allow extra time for security screening procedures

TSA and International Guidelines:

  • Insulin is allowed through security checkpoints without quantity restrictions
  • Carry original prescription bottles or pen packaging
  • Declare insulin and diabetes supplies during security screening
  • Research destination country regulations for medication imports

Hot Weather Storage Solutions

High temperatures pose serious risks to insulin effectiveness, especially during summer travel or in warm climates:

Cooling Options:

  • Invest in a medical-grade insulin cooling case
  • Use cooling packs designed for medications (avoid direct ice contact)
  • Consider battery-powered medication refrigerators for extended trips
  • Plan for air conditioning failures or power outages

Heat Protection Strategies:

  • Never leave insulin in parked vehicles
  • Carry insulin in an insulated bag during outdoor activities
  • Monitor local weather forecasts and plan accordingly
  • Have backup cooling plans for emergencies

Emergency Preparedness

Natural disasters, power outages, and other emergencies require advance planning:

Emergency Kit Essentials:

  • At least 7 days’ worth of insulin and supplies
  • Battery-powered or manual cooling options
  • Non-perishable snacks and glucose tablets
  • Emergency contact information for healthcare providers
  • Copy of prescriptions and medication lists

Power Outage Planning:

  • Identify local pharmacies with backup power
  • Know locations of cooling centers or facilities with refrigeration
  • Have manual cooling options like cool wet towels
  • Understand how long your refrigerator stays cold without power (typically 4-6 hours)

Proper preparation ensures you can maintain diabetes management even during unexpected situations or travel disruptions.

Summary: Key Takeaways for Insulin Storage

Proper insulin storage isn’t just about following rules, it’s about ensuring your diabetes management remains effective and your health stays protected. The question “does insulin need to be refrigerated” has a clear answer: yes for unopened supplies, with flexible options for opened insulin based on your usage patterns and lifestyle.

Temperature control remains the most critical factor in insulin storage. Whether you choose refrigerated or room temperature storage for opened insulin, consistency and protection from extreme temperatures, light, and physical damage are essential. Regular visual inspections and awareness of performance changes help you identify when insulin may be compromised.

Remember that different insulin types have varying storage requirements and timeframes. Always check your specific medication’s packaging for precise guidelines, and don’t hesitate to replace insulin that shows any signs of deterioration. Your health depends on using medication that maintains its full effectiveness.

For reliable insulin supplies and diabetes management support, explore our comprehensive medication options and consult with healthcare professionals about the best storage practices for your specific situation.

Frequently Asked Questions About Insulin Storage

How to know if insulin is spoiled?

Spoiled insulin shows several warning signs including cloudiness in normally clear insulin, clumping or crystallization, unusual color changes, or an odd smell. If your blood sugar levels remain consistently high despite normal insulin doses, this may also indicate compromised medication. When in doubt, replace the insulin and consult your healthcare provider.

Can you put insulin back in the fridge?

Once insulin has been stored at room temperature, it’s generally not recommended to return it to the refrigerator. The temperature fluctuation can affect the medication’s stability. However, if insulin was briefly exposed to room temperature (less than a few hours) and you prefer refrigerated storage, it’s typically safe to return it to the fridge. Always check with your pharmacist for specific guidance.

How can you tell if insulin is still good?

Good insulin should be clear and colorless (for rapid and long-acting types) or uniformly cloudy (for intermediate-acting types) with no clumping, particles, or unusual odors. It should maintain its normal consistency and continue to effectively control your blood sugar levels. Check the expiration date and note how long it’s been since opening, as effectiveness decreases over time even with proper storage.

How long does it take for insulin to go bad?

Unopened insulin remains effective until its expiration date when properly refrigerated. Once opened, most insulin types stay potent for 28-42 days at room temperature or longer if kept refrigerated. However, insulin exposed to extreme heat can degrade within hours, while frozen insulin becomes immediately unusable. The exact timeframe varies by insulin type and storage conditions.

What are the symptoms of bad insulin?

Using degraded insulin typically results in poor blood sugar control, with levels remaining higher than expected despite normal dosing. You might experience increased thirst, frequent urination, fatigue, or other hyperglycemia symptoms. Some people also report unusual burning or stinging at injection sites when using compromised insulin.

What happens if you take insulin that’s gone bad?

Using spoiled insulin can lead to dangerously high blood sugar levels since the medication won’t work effectively. This can result in diabetic ketoacidosis (DKA) or other serious complications if not addressed quickly. If you suspect you’ve used compromised insulin and experience symptoms like nausea, vomiting, or very high blood glucose readings, seek immediate medical attention and replace your insulin supply.


Sign Up For Newsletter

Please enable JavaScript in your browser to complete this form.

Join 60.000+ Subscribers and get a new discount coupon on every Saturday.

Address

PO Box 29631, Mississauga RPO Central Parkway, ON L5A 4H2

Phone Number

1-647-576-2076

better you rx big letter logo

Discover convenience with Better You Rx, your trusted pharmacy-affiliated partner. We work with leading pharmacies to deliver prescriptions and over-the-counter medications right to your doorstep. Enjoy cost-effective solutions on a platform that’s easy to use. We focus on safety and efficacy in all products. Our dedicated team ensures a smooth experience. From ordering to delivery, we simplify your healthcare needs. Choose Better You Rx for reliable service and expert support. Trust us for all your medication requirements. Experience the ease of modern pharmacy care.

Categories

Operating Hours: 
10:00AM – 6:00PM CST
Monday – Friday

Our Payment Partners :

Copyright © 2024 BetteryouRX. All Rights Reserved.

Join The Waitlist Be among the first to know when becomes available.
Add to cart